
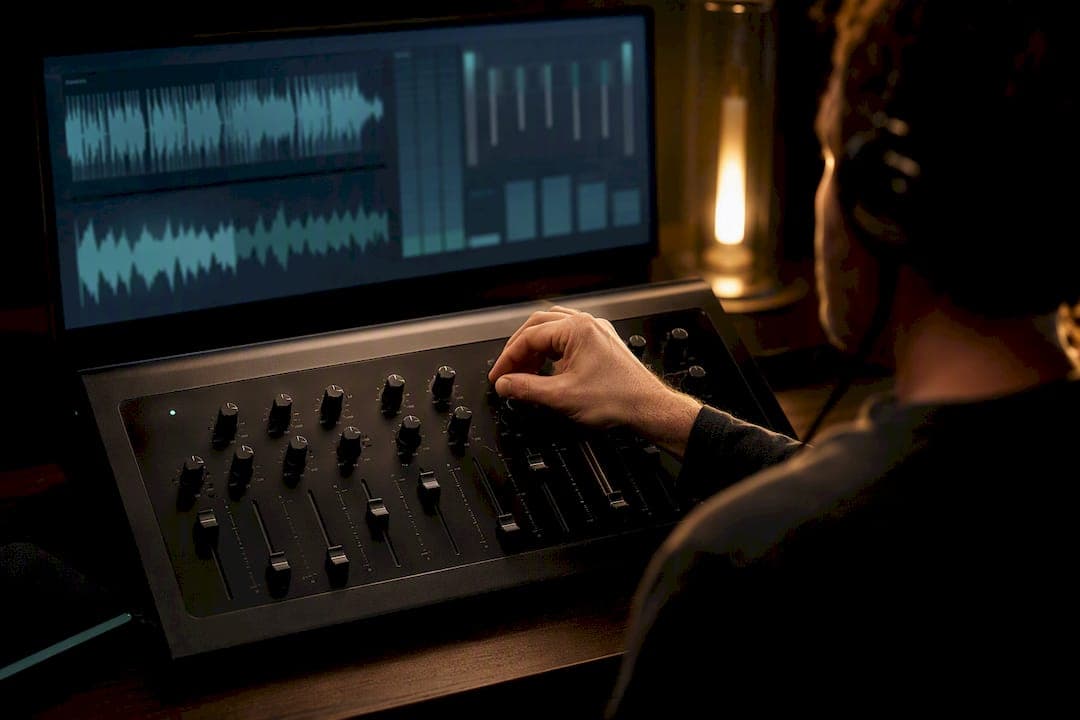
An overcompressed mix has lost the gap between its quiet and loud moments, so everything sits at nearly the same volume and starts to sound pumped, dull and flat under pressure. You'll hear it as breathing or pumping around the kick, snappy transients turning into mush, and a strange listening fatigue that sets in faster than it should. The fastest way to confirm it: use an online Sound Studio to mix and fine-tune audio, bypass every compressor, match the levels by ear, and watch your gain-reduction meters while you do it.
TL;DR:
- Overcompressed mixes often exhibit constant gain reduction, with a brick-like waveform and ear fatigue during typical listening sessions.
- Using a high ratio, fast attack, and low threshold simultaneously causes prolonged compression and audible pumping effects.
- Hot input levels or crowded arrangements are common upstream issues that trigger continuous compression, even before adjusting compressor settings.
- Diagnosing overcompression involves level-matching, observing gain-reduction meters during playback, and testing in different listening environments.
- The most effective fix is to reduce compression by removing or bypassing problematic stages and employing parallel compression or gentle EQ adjustments.
Table of Contents
- What does an overcompressed mix actually sound like?
- How compressor settings create the overcompressed sound
- Why over-compression often starts before you touch a compressor
- A step-by-step way to diagnose the problem
- How to fix a mix that's already overcompressed
- Mixing habits that stop this happening again
- Your 10-minute overcompression checklist
- How AubioMix flags overcompression before you do
- Is heavy compression ever the right call?
- Get a second opinion on your mix in minutes
- Sources
- FAQ
What does an overcompressed mix actually sound like?
Pumping is the giveaway most producers notice first: the mix audibly "breathes" as the compressor releases after every kick or snare hit, ducking the rest of the track then letting it swell back. Listen right after a kick drum on the two and four. If the hi-hats or pads noticeably swell back in after each hit, your release time and ratio are fighting each other on the bus.
Transient loss is the other classic sign, and it's often more damaging because it's quieter about it. A snare that should crack now thuds. A plucked synth loses its pick attack. Vocal consonants, the "t" and "s" sounds that carry intelligibility, blur into the vowels around them. This happens because compression turns down everything above a set threshold, and a fast attack time catches the very transient that gives a sound its identity.
The symptoms tend to cluster together:
- Constant, unchanging gain reduction on the meter, rather than reduction that only kicks in on peaks
- A waveform that looks like a brick, with almost no variation in height across a section
- Ear fatigue after just a few minutes, not the usual full-track listen
- A mix that sounds loud at first but strangely small and airless after thirty seconds
The common audible symptoms of dynamic range loss include exactly this combination: pumping, ear fatigue, and a lack of punch that no amount of extra loudness seems to fix. If your gain-reduction meter is sitting at a high level almost continuously across several tracks, treat that as an early warning rather than a badge of loudness.
How compressor settings create the overcompressed sound
Every compressor has five controls, and over-compression is almost always a story of two or three of them working against each other rather than one villain acting alone.
Threshold sets the level above which the compressor starts working. Ratio decides how hard it pushes once triggered, expressed as input to output (a 4:1 ratio means 4 dB over threshold becomes 1 dB out). Attack is how fast the compressor clamps down once the signal crosses that threshold, and release is how long it takes to let go afterwards. Makeup gain simply turns the whole signal back up once compression has quietened it down.
The trouble starts when a low threshold, a high ratio, and a fast attack all stack on the same track. The compressor is now working almost permanently, catching every transient before it can breathe, and the release can't recover fast enough before the next hit arrives. That's the pumping loop.
Sensible starting points for most mix-bus and mix-track work:
- Ratio: 2:1 to 4:1 for general mixing; save 8:1 and beyond for obvious effect or limiting
- Attack: 10 to 30 milliseconds on drums and vocals if you want transients to survive
- Release: matched roughly to the track's tempo, so the compressor lets go before the next strong beat
- Threshold: set so gain reduction only shows on the louder phrases, not constantly
Pro Tip: Set your attack slightly slower than feels natural at first, then dial it back in small steps while watching the transient on the meter, not just listening. Your ear adjusts to squashed transients faster than you'd think, so trust the meter more than your first impression.
Why over-compression often starts before you touch a compressor
Plenty of squashed mixes never had a bad compressor decision at all. The compressor is just reacting to what it's been fed, and what it's been fed is too hot or too crowded.
Hot input levels are the usual culprit. If a track is hitting a compressor at minus 6 dBFS instead of minus 18, that compressor has almost no room to react musically. It's working flat out from the first transient, which is why the same plugin can sound gentle on one track and brutal on another. Poor gain staging and a cluttered arrangement force the mix-bus compressor to work continuously, and no amount of attack or release tweaking fixes a problem that started upstream.
Dense arrangements do the same thing from a different angle. Five instruments occupying the same frequency range and hitting at the same time will spike the bus compressor every bar, whether or not any single track is too loud on its own.
Before touching a single compressor setting, run these checks:
- Look at the level meter going into each compressor, not just the output
- Mute or solo suspect elements one at a time to hear what's actually triggering the gain reduction
- Check your track routing for accidental duplicate sends or doubled busses feeding the same compressor
A quick pass on gain-staging discipline before you reach for compression settings solves more overcompressed mixes than any plugin swap.
A step-by-step way to diagnose the problem
Diagnosing an overcompressed mix isn't guesswork if you run it as a proper test rather than a vibe check.
- Level-match the bypass. Bypass the compressor and turn the dry signal up or down until it's the same perceived loudness as the compressed version. Skipping this step is the single biggest reason producers convince themselves compression "obviously" sounds better. It usually just sounds louder.
- Watch the gain-reduction meter under playback. Reduction that only appears on loud peaks and recovers quickly is healthy. Reduction that sits at a constant number through quiet and loud passages alike means the compressor never gets a rest.
- Solo stems and bypass insert by insert. Start at the top of the chain and bypass each processor in turn, listening after every change rather than bypassing everything at once. This tells you exactly which stage introduced the squash.
- Listen in more than one context. Check the mix at low volume on a laptop speaker, then on headphones. Listening across multiple systems and volumes reveals whether a mix only works loud, which is a classic overcompression tell, since a healthy mix should still feel comfortable at conversation-level volume.
Pro Tip: Do the low-volume test at the very end of a session, not the start. Fatigued ears at high volume will forgive pumping that a fresh pair of ears at a quiet level will catch instantly.
How to fix a mix that's already overcompressed
The instinct to add another plugin to fix a squashed mix almost always makes things worse. The better move is subtraction first, addition second.
Start by removing or bypassing the suspect compressor entirely and comparing against the compressed version, level-matched. If the bypassed version has more life and roughly the same subjective loudness once matched, you've found your culprit and you now have permission to start again more gently.
Rather than reaching for one aggressive compressor to replace it, rebuild density using parallel and serial compression. Blend an aggressively compressed duplicate bus under the dry, untouched track, and you get sustain and perceived loudness while the original transients stay intact. Two or three light compressors in series, each doing 1 to 2 dB of work, tend to sound more musical than one compressor doing 8 dB alone.
A few gentle EQ moves also help restore the sense of movement a squashed mix loses:
- A small boost around 80 to 120 Hz can bring back low-end weight that got flattened
- A narrow boost on the attack frequency of a snare or vocal (often 2 to 5 kHz) can reintroduce a sense of transient even after compression has softened it
- Avoid broad, heavy-handed boosts, since they tend to just make the squashing more obvious
At the mastering stage, resist the urge to re-compress a mix that's already tight. Mastering engineers typically remove extra compression and lean on careful limiting and selective EQ instead, because a single well-chosen limiter usually restores more punch than trying to "uncompress" with transient designers or expanders.
Mixing habits that stop this happening again
The most reliable fix for overcompression is never having the problem in the first place, and that comes down to habits more than gear.
- Give every compressor a stated job. "Control the snappiest snare hits" is a job. "Make it louder" is not. Write the reason down if you have to; it stops you nudging the ratio up out of habit later in the session.
- Default to light and serial, not heavy and single-stage. Two gentle compressors, or a parallel compression blend, almost always beats one compressor doing all the work. Save serious limiting for the mastering stage.
- Use a reference track and take breaks. Level-match your reference against your mix regularly, and step away for ten minutes every hour. Ears adapt to squashing far quicker than most producers expect.
Pro Tip: Try the exercise of setting a compressor to an obviously extreme ratio and fast attack first, just to hear what over-compression sounds like in isolation, then back the settings off toward transparency. It trains your ear to catch the early signs before they become a habit.
Your 10-minute overcompression checklist
Run this before you commit to a bounce, especially if a mix has been sitting under processing for a few sessions:
- Level-match and bypass every compressor in the chain, then listen for transients on drums and vocals.
- Check gain-reduction meters on individual tracks and on the master bus. Look for constant reduction rather than peak-only movement.
- Temporarily disable bus compression entirely and compare against the version with it engaged.
- If dynamics feel dead, rebuild them with parallel compression or a transient shaper rather than more single-stage compression.
- At the mastering stage, audition two or three limiters and a gentle low-end EQ boost before adding any further compression.
How AubioMix flags overcompression before you do
A diagnostic tool can analyze an uploaded mix and return a report covering compression, transients, levels and other areas, so you don't have to run every bypass test by hand. The report can highlight which tracks or bus stages are showing constant gain reduction rather than the healthy peak-only kind, and flag the likely sources, such as a hot input level, a crowded arrangement, or compressor settings.
This approach maps directly onto the checklist above:
- Where the checklist says "check gain-reduction meters", the analysis can show which stems are sitting in that constant-reduction zone
- Where the checklist says "identify the likely culprit", the analysis can point at specific frequency ranges or elements competing for space
- Where you'd normally solo and bypass insert by insert, the feedback can help identify where the problem actually lives
It won't replace your ears entirely, and it shouldn't. But it turns a diagnostic process that usually takes twenty minutes of careful A/B listening into something you can confirm in a couple of minutes, then spend the rest of your session actually fixing.
Is heavy compression ever the right call?
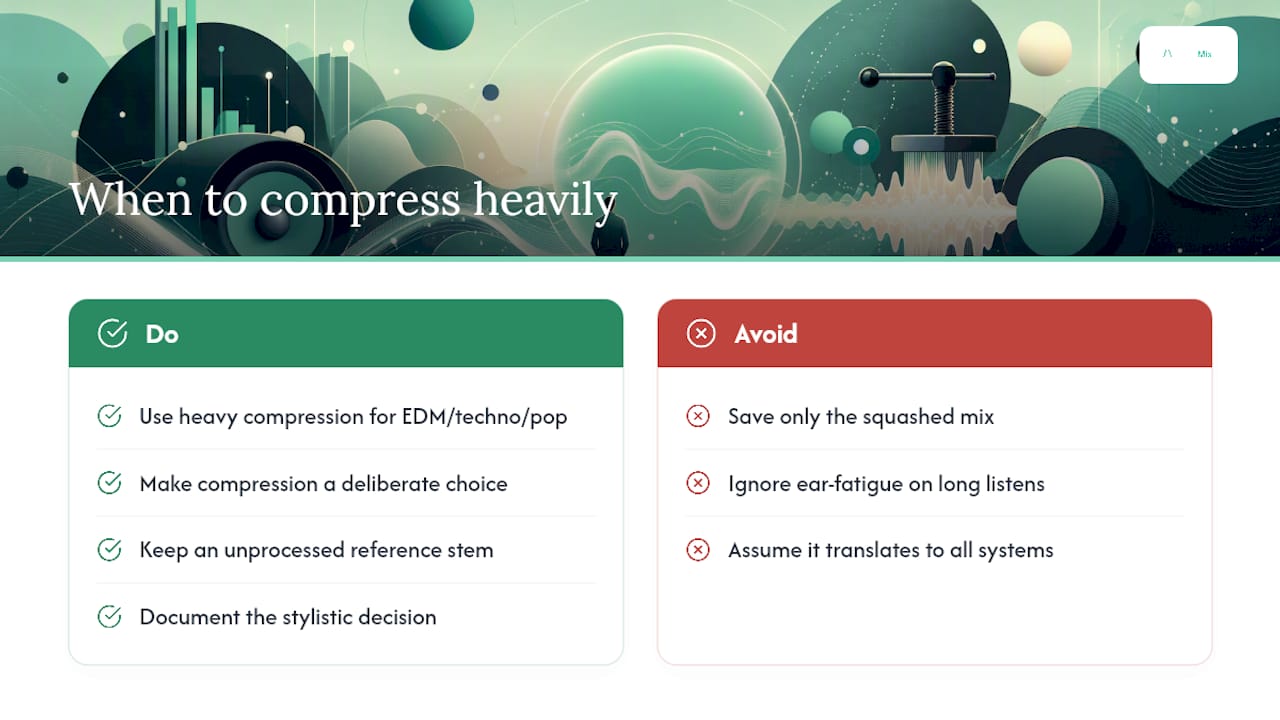
Sometimes, yes. EDM, techno and a good chunk of modern pop lean on aggressive bus compression and limiting as a genre signature, not a mistake, and a wall-of-sound production style genuinely calls for less dynamic range than a jazz trio or a folk ballad. The question isn't whether compression is heavy; it's whether it's a choice you made on purpose.
The risk with any heavily compressed style is ear fatigue on long listens and poor translation across systems, a club system or a phone speaker can expose pumping that felt fine in the studio. Document the stylistic decision, and keep an unprocessed reference stem somewhere safe. If a client or a future remix ever needs the dynamics back, you'll be glad you didn't only save the squashed version.
— AubioMix
Get a second opinion on your mix in minutes
Every diagnostic step above works, but running level-matched bypass tests across a full session, track by track, still eats time most producers don't have between deadlines. AubioMix exists to shortcut exactly that part of the process, not replace your judgement, but hand you a written and visual breakdown of where your compression is actually behaving and where it's constantly clamped down.

Upload a mix and the report flags exactly which stems are sitting in that constant gain-reduction zone the checklist warns about, alongside more than a dozen other checks covering EQ, stereo width, and loudness. If you want to see the kind of feedback a specific style gets, the deep house benchmark report shows a real example of the diagnostic output on a genre where bus compression choices matter enormously. Run your next bounce through it before you send it anywhere, and you'll know in minutes whether that squashed feeling is a mixing problem or a mastering-ready mix.
Sources
- Dynamic range compression in audio (Medium)
- Dynamic range compression — Wikipedia
- How to use compression without squashing your mix — Wisseloord
- How to fix over-compressed mixes — Mojito Mastering
FAQ
What does overcompression sound like?
It sounds like pumping or breathing around the beat, dulled transients on drums and vocals, and a mix that feels loud but strangely lifeless within seconds, with listening fatigue setting in faster than usual.
What does "heavy compression" mean?
Heavy compression means a low threshold combined with a high ratio and fast attack, so the compressor engages constantly rather than only on peaks, which can either be a deliberate genre choice or the root of an overcompressed sound depending on context.
What is compression in a mix?
Compression is a process that turns down audio above a set threshold, reducing the gap between the quietest and loudest parts of a track so levels sit more consistently.
Does compression make a song louder?
Compression itself reduces peaks rather than adding loudness; perceived loudness usually comes from the makeup gain or limiting applied afterwards, not the compression stage itself.
How can I tell if my compressor settings are too aggressive?
Watch the gain-reduction meter during playback. If it shows constant reduction through both quiet and loud sections rather than only reacting to peaks, your settings are likely too aggressive, and running your mix through a tool like AubioMix will flag exactly which tracks show that pattern.