
Automation in music production is the process of programming dynamic changes to audio parameters, such as fader levels, panning, send amounts, and plugin settings, so that your mix moves and breathes like a live performance. A static mix sets every level and process at a fixed point. Automation turns those fixed points into a directed emotional journey, lifting a chorus, pulling back a reverb tail, or nudging a vocal forward at exactly the right moment. Professional mixes often require hundreds of individual fader rides across a single song. That scale tells you everything about how seriously working engineers take this craft. Understanding automation is not optional if you want your productions to compete at a professional level.
What automation tools and features do modern DAWs offer?
Every major DAW handles automation through dedicated lanes attached to each track. These lanes display parameter changes as a drawn curve over time, and you can edit them with breakpoints, which are anchor points that define the shape of the move. The two most common curve styles are linear, which creates a straight ramp between two points, and exponential, which creates a gradual then steep (or steep then gradual) sweep. Exponential curves feel more natural for volume moves because human hearing responds logarithmically to level changes.
DAWs typically offer three automation modes for real-time recording:
- Write mode records every parameter move you make, overwriting anything previously written.
- Touch mode records only while you actively touch or move a control, then snaps back to the existing automation when you release.
- Latch mode records from the moment you touch a control and holds the last value when you release, rather than snapping back.
Touch mode is the most useful for fader rides on a vocal because it lets you correct specific phrases without destroying the surrounding automation.
Beyond fader and pan lanes, you can automate virtually any plugin parameter. Filter cutoff sweeps, EQ band boosts, saturation drive, reverb mix percentage, and delay feedback are all fair game. The creative possibilities are genuinely exciting once you start thinking of your plugins as instruments rather than static processors.

| Automation type | Common parameters | Typical use |
|---|---|---|
| Volume automation | Fader level, trim gain | Vocal rides, section lifts |
| Pan automation | Left/right position | Movement, width effects |
| Send automation | Reverb/delay send level | Dynamic space control |
| Plugin parameter automation | EQ, filter, saturation | Creative sweeps, emphasis |
| AI administrative automation | Batch rendering, loudness normalisation | File management, delivery prep |
AI agents handle administrative tasks like batch stem rendering, loudness normalisation, and file naming, reducing hours of manual labour. This type of business process automation sits outside your DAW entirely, which means it never interferes with your delicate mix session.
Pro Tip: Set your DAW automation mode to Touch for all fader rides. It gives you surgical control over individual phrases without accidentally overwriting the moves you have already perfected.
How to set up an efficient automation workflow for dynamic mixes
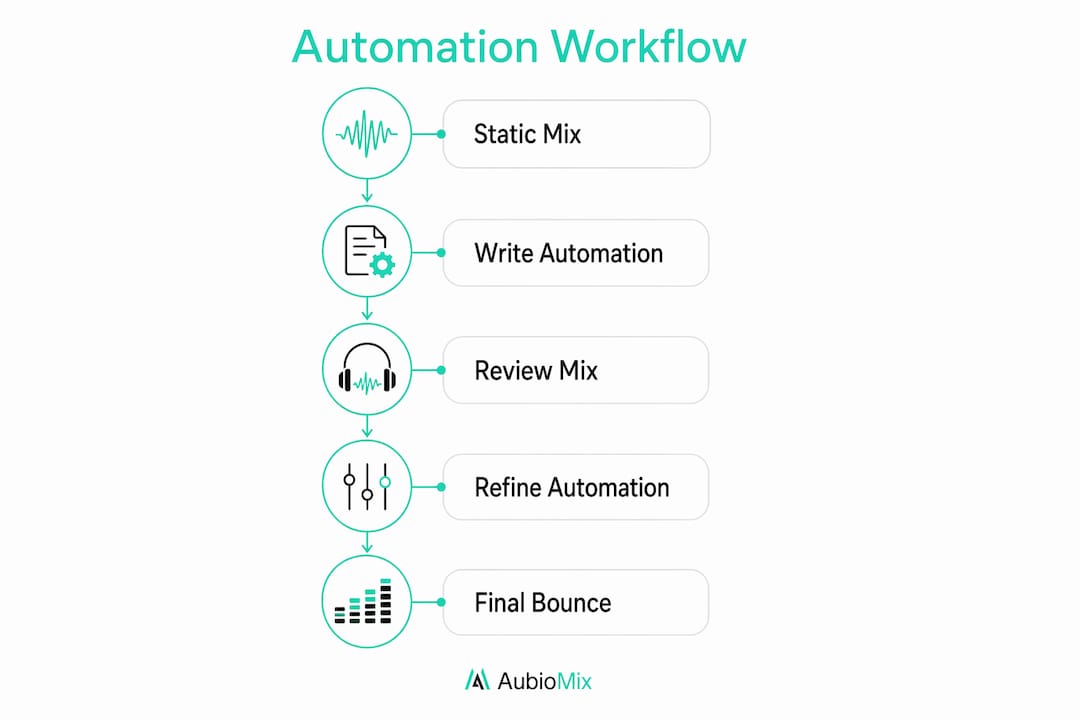
The single most important rule in professional mixing is this: establish a solid static mix before you write a single automation point. A static mix means every fader, EQ, compressor, and reverb is set to a position that works reasonably well for the whole song without any movement. Think of it as the skeleton. Automation is the muscle and expression you layer on top.
Starting automation before your static mix is stable creates a painful cycle of rework. Every time you adjust a plugin setting or rebalance a group, your existing automation curves become wrong. Freeze the static mix first, then move into automation.
Here is a practical step-by-step workflow we recommend:
- Finalise your static mix. Balance all elements, set your compression and EQ, and get a mix that sounds acceptable from start to finish without any movement.
- Create automation lanes for your lead vocal. The lead vocal is where automation has the most impact. Start here before touching anything else.
- Ride the lead vocal fader. Listen through the song phrase by phrase and draw or record level adjustments so every word sits clearly in the mix. A single lead vocal track routinely involves dozens to hundreds of automation rides over a typical 3–4 minute song.
- Add section-level volume boosts. Lift your chorus faders by +1 to +2 dB across the board to create energy contrast. Chorus sections typically receive a macro volume boost of +1 to +2 dB with complementary send adjustments to enhance energy.
- Automate your reverb and delay sends. Pull the reverb send down during dense, busy sections and open it up during sparse or emotional moments. This creates a sense of space and movement without cluttering the mix.
- Review the full mix in context. Play the song from start to finish and listen for automation moves that feel abrupt, over-cooked, or inconsistent.
The key to great automation is restraint. Producers who are new to the technique tend to automate everything they can hear. The result is a mix that feels busy and unsettled. Space your moves out, and let the music breathe between them.
Pro Tip: After writing your automation, bounce a rough mix and listen back on headphones, earbuds, and a phone speaker. Automation moves that sound subtle on studio monitors can feel exaggerated on consumer playback devices.
For a deeper look at how automation fits into the broader mix engineer workflow, the principles above apply across every genre.
What advanced automation techniques enhance creative control?
Once you have mastered basic fader rides and section lifts, the real creative territory opens up. The most powerful advanced technique is pre-compression gain automation, sometimes called gain riding or trim automation.
Using gain or trim plugins for pre-compression rides controls level before dynamics processing, resulting in transparent, consistent compression. When you automate the fader after a compressor, you change the output level but not the compression behaviour. When you automate a gain plugin placed before the compressor, you feed the compressor a more consistent signal. The compressor then works less hard, and the result is a vocal that sits naturally in the mix without pumping or breathing artefacts.
Here are the advanced techniques worth adding to your toolkit:
- Pre-compression gain rides: Place a gain or trim plugin at the top of your vocal chain and automate it to even out performance dynamics before the compressor sees the signal.
- EQ parameter automation: Automate a high-shelf boost to add air and presence to a vocal during the final chorus, then pull it back for the verses.
- Filter sweeps on synths or pads: Automate a low-pass filter cutoff to open gradually through a build section, creating tension and release.
- Saturation drive automation: Increase saturation on a synth bass during the drop for added harmonic density, then reduce it in the breakdown for contrast.
- Dynamic reverb sends: Automate the send level to a long reverb return so it swells during emotional peaks and retreats during rhythmic sections.
AI tools are genuinely useful for the sketch phase of a mix. They can generate a rough balance quickly, which gives you a starting point rather than a blank canvas. However, the creative decisions, the filter sweep that builds tension, the reverb swell that makes a bridge feel vast, those require human intent.
The best music automation blends human intent with AI assistance, using AI for sketches and repetitive tasks while reserving emotional decisions for humans. AI excels at constraint-based workflows; humans excel at intent and final mix judgements.
Over-reliance on AI-powered creative automation risks diluting the producer's unique style and artistic identity. Use AI to speed up the admin and the rough work. Keep the emotional decisions in your own hands.
For more on the types of automation in mixing and how to apply each one creatively, that guide goes deep on the subject.
What common pitfalls should producers avoid with automation?
Automation mistakes are easy to make and surprisingly common, even among experienced producers. Knowing what to watch for saves you hours of frustrating rework.
- Starting automation before the static mix is stable. This is the most costly mistake. Every static mix change after automation is written means revisiting your automation curves. Lock down your static mix first.
- Using only fader automation for gain control. Automating the fader after a compressor changes the output level but not the compression response. Use a gain plugin before the compressor for transparent rides, and reserve the fader for macro-level moves.
- Over-automating. If every bar has a volume move, a filter sweep, and a reverb change, the listener's ear loses the thread. Automation should feel like direction, not decoration.
- Ignoring automation playback consistency. Always check your automation by playing the full song from the top, not just the section you edited. Moves that feel right in isolation can feel wrong in context.
- Relying on AI tools for creative decisions. AI-assisted workflows automate repetitive file management tasks without interfering with creative mix automation. That is the right boundary. Push AI beyond admin and you risk losing the personal voice that makes your mixes distinctive.
Pro Tip: After completing your automation, use your DAW's automation view to zoom out and look at the full song timeline. If the automation lanes look like a seismograph during an earthquake, you have over-automated. Aim for purposeful, readable curves.
Key takeaways
Effective automation in music production requires a stable static mix as its foundation, purposeful parameter moves, and human creative judgement at every stage.
| Point | Details |
|---|---|
| Static mix first | Always finalise your static mix before writing any automation to avoid constant rework. |
| Pre-compression gain rides | Automate a gain plugin before your compressor for transparent, natural-sounding vocal control. |
| Section-level energy management | Lift chorus faders by +1 to +2 dB and open reverb sends to create contrast and movement. |
| AI for admin, not artistry | Use AI tools for batch rendering and file management; keep emotional mix decisions human. |
| Restraint is the skill | Fewer, more purposeful automation moves create a cleaner, more emotionally directed mix. |
Automation and artistic identity: my honest view
I have spent a long time watching producers fall into two camps. The first group avoids automation because it feels fiddly and time-consuming. The second group automates everything in sight because the technology makes it easy. Neither approach produces great mixes.
The producers I admire most treat automation the way a film director treats camera movement. Every move has a reason. A fader ride is not just a level correction; it is a decision about what the listener hears and feels at that exact moment. That level of intentionality is what separates a technically correct mix from one that genuinely moves people.
AI tools have changed the admin side of production significantly, and I think that is a good thing. Batch rendering, loudness normalisation, file organisation — these tasks used to eat hours. Handing them to an AI agent frees you to spend more time on the creative work. But I have seen producers start using AI to generate rough mixes and then accept those mixes with minimal adjustment. The 'human vs AI' debate is outdated; the real question is where you draw the line between AI speed and human intent.
My advice is to draw that line at the emotional decisions. Let AI handle the repetitive work. Own every creative move yourself. Your automation should sound like you.
— Aubiomix
Aubiomix: professional feedback on your mix automation
Getting your automation right is one thing. Knowing whether it is actually working in your mix is another challenge entirely. That is where Aubiomix comes in.

Aubiomix lets you upload your audio file and receive detailed, pro-level feedback on your mixing and mastering, including how well your automation is serving the dynamics and emotional arc of your track. You get specific, actionable mix feedback on what is working and what needs attention, without waiting days for a session with a mix engineer. Whether you are refining vocal rides, checking your section-level energy management, or evaluating your reverb sends, Aubiomix gives you the clarity to make confident decisions and move forward with your mix.
FAQ
What is automation in music production?
Automation in music production is the programming of dynamic parameter changes, such as volume, panning, and plugin settings, within a DAW so that a mix moves and responds over time without manual intervention during playback.
When should I start adding automation to my mix?
Always establish a stable static mix before writing any automation. Starting automation too early leads to constant rework every time you adjust your processing or balance.
What is pre-compression gain automation?
Pre-compression gain automation involves placing a gain or trim plugin before your compressor and automating it to control level before the dynamics processor. This produces more transparent, natural-sounding compression with fewer pumping artefacts.
How much automation is too much?
There is no fixed number, but if your automation lanes look densely packed across the full song timeline, you have likely over-automated. Purposeful, spaced moves create direction; constant movement creates clutter.
Can AI tools replace manual automation in a mix?
AI tools handle administrative tasks like batch rendering and loudness normalisation well, but creative automation decisions require human intent. The most effective approach combines AI efficiency for admin with human judgement for every emotional mix decision.