
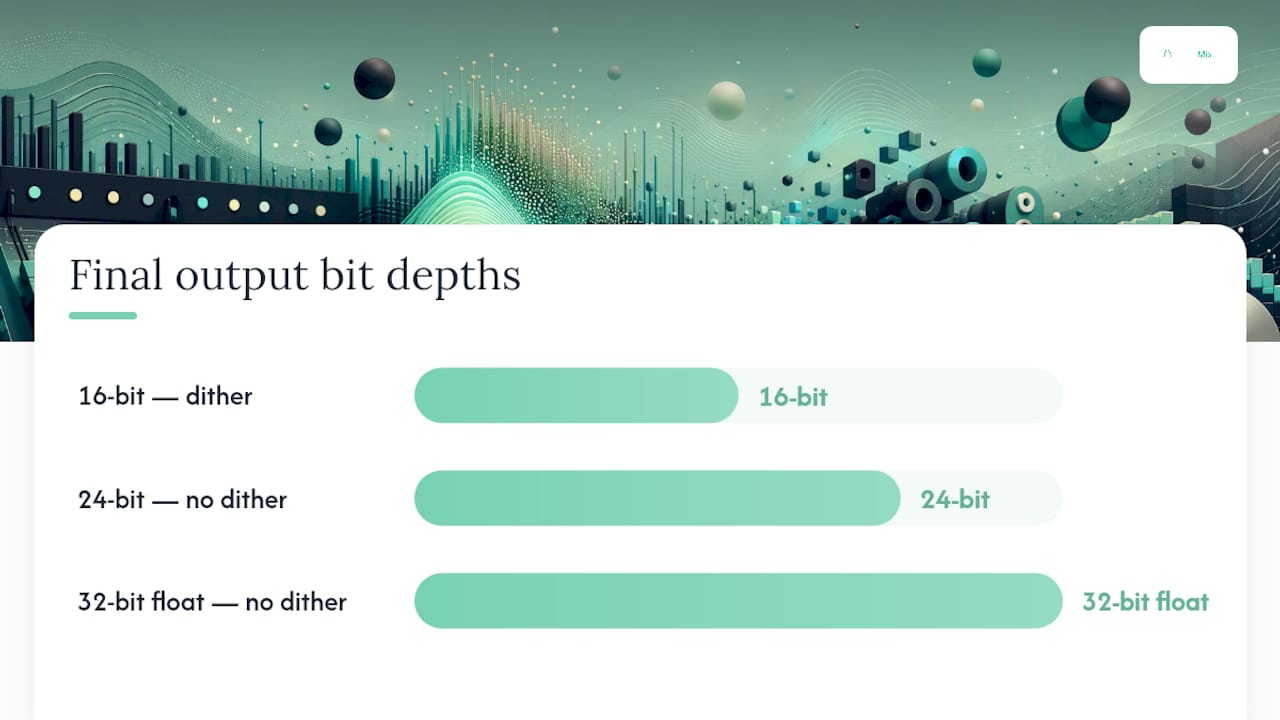
Dither only when you reduce bit depth, and apply it exactly once as the very last step before writing the final file. That's the whole rule. If you're exporting a 24-bit or 32-bit float master for further processing, leave dither off entirely. If you're creating a 16-bit CD master or a 16-bit distribution file from a 24-bit session, turn dither on, place it after every other process, and don't touch the level again afterwards.
- Last-step rule: dither goes on after fades, limiting, and any final gain change. Nothing follows it.
- Exception rule: stems, production bounces, and any file destined for further processing get exported without dither, at full working resolution.
- Format rule: CD masters (16-bit) need dither; streaming platforms accept 24-bit masters, so dithering is optional unless you're also reducing bit depth for that delivery.
Right now: check your target bit depth. If it's lower than your session's working resolution, switch dither on at the export stage only.
Key takeaways
Dither only when you reduce bit depth, apply it once as the last step, and keep a 24-bit master for every project.
| Point | Details |
|---|---|
| Dither only on bit-depth reduction | Enable dither when exporting 24→16-bit; leave it off for 24-bit or 32-bit float exports. |
| Apply dither as the final step | Place dither after all processing, fades, and level changes — nothing follows it. |
| Stems and bounces stay undithered | Export stems and intermediate files at full working resolution for further processing. |
| TPDF is the safe default | Use TPDF for most exports; reserve noise-shaped dither for demanding single-pass 16-bit masters. |
| Aubiomix validates your export | Upload your final file to Aubiomix to confirm noise floor, true peak, and loudness before distribution. |
Table of Contents
- Your export checklist for applying dither correctly
- What dithering actually does to your audio
- When you should dither and when you should not
- How to enable dither in Pro Tools, Audacity, Logic Pro, Ableton, and Reaper
- Common dithering mistakes and how to fix them
- How to listen and measure to confirm dither is working
- How Aubiomix fits into your export validation workflow
- A practitioner's perspective on dithering
- Your final exports deserve a second set of ears
- Sources
Your export checklist for applying dither correctly
Work through these steps before you hit export on any final master.
- Confirm your session is running at 32-bit or 64-bit float internally (most modern DAWs default to this).
- Decide your target bit depth: 16-bit for CD, 24-bit for streaming and archival masters.
- Complete all mastering-level processing — limiting, EQ, compression, loudness targeting — before you reach the dither stage.
- Place dither as the absolute last process in the chain, post-fader, after any automation that affects output level.
- Set your sample rate and file format (WAV or AIFF for lossless delivery), then export.
- After export, do a quick level check: if you need to adjust gain, go back to the pre-dither stage and re-export rather than processing the dithered file.
Pro Tip: If you're unsure whether your dither is positioned correctly, export both a 24-bit master and a dithered 16-bit version, then A–B them at matched levels. Any audible harshness or stepping in the 16-bit file that isn't in the 24-bit version points to a dither placement problem, not a dither algorithm choice.
What dithering actually does to your audio
Dither converts quantisation distortion into low-level noise. That's the short version, and it's worth understanding why that trade is almost always worth making.
When you reduce bit depth — say from 24-bit to 16-bit — each audio sample gets rounded to the nearest available value in the lower-resolution format. Without dither, that rounding error is correlated with the signal itself, which produces harmonic distortion and modulation artefacts. These are particularly audible on quiet passages and reverb tails, where the signal sits close to the noise floor. Dithering turns that correlated error into random noise, which the ear tolerates far better than tonal distortion.
The two main types you'll encounter are TPDF (Triangular Probability Density Function) and noise-shaped dither. TPDF is the safe, universally recommended default: it fully decorrelates the quantisation error from the signal and adds a flat, low-level noise floor. Noise-shaped dither goes a step further by pushing that noise energy into frequency bands the ear is less sensitive to, which increases perceived dynamic range. Peer-reviewed work published in the JAES confirms that correctly applied dither and noise shaping measurably reduce perceivable quantisation artefacts in multi-step digital workflows.
There's also a distinction between subtractive and non-subtractive dither. Subtractive dither requires the dither signal to be available at decoding, which isn't practical for standard distribution. Non-subtractive dither — what every DAW and plugin uses — adds the dither signal at encode only, which is why the Eusipco 2024 proceedings focus on jointly specifying the dither's probability density and power spectral density to shape the error spectrum without needing a matching decoder.
The Audacity manual gives a useful practical reference for typical dither levels:
| Export target | Approximate peak dither level |
|---|---|
| 24-bit PCM | approx. −90 dBFS |
| 16-bit PCM | approx. −80 dBFS |
| 32-bit PCM WAV | no dither applied (lossless) |
Those numbers tell you something useful: at 16-bit, dither sits roughly 80 dB below full scale, well below the noise floor of any real listening environment. The cost is genuinely negligible.
Pro Tip: Never dither intermediate files. If you bounce a stem or a rough mix at 24-bit for further processing, exporting without dither preserves full resolution and avoids accumulating noise across multiple passes.
When you should dither and when you should not
The decision is binary and depends entirely on whether you're reducing fixed-point bit depth at the final output stage.
Dither when:
- Exporting a 16-bit CD master from a 24-bit or 32-bit float session.
- Delivering a 16-bit file to any platform that requires it.
- Converting any fixed-point format to a lower fixed-point format as the final step.
Do not dither when:
- Exporting a 24-bit master for streaming platforms (Spotify, Apple Music, and most others accept 24-bit; no bit-depth reduction means no dither needed).
- Exporting stems for a mixing engineer — stems should always be exported at full working resolution, undithered.
- Creating production bounces or revision files for further processing.
- Exporting to 32-bit float WAV, which is lossless and requires no dither.
Mastering engineer Mat Leffler-Schulman states the rule plainly: apply dither once at the final word-length reduction. Re-dithering a pre-dithered file compounds errors rather than correcting them.
A note on normalisation: always normalise or set your final output level before dither, not after. Once dither is applied, any gain change alters the relationship between the dither noise and the signal, which partially defeats the purpose. Normalise before mastering is complete, then dither last.
Here's how the main dither algorithms compare, based on Cakewalk's documentation:
| Algorithm | Noise floor character | Best use case | Caution |
|---|---|---|---|
| Rectangular | Flat, slightly higher noise | Quick internal bounces | Not ideal for final 16-bit masters |
| TPDF (Triangular) | Flat, fully decorrelated | Final masters, safe default | None — use freely |
| Noise-shaped (Pow-r) | Shaped to less-sensitive frequencies | Demanding 16-bit final masters | Use only as single, final dither pass |
How to enable dither in Pro Tools, Audacity, Logic Pro, Ableton, and Reaper
If you need to convert to a lower fixed-point bit depth, enable dither at the final export stage or place a dither plugin as the last insert on your master bus. Here's where to find the controls in each DAW.
Pro Tools When bouncing to disk, Pro Tools applies dither automatically when you select a lower bit depth than your session. In the Bounce to Disk dialogue, set the bit depth to 16-bit and Pro Tools will apply its built-in dither. For more control, insert a dedicated dither plugin (such as POW-r Dither or a third-party option) as the final insert on your master fader, then set the Bounce to Disk bit depth to match.
Audacity Audacity applies dither automatically during export when converting from a higher bit depth to a lower one. In Preferences > Quality, you can set the dither type (None, Rectangle, Triangle, or Shaped). The Audacity manual recommends leaving "High-quality dither" enabled for 16-bit exports. For 32-bit PCM WAV exports, Audacity applies no dither because the conversion is lossless.
Logic Pro In Logic's Bounce dialogue, select your output bit depth. When bouncing to 16-bit, Logic applies dither automatically. You can also insert a dither plugin on the Stereo Out channel strip as the final insert for manual control over the algorithm.
Ableton Live In Ableton's Export Audio/Video dialogue, set the Bit Depth to 16 Bit and the Dither Options to your preferred type (Triangular, Rectangular, or Pow-r). For 24-bit exports, set Dither Options to "No Dither." If you use a dither plugin on the master channel, set Ableton's export dither to "No Dither" to avoid double-dithering.
Reaper Reaper doesn't apply dither automatically in the same way. In Render to File, set your output bit depth and check the "Dither" box if reducing bit depth. Alternatively, insert a dither plugin (JS: Dither or a third-party option) as the final item on your master send, then render without the built-in dither option ticked.
Pro Tip: If your DAW doesn't expose a dither option during export, insert a dither plugin on the master bus as the very last insert and bypass it for all intermediate bounces. This gives you consistent, algorithm-specific control regardless of what the export dialogue offers.
Common dithering mistakes and how to fix them
These are the errors that show up most often, and each one has a straightforward fix.
- Applying dither multiple times. This is the most common mistake. If you dither a 16-bit file and then process it again, you're adding a second noise layer on top of the first. Fix: always go back to the pre-dither 24-bit source and re-export. Mat Leffler-Schulman's mastering notes are clear that re-dithering compounds errors rather than resolving them.
- Dithering before final level changes. If you apply dither and then adjust the master fader or run a limiter pass, the dither noise shifts relative to the signal. Fix: complete all level adjustments first, then dither as the absolute last step.
- Dithering stems. Stems are for further processing, so they need full resolution. Fix: remove dither from your stem export settings and re-export at 24-bit or 32-bit float. See the stem export guide for the full workflow.
- Using noise-shaped dither on files that will be processed again. Noise-shaped dither is designed for a single, final pass. If the file goes through another processing stage, the shaped noise interacts unpredictably. Fix: use TPDF for anything that might be processed further.
Detecting double-dithering is straightforward with a spectral analyser. Open the exported file in Audacity or a similar tool and inspect the noise floor in the spectral view. Double-dithered files often show an elevated or uneven noise floor compared to a cleanly dithered file. Quantisation artefacts without dither appear as harmonic spikes correlated with the signal.
Pro Tip: If you only have a pre-dithered 16-bit file and need to remaster it, treat it as a 16-bit source and apply minimal processing. Avoid heavy EQ or compression, which will re-expose the quantisation noise. For a reissue, always source the original 24-bit session files if they exist.
Plugin implementation can also introduce unexpected bit-depth changes. Some older or budget plugins internally quantise to 16-bit or 24-bit fixed-point. If you see artefacts that don't match your expected noise floor, check each plugin in your chain for internal precision settings.
How to listen and measure to confirm dither is working
A quick A–B test takes about five minutes and tells you everything you need to know.
- Export two versions of your final master: one dithered 16-bit file and one undithered 16-bit file (or a 24-bit reference).
- Level-match both files precisely — even a 0.1 dB difference will skew your perception.
- Listen on reference monitors at a moderate level, then switch to headphones. Focus on quiet passages, reverb tails, and fade-outs where quantisation artefacts are most audible.
- Listen again at a low level, roughly 20–30 dB below your normal mix level. Quantisation distortion becomes more apparent as the signal approaches the noise floor.
- Open both files in a spectral analyser. Look for harmonic spikes in the undithered file that are absent in the dithered version. The HydrogenAudio dither demonstration provides reference examples of what these artefacts look like spectrally.
- If you hear no meaningful difference at typical listening levels, choose the dithered file. It's mathematically correct for a 16-bit delivery, and the noise cost is inaudible in any real listening environment.
How Aubiomix fits into your export validation workflow
Aubiomix provides objective, automated checks that can confirm whether artefacts or noise issues are present in your exported files and flag export-related problems including loudness, true peak, clipping, and an elevated noise floor that might indicate a dithering error.
Here's how to incorporate it:
- Upload your dithered 16-bit master and your 24-bit archival master separately to Aubiomix.
- Review the noise floor and true peak readings in the feedback report. An unexpectedly high noise floor on the 16-bit file can indicate double-dithering or a misplaced dither stage.
- Use the loudness and clipping feedback to confirm your file meets distribution-ready criteria before submission.
- Cross-reference the Aubiomix audio metrics glossary for LUFS, true peak, and LRA definitions if any of the reported values are unfamiliar.
Aubiomix covers 15+ areas of mixing and mastering analysis, so the same upload that checks your dither also validates your frequency balance, stereo width, and mastering prep. It's a useful final pass before you send files to a distributor or label. If you want to check your mix is ready before you even reach the export stage, the mix readiness checklist is a good place to start.
A practitioner's perspective on dithering
The single rule that matters is this: apply dither once, at the final conversion to a lower fixed-point bit depth, and never again. Everything else in the dithering conversation — algorithm choices, noise shaping curves, TPDF versus Pow-r — is secondary to getting that sequencing right.
What I'd add from working through this regularly is the habit of always keeping a 24-bit master alongside any 16-bit delivery file. The 24-bit version is your safety net. If a platform's requirements change, if a remaster is needed, or if you simply want to revisit the mix, you have a clean, undithered source to work from. The dithered 16-bit file is for distribution only, not for further processing.
Your final exports deserve a second set of ears
Getting dither right is the last technical decision before your music reaches listeners, and it's one of the few places where a small workflow error has a measurable effect on the final sound. Aubiomix gives you an objective second opinion on that final file: upload your exported master and receive detailed feedback on noise floor, true peak, loudness, and 15+ other mix and mastering parameters, so you know the file is genuinely distribution-ready before it leaves your hands.

Credit packs and monthly subscriptions are both available, so you can run a single export check or build Aubiomix into every release workflow. Head to Aubiomix to upload your first file and see the analysis for yourself.
Sources
- Dither - Audacity Manual
- What Is Dithering in Audio? — iZotope
- Dither in mastering: what it actually is and when to use it — Mat Leffler‑Schulman
- Proceedings paper — PSD shaping for non-subtractive dither (Eusipco 2024)