
The noise floor is the constant, low-level hiss and hum sitting under every recording, the sound your gear and room make even when nobody is playing a note. The single most effective move you can make is getting a strong, clean signal at the very first gain stage, because every dB you fail to capture at the mic preamp has to be recovered later with make-up gain that boosts noise right alongside it. Room treatment and equipment quality both matter, but gain staging is where you win or lose this fight.
TL;DR:
- Proper gain staging at the first preamp stage is crucial to prevent noise from increasing later in the process; aim for peaks between −12 and −18 dBFS.
- Achieving a noise floor of approximately −70 to −85 dBFS in quiet passages is standard for music, while spoken-word projects generally accept higher levels, around −50 to −60 dBFS.
- Avoid heavy compression and stacking saturation or emulate plugins, as these can lift low-level noise into audible territory during mixing.
- Use targeted noise reduction tools, applying only 6 to 12 dB of spectral reduction after accurate noise profiling to prevent artifacts and preserve musicality.
- Conduct a pre-mix noise-floor sweep by checking quiet sections with spectrograms and meters to identify and address issues before final mastering or delivery.
Table of Contents
- What is noise floor and how do you measure it?
- What causes noise in a recording or mix?
- How does mix processing affect your noise floor?
- Recording-stage steps that keep noise out from the start
- What mix-stage tools and workflows actually reduce noise safely?
- What are realistic noise-floor targets for different projects?
- What AubioMix has learned from 6,000+ mix reports
- The pre-master noise-floor sweep
- Does bit depth or file format change your noise floor?
- Why does noise floor actually matter to a listener?
- What do people get wrong about noise floor in mixing?
- How do you reduce noise without flattening the mix?
- The real cost of a high noise floor isn't what you think
- Get a clear read on your mix's noise floor in minutes
- Sources
What is noise floor and how do you measure it?
The noise floor is the residual level of unwanted sound, electrical hiss, hum, room rumble, that remains present in a recording or mix when no intentional signal is playing. In digital terms, you measure it against dBFS (decibels relative to full scale), where 0 dBFS is the absolute ceiling before clipping and everything else is a negative number describing how far below that ceiling your audio sits.
Signal-to-noise ratio (SNR) is what tells you whether that floor is a problem. It is simply the gap, in decibels, between your loudest wanted signal and the noise sitting beneath it. A vocal take peaking at −6 dBFS with a noise floor at −70 dBFS gives you a healthy 64 dB of SNR, plenty of room for the quiet passages to breathe without the hiss becoming audible. Track that same vocal too quietly, say peaking at −30 dBFS against the same −70 dBFS floor, and you are working with only 40 dB of SNR. Push that up to a usable level with gain later, and the noise comes up with it.
Measuring the floor properly means capturing a genuine reference point. Before or after a session, record 10 to 15 seconds of pure room tone, the mic live, nobody moving, nothing playing, and look at what your meters show.
- RMS metering averages level over time and reflects perceived loudness, which is what you want when judging whether a quiet passage will actually bother a listener.
- Peak metering captures the single highest instantaneous sample, useful for catching transients and avoiding clipping but a poor guide to how noisy something sounds.
- Spectrograms show you where in the frequency spectrum the noise sits, essential for telling a 50/60 Hz hum from broadband hiss or HVAC rumble.
- Loudness meters like those built into iZotope RX or Nugen VisLM let you isolate that quiet section and read an integrated value rather than guessing from a bouncing needle.
Professional music mixes typically target an integrated noise floor of roughly −70 to −85 dBFS in the quietest passages, a range worth treating as your benchmark before deciding whether more cleanup is needed.
Get into the habit of checking this early. A mix that measures well in its quiet sections rarely surprises you at mastering, and diagnosing a noisy stem after forty tracks are already summed is a far harder job than catching it at the source.
What causes noise in a recording or mix?
Noise arrives from four broad directions, and knowing which one you are dealing with changes your fix completely. Treating hum with a noise gate, or treating self-noise with a de-humming filter, wastes time and often damages the signal you actually want.
Equipment self-noise is the electrical hiss inherent to every preamp, converter, and microphone. Manufacturers publish this as EIN (equivalent input noise) or a self-noise figure in dB(A), and it is a fixed property of the gear, not something you can EQ away. A budget condenser mic with a self-noise rating of 20 dB(A) will always sound sissier on a quiet acoustic guitar than a large-diaphragm mic rated at 7 dB(A), no matter how carefully you track. This is exactly the kind of noise that any analogue piece of recording gear contributes to your effective floor before you even factor in the room.
Ground loops produce a distinctive, tonal 50 Hz or 60 Hz hum (plus harmonics), caused when two pieces of equipment are earthed at different points and a small voltage difference creates a current loop through your cabling. The tell-tale sign is a hum that changes pitch or disappears when you unplug one device or lift a ground pin, and it shows up on a spectrogram as thin, perfectly vertical lines at 50/60 Hz and their multiples, quite different from the broad, fuzzy smear of hiss.
Electromagnetic interference (EMI) and radio-frequency noise creep in through unbalanced cables, long cable runs, or cabling routed parallel to mains power. Symptoms include buzzing, crackling, or intermittent noise that changes when a phone rings nearby or a dimmer switch is used in the same room. Portable recording rigs are especially vulnerable here: battery-powered interfaces near laptop chargers, or XLR runs coiled next to a mains extension, are a common culprit on location shoots.
Room and ambient noise covers everything the mic picks up that isn't the performance: HVAC rumble, computer fans, traffic, fridge hum. On a spectrogram, this typically shows as a low-frequency wash below 200 Hz, steady and unbroken, distinct from the intermittent spikes of EMI or the clean tonal lines of a ground loop.
A quick diagnostic checklist:
- Hum with a clear pitch that shifts or vanishes when you change earthing = ground loop.
- Crackling or buzzing tied to nearby electronics = EMI or RF pickup.
- Steady low-end wash with no clear pitch = room or HVAC noise.
- Hiss present even with the mic capsule capped or the input muted = equipment self-noise.
How does mix processing affect your noise floor?
Compression is the single biggest culprit for making an already-present noise floor audible, and it is almost never the compressor's fault directly. Consider a vocal recorded with a −70 dBFS noise floor and peaks at −12 dBFS. Apply 10 dB of compression and the same amount of make-up gain to bring peaks back to −12 dBFS, and you have just lifted the quiet sections, and the noise sitting in them, by roughly that same 10 dB. Your SNR hasn't changed on paper, but the noise now lives much closer to audible territory during the track's quietest moments, exactly where a listener's ear is most sensitive to it.
Summing compounds the problem. Every stem carries its own small noise contribution, and when you combine many channels on a mix bus, those individual noise floors accumulate. A single quiet synth pad hissing at −75 dBFS is inaudible alone. Forty tracks each contributing their own low-level noise, and the aggregate floor on the master bus can sit noticeably higher than any single track suggested.
Saturation and analogue-modelled plugins add a further layer, often deliberately. Many tape and console emulations inject a simulated noise floor to mimic the character of the hardware they model, which is a legitimate creative choice but an invisible one unless you go looking. It is worth periodically auditing your plugin chain: bypass the entire chain, or solo a frozen stems-only version, and listen at a consistent reference level to hear exactly how much noise your processing has quietly stacked on top of the source material.
- Compression with heavy make-up gain lifts noise in quiet passages, not just the peaks.
- Summing dozens of low-noise stems can still produce an audible aggregate floor.
- Saturation and tape/console emulations often add their own simulated hiss by design.
- Bypassing a full chain and listening at matched level is the fastest way to isolate plugin-added noise.
Pro Tip: Before reaching for a noise reduction plugin, solo your mix bus with everything bypassed and listen at a fixed, moderate level. If the noise floor sounds worse with processing engaged than without it, the fix isn't a de-noiser, it's your gain structure.
Gate before you compress when a track has a genuinely troublesome floor, not the other way round. A gate closing on silence before compression ever touches the signal means you are not compressing, and therefore amplifying, noise that shouldn't be there in the first place. Parallel compression deserves a caveat too: blending in a heavily compressed duplicate track is a fantastic way to add density, but that duplicate has its own lifted noise floor, and blending it in at any real level reintroduces the exact problem you gated away on the original.
Recording-stage steps that keep noise out from the start
Everything you do at the recording stage is cheaper and more effective than fixing it later, because you are preventing noise rather than disguising it.
- Set your input gain properly. Aim for peaks landing between −12 and −18 dBFS on a 24-bit session. This isn't an arbitrary convention, it is the sweet spot that gives you enough headroom to avoid clipping on unexpected transients while capturing enough signal that you are never forced to apply large amounts of make-up gain, and the noise that comes with it, in the mix. Read more on gain staging in mixing if this is an area you want to tighten up across your whole session, not just at tracking.
- Choose your microphone deliberately. For quiet sources, acoustic guitar finger picking, whispered vocals, room ambience, a mic's self-noise spec matters far more than it does on a loud source like a kick drum or a shouting rock vocal. Reach for the lowest self-noise mic available for delicate work, and use a directional polar pattern (cardioid, hypercardioid) to physically reject off-axis room noise rather than trying to remove it afterwards.
- Use balanced cabling and keep runs short. Unbalanced connections are far more susceptible to picking up EMI over distance. Where you must run cable near mains power, cross the two at a right angle rather than running them in parallel, a simple physical habit that dramatically cuts inductive interference.
- Sort your power and grounding. A power conditioner smooths out electrical noise from shared circuits, and keeping all your gear on a single-point ground avoids the voltage differences that cause ground-loop hum. If something is genuinely noisy, an old fan-cooled processor, a buzzing dimmer switch, switch it off or isolate it before you press record rather than fighting it in post.
- Treat the room and time your session around it. Basic acoustic treatment reduces reflections that add to the perceived noise floor, but timing matters just as much: recording between HVAC cycles, or switching the system off entirely for the take, often does more good than any amount of foam on the wall.
Pro Tip: If you're recording somewhere unfamiliar, capture room tone the moment you arrive, before you've adjusted anything. It tells you immediately whether you're fighting HVAC, traffic, or a genuinely quiet space, and it doubles as the reference file you'll need later for spectral de-noise.
Modern 32-bit float recording has changed some of these calculations but not all of them. It gives you enormous dynamic-range headroom, so a level you thought was too quiet can be amplified in post without adding digital quantisation noise. What it does not do is erase the physical self-noise of your microphone or preamp, that noise was captured the moment sound hit the capsule, and no bit depth fixes it after the fact. Treat 32-bit float as a safety net for unpredictable dynamics, not a replacement for careful gain staging.
What mix-stage tools and workflows actually reduce noise safely?
Fixing noise in the mix is a legitimate part of the job, but the order you do things in, and the restraint you apply, decides whether the fix is invisible or obvious.
- Capture a genuine noise profile first. Find, or record separately, a few seconds of pure room tone from the exact same session, mic, preamp, gain setting, room. Feed that segment into a spectral de-noise tool as its learning reference. A profile taken from a different take or a different day rarely matches well enough to work cleanly.
- Decide between de-hum and broadband de-noise. If your problem is a tonal 50/60 Hz hum with clean harmonic lines on the spectrogram, a dedicated de-hum tool targeting those specific frequencies will do a cleaner job than a broadband de-noiser, which is built for hiss and rumble rather than tonal artefacts. Using the wrong tool for the wrong noise type is one of the most common mixing mistakes, and it usually shows up as an oddly hollow or phasey result.
- Apply noise reduction before EQ and compression, not after. Cleaning the signal first means your subsequent EQ moves and compression are shaping a genuinely quieter source, rather than amplifying noise that a later de-noise pass will then have to fight against a compressed, boosted version of itself.
- Validate every setting with an isolated listen. Most spectral tools include an "output noise only" or similar solo mode that lets you hear exactly what is being removed. Use it, and A/B against the untouched signal at matched level, not just at whatever gain the plugin happens to be set to.
- Stay conservative with the reduction amount. Industry-standard workflows treat 6 to 12 dB of reduction as generally transparent, while pushing past roughly 15 dB starts to risk the telltale watery, underwater artefacts that spectral processing is known for when pushed too hard.
A conservative 6 to 12 dB spectral reduction, applied after accurate noise profiling, typically removes the audible hiss without introducing artefacts, while reductions beyond around 15 dB carry a real risk of damaging the wanted signal alongside the noise.
The single biggest workflow mistake is starting with the de-noiser instead of the gain structure. If a track is noisy because it was tracked too quietly and then boosted 15 dB in the mix, no amount of spectral processing will sound as good as simply going back and re-gaining the source, either with clip gain on the original recording or, where re-recording isn't an option, a careful static gain adjustment before any de-noise plugin ever touches it.
What are realistic noise-floor targets for different projects?
Not every project needs the same level of silence, and chasing a music-mastering standard on a podcast, or accepting broadcast tolerances on a mastering job, wastes effort in one direction and damages quality in the other.
| Delivery context | Typical noise floor target | Measurement window to trust |
|---|---|---|
| Music mixes (pre-master) | Roughly −70 to −85 dBFS integrated in quiet passages | RMS/integrated, on isolated quiet sections |
| Podcast | Roughly −50 to −60 dBFS | RMS, checked between speech |
| Broadcast / ACX-style spoken word | Governed by platform-specific noise thresholds | RMS over silent gaps |
| Mastering (final check) | Matches the source mix target, tightened if anything | RMS on the quietest 10 to 15 seconds |
These figures come from measured targets across delivery formats, and the pattern is consistent: music has the tightest tolerance because listeners expect near-silence between notes, while spoken-word formats accept a slightly higher floor because a touch of ambient presence reads as natural room sound rather than a defect.
A quick audit takes minutes once you know what to check:
- Isolate the quietest 10 to 15 seconds of your mix and solo it.
- Read the integrated RMS value on a proper loudness meter, not just the input fader position.
- Cross-check with a spectrogram to see whether the floor is broadband hiss, tonal hum, or low-frequency rumble.
- Compare the result against the target for your delivery context before deciding whether more cleanup is warranted.
Peak metering has its place here too, but only as a clipping safeguard. RMS is what tells you whether the noise floor will actually be audible to a listener sitting in a quiet room, which is the question that actually matters.
What AubioMix has learned from 6,000+ mix reports
Patterns emerge when you look across thousands of uploaded mixes rather than one project at a time, and the noise-related issues AubioMix flags most often are strikingly consistent.
The most common root cause by far is low tracking levels corrected later with heavy make-up gain, exactly the mechanism described earlier: a vocal or guitar recorded too quietly, then pushed up 10 or 15 dB in the mix, dragging its noise floor into audible territory right alongside it. Second is over-compression stacked with generous make-up gain across multiple stems, which compounds the summing problem: no single track sounds obviously noisy in isolation, but the aggregate on the mix bus tells a different story.
The third recurring pattern is excessive reliance on saturation and analogue-modelled plugins across an entire mix bus, each one adding its own small, simulated noise contribution that nobody budgeted for.
- Low tracking levels forcing large make-up gain later, the single most frequent cause flagged.
- Over-compression combined with make-up gain across multiple stems compounding on the bus.
- Heavy saturation or tape-emulation stacking adding cumulative, unaccounted-for hiss.
- Missing or skipped noise reduction on a small number of genuinely problematic stems.
The fixes that most reliably move a report's score in the right direction are unglamorous: going back to adjust input gain or applying retrospective clip gain on the offending track, applying conservative spectral de-noise only where a genuine problem exists rather than across the whole session, and in a surprising number of cases, simply removing a single noisy stem that was adding more hiss than musical value.
Reports communicate findings by flagging the specific track or frequency range where the floor is elevated, alongside a plain-language explanation of the likely cause and a suggested fix, rather than a bare number with no context attached.
The pre-master noise-floor sweep
Run this sequence before you bounce a final mix. It takes fifteen minutes and catches the overwhelming majority of noise problems before a client, a label, or a streaming platform's mastering chain ever hears them.
- Solo the quietest 10 to 15 seconds of the arrangement, an intro, an outro, a breakdown, and inspect it on a spectrogram for anything unexpected.
- Confirm your tracking and mix peaks sit between −12 and −18 dBFS across your key stems, not just the final master fader.
- If you spot clean tonal lines at 50 or 60 Hz, apply a targeted de-hum tool rather than broadband de-noise.
- For genuine broadband hiss, apply spectral de-noise conservatively, starting around 6 to 8 dB and checking with an isolated "noise only" listen before committing further.
- Do a full-mix listen on reference monitors and on headphones, at a level matched to typical mastering monitoring, not cranked up to mask problems or turned down to hide them.
| Check | What you're listening or looking for | Pass condition |
|---|---|---|
| Quiet-passage spectrogram | Unexpected hum lines, broadband hiss, low-end rumble | Clean, matches target range for context |
| Tracking/mix peak levels | Peaks sitting too low, forcing heavy make-up gain | −12 to −18 dBFS on key stems |
| Hum check | Tonal 50/60 Hz lines on spectrogram | None present, or removed with de-hum |
| Reference listen | Audible hiss during quiet sections on monitors or headphones | Not noticeable at normal listening level |
If any row fails, go back to the relevant section rather than reaching for a blanket fix. A hum problem and a hiss problem need different tools, and treating both the same way is how over-processing artefacts creep into an otherwise clean mix.
Does bit depth or file format change your noise floor?
Bit depth sets the theoretical noise floor of the digital system itself, separate from whatever analogue noise your microphone or preamp already captured. Each additional bit of depth lowers the digital quantisation noise floor by roughly 6 dB, which is why 24-bit recording, offering vastly more resolution than 16-bit, has become the standard for tracking and mixing rather than a luxury.
That digital floor and your recording's actual noise floor are two separate things, though, and conflating them is a common mistake. A 24-bit file recorded through a noisy preamp in a room with HVAC rumble will still sound noisy, because the analogue noise captured at the microphone sits far above the digital system's own theoretical floor. Bit depth governs how much headroom you have to work with; it does nothing to remove noise that was already present in the air or the electronics before conversion.
File format matters differently. Lossy formats like MP3 or AAC can, in some cases, mask very low-level noise through their compression algorithms, but they can equally introduce their own artefacts around transients and high frequencies that interact unpredictably with an existing noise floor. For any mixing or mastering decision, work in an uncompressed format, WAV or AIFF, at 24-bit minimum, and save lossy conversion for the final distribution step once your noise-floor decisions are already locked in.
Why does noise floor actually matter to a listener?
A low, well-controlled noise floor is largely invisible when done right, which is exactly why so many mixes ship with more noise than they need. Listeners rarely consciously notice hiss on a loud chorus; they notice it in the quiet intro, the breakdown before the drop, the silence between a vocal phrase and the next line, precisely where the ear is most sensitive because there's nothing else competing for attention.
The perceptual impact compounds on quieter, more intimate material. A stripped-back acoustic ballad or a spoken-word podcast segment has nowhere for noise to hide, while a wall-of-guitars rock mix can bury a surprising amount of hiss under sheer density. This is part of why the target ranges differ so much by context: the genre and arrangement dictate how forgiving the mix can afford to be.
There's also a trust factor that's easy to underestimate. A noisy master reads, subconsciously, as unfinished or amateur, even to listeners who couldn't name what's bothering them. On streaming platforms where a listener's next click is one swipe away, that subconscious impression of polish, or lack of it, plays a real role in whether they stay through the quiet second verse or skip ahead.
What do people get wrong about noise floor in mixing?
The most persistent misconception is that noise reduction plugins are a cure rather than a bandage. A spectral de-noiser can clean up a genuinely noisy recording, but engineers who reach for it first, before fixing gain staging, often end up processing away the symptom while the underlying cause, a track tracked too quietly and boosted too much, remains untouched on the next session.
A second common error is assuming digital recording eliminates noise entirely. Digital systems have an extremely low theoretical noise floor of their own, but that number describes the converter, not your microphone, your preamp, or your room. People also frequently blame "digital noise" for what is, in reality, analogue self-noise or room noise that was captured perfectly faithfully by a very clean digital system.
There's a related myth that louder is always noisier. In fact the opposite tends to be true: a track recorded too quietly and pushed up with make-up gain usually ends up noisier than one recorded at a healthy level from the start, because the noise gets amplified along with the signal.
Finally, plenty of engineers treat every noise problem as the same problem, applying broadband de-noise to a tonal ground-loop hum, or a de-hum filter to genuine hiss. Each tool is built for a specific noise signature, and mismatching them either fails to fix the issue or introduces artefacts that weren't there before.
How do you reduce noise without flattening the mix?
Over-aggressive noise reduction has a specific, recognisable cost: it doesn't just remove hiss, it can shave off the natural decay tails of cymbals, the breathiness in a vocal, and the subtle room ambience that makes a recording feel alive rather than sterile. Push a spectral de-noiser too hard and you get that familiar underwater, phasey quality, dynamics and tone sacrificed for silence.
The safest approach is threshold discipline. Set your reduction only as high as the measured problem requires, not as high as the plugin allows, and always compare against the untouched signal at matched level rather than judging in isolation, where any reduction in noise can trick your ear into hearing an improvement that isn't really there.
Frequency-selective processing beats broadband cuts almost every time. If the noise sits mostly below 200 Hz, restrict your de-noise or de-hum tool to that range rather than processing across the full spectrum, leaving the midrange and top end, where most of a vocal's character and a cymbal's shimmer live, completely untouched.
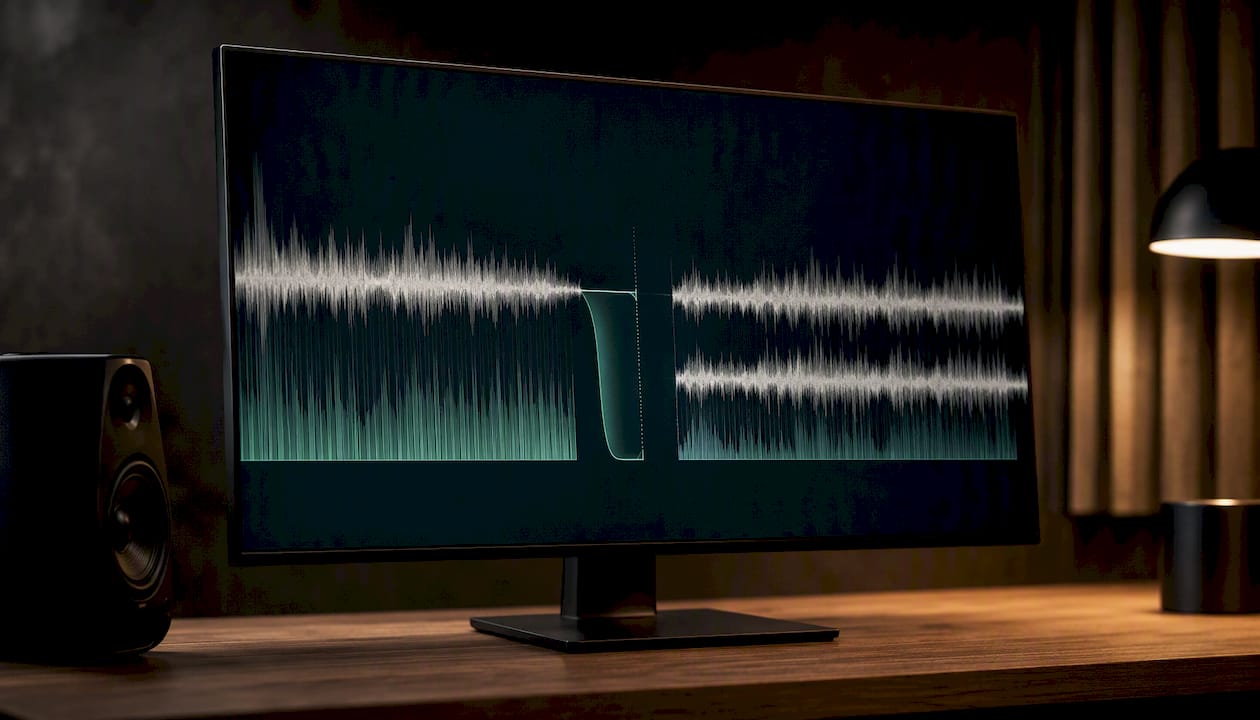
Finally, remember that a small amount of residual noise is often the more musical choice. A touch of tape hiss or room tone can read as warmth and space rather than a flaw, particularly on acoustic or vintage-styled material. The goal isn't digital silence, it's a floor low enough that nothing distracts, while everything that makes the performance feel human stays intact.
The real cost of a high noise floor isn't what you think
Most engineers treat noise floor as a technical checkbox, something to glance at once during mixdown and forget about. That's backwards. Every extra revision cycle on a mix, the client asking for "cleaner vocals" without quite knowing why, the master that sounds fine in the studio but noisy on a phone speaker, traces back more often to gain staging decisions made in the first thirty seconds of a session than to anything done at mixdown.
The industry's fixation on de-noise plugins as the solution has, if anything, made this worse. Spectral tools are genuinely excellent, but their existence has let a generation of engineers skip the harder, less glamorous discipline of tracking properly in the first place. A de-noiser is a repair tool, not a substitute for gain staging done right at the source, and treating it as the latter is exactly why so many mixes still sound thin and processed after "cleanup."
What we'd push back on is the idea that a pristine, absolutely silent noise floor is always the goal. Context decides that, not a universal number. A folk record with room tone and string noise left in place can sound more honest than one scrubbed to digital silence, while a podcast or corporate voiceover genuinely needs that consistency a music mix doesn't. Knowing which target applies to your project matters more than chasing the lowest number you can measure.
— AubioMix
Get a clear read on your mix's noise floor in minutes
Working out whether your noise floor is genuinely a problem, or exactly where it's coming from, is hard to do by ear alone, especially late in a project when your ears are tired and every track sounds slightly suspect. An online app takes the guesswork out of that judgement call: upload a mix and get a detailed report flagging noise, clipping, and gain staging issues alongside the other 15-plus areas that shape a finished track, with specific, written guidance on what to fix and why.

Reports show you exactly where the floor sits against genre-relevant benchmarks, whether that's a techno track that needs a tight, controlled low end or a jazz recording where natural room tone is part of the character. The scoring behind every report follows a documented evaluation framework, so you can see precisely what's being measured rather than trusting a black-box number.
If you've got a track that's been nagging at you, one where something feels slightly off in the quiet sections but you can't quite pin it down, that's the one worth running through a professional mix analysis service first to get actionable insight before you sink another session into guesswork.
Sources
The measurement targets, gain-staging figures, and workflow steps referenced throughout this guide draw on a handful of genuinely useful references worth bookmarking.
- What Is the Noise Floor? How to Reduce It In Your Recordings
- Audio Noise Floor: Definition, Measurement, Targets | AudioUtils
- Musicproductionwiki
For tools, iZotope RX remains the standard for spectral de-noise and de-hum work, paired with any spectrum analyser plugin and your DAW's built-in loudness or amplitude statistics for day-to-day metering.