
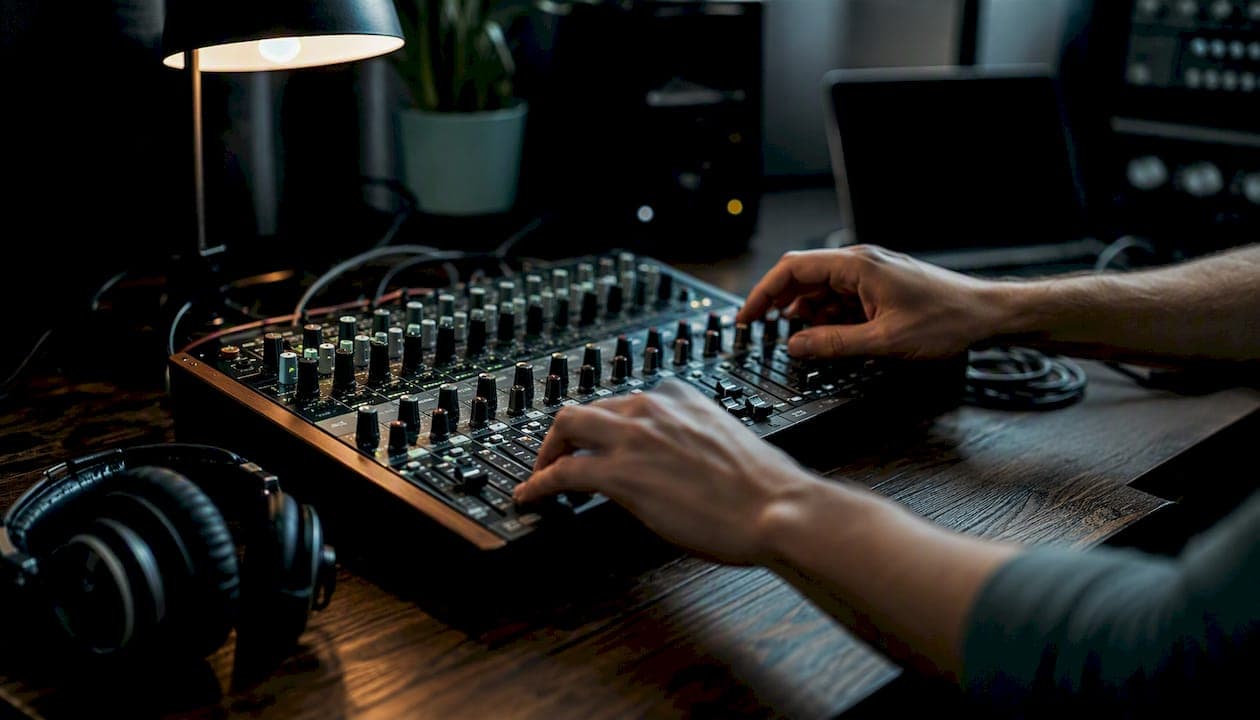
Follow this seven-step workflow and you will get a clearer, more balanced mix in a single session, even if you have never touched a fader before.
Your seven-step easy mixing workflow:
- Step 1 — Reference: Load a commercial track you love into your DAW and calibrate your ears before touching anything.
- Step 2 — Gain staging: Set every track so peaks sit around -10 dBFS, leaving plenty of headroom for processing.
- Step 3 — Rough balance: Drag faders to a working balance. Start with your anchor track (usually the lead vocal or kick drum) and build outward.
- Step 4 — EQ cuts: High-pass filter everything that does not need low end, then make surgical cuts to remove mud and masking.
- Step 5 — Compression: Tame the most dynamic tracks first. Gentle ratios, moderate attack, and let the transients breathe.
- Step 6 — Stereo and panning: Keep kick, bass, and lead vocal centred. Spread guitars, pads, and backing vocals outward for width.
- Step 7 — Effects, automation, and export: Add reverb and delay on shared aux channels, ride a few faders for movement, then export at the right level for mastering.
One line to keep in mind: mixing balances and shapes individual tracks so they sit together; mastering takes the finished stereo file and prepares it for release.
Key takeaways
A structured, seven-step mixing workflow — from reference and gain staging through to export prep — produces cleaner, more balanced mixes faster than any single plugin or gear upgrade.
| Point | Details |
|---|---|
| Gain staging first | Keep individual track peaks around -10 dBFS to protect headroom and keep plugins working cleanly. |
| Reference tracks are non-negotiable | Load a commercial track before touching a fader; it gives your ears a reliable, repeatable target. |
| Group and bus early | Route drums, bass, and vocals to their own buses to reduce fader clutter and apply shared processing efficiently. |
| Spend budget on monitoring | Quality headphones or studio monitors improve every mixing decision; plugins come second. |
| Use Aubiomix for objective feedback | Upload your mix to Aubiomix after export to get a detailed report across 15+ areas and specific steps to improve. |
Table of Contents
- What is mixing, and how does it differ from mastering?
- How to run a complete mix session step by step
- What gear and DAW do you actually need to start?
- Core techniques explained: EQ, compression, panning, and bussing
- A one-page checklist and session template you can use right now
- How mix-feedback tools speed up your learning
- How long does it take to learn, and what will it cost in the UK?
- Why a simple workflow beats chasing gear
- Get faster feedback on every mix with Aubiomix
- Sources
What is mixing, and how does it differ from mastering?
Mixing is the process of taking every recorded or programmed element in a song — drums, bass, guitars, synths, vocals — and blending them into a single, coherent stereo file. You are adjusting levels, sculpting frequencies with EQ, controlling dynamics with compression, and placing sounds in the stereo field with panning. The goal is not loudness; it is clarity and balance.
Mastering is a separate, subsequent process. A mastering engineer receives your finished stereo mix and applies gentle, broad processing to optimise it for streaming platforms, vinyl, or CD. They work with one file; you work with many tracks. The distinction matters because beginners often try to make their mix loud during the mix session itself, which eats into the headroom a mastering engineer needs. Leave that job to mastering.
A few terms worth knowing from the start:
- Headroom is the gap between your loudest peak and 0 dBFS (the digital ceiling). Protecting headroom prevents clipping and gives your plugins room to work cleanly.
- LUFS (Loudness Units relative to Full Scale) is the loudness standard streaming platforms use. Spotify targets around -14 LUFS integrated; knowing this helps you understand why you should not over-compress during mixing.
- Bus or subgroup routing means sending a group of related tracks (all your drum mics, for example) to a single channel so you can process and control them together. It is one of the most practical workflow shortcuts available to any beginner.
How to run a complete mix session step by step
According to iZotope's beginner mixing guide, calibrating your ears with reference material before you touch a fader produces more consistent results and speeds up learning considerably. That single habit separates beginners who improve quickly from those who spin their wheels.
Here is a timeboxed sequence you can follow in one sitting:
-
0–15 min: Reference and setup. Import a commercial track in the same genre into your DAW on a dedicated reference track. Set your monitoring volume to a comfortable, consistent level. Mute the reference and listen to your rough mix once, noting the three biggest problems (too muddy, vocal buried, no width). Write them down.
-
15–45 min: Gain staging and rough balance. Lower every fader to zero and bring each track up one at a time. Keep individual track peaks around -10 dBFS so your plugins behave predictably and you preserve headroom for mastering. Choose your anchor track — lead vocal in most pop and R&B, kick drum in most electronic and hip-hop — and balance everything else relative to it.
-
45–90 min: EQ and dynamics. High-pass filter any track that does not carry meaningful low-end energy (guitars, pianos, synth pads, room mics). Make cuts first to remove conflicting frequencies, then add gentle boosts only where a track genuinely needs presence. Apply compression to the most dynamic tracks: a ratio of 3:1 or 4:1 with a moderate attack (around 10–30 ms) and a medium release (60–120 ms) is a solid starting point. Avoid over-compressing; if you cannot hear the compressor working, that is usually fine.
-
90–120 min: Stereo field and effects. Pan your elements deliberately. Keep kick, bass, and lead vocal centred. Spread rhythm guitars, backing vocals, and wide synths outward. Route all your drum tracks to a drum bus and backing vocals to their own bus — this reduces fader clutter and lets you apply glue compression to the whole group from one channel. Set up one or two shared aux channels for reverb and delay rather than opening a separate plugin on every track; this conserves CPU and creates a unified sense of space.
-
Final 10–20 min: Automation and export prep. Ride the lead vocal fader through the song to keep it consistently present. Add a simple volume automation on the chorus to lift energy. When you are satisfied, check your mix against the reference track one more time, then export as a 24-bit WAV at your session's sample rate, with peaks sitting no higher than -3 dBFS to leave mastering headroom.
Pro Tip: Build a simple two-bar loop of the busiest section of the song (usually the main chorus) and do all your detailed EQ and compression work on that loop first. Once it sounds clear and balanced in the densest part, the verses and breakdowns will almost always fall into place with minimal adjustment.
Quick checklist to paste into your session notes:
- Reference track loaded and level-matched
- All tracks gain-staged to peaks around -10 dBFS
- Anchor track set; rough balance complete
- High-pass filters applied where needed
- EQ cuts made before any boosts
- Compression on dynamic tracks where needed
- Kick, bass, and lead vocal centred
- Drum bus and vocal bus created
- Shared reverb and delay aux channels set up
- Automation on lead vocal
- Export at 24-bit, peaks at -3 dBFS or lower
What gear and DAW do you actually need to start?
The good news is that the minimal kit for easy mixing is shorter than most gear guides suggest. The core tools are a DAW, EQ and compression plugins, a reliable pair of headphones or monitors, and an audio interface. That is genuinely it for getting started.
Minimal hardware list:
- Computer: Any modern laptop or desktop with at least 8 GB RAM and an SSD will handle most beginner sessions without dropout.
- Audio interface: An entry-level interface (Focusrite Scarlett Solo or Behringer UMC22 are widely available in the UK) converts your audio to and from digital cleanly and gives you proper headphone monitoring.
- Headphones or studio monitors: This is where to spend your budget first. Closed-back headphones like the Audio-Technica ATH-M50x or Sony MDR-7506 give you a reliable, detailed picture of your mix. If you have a treated room, a pair of near-field monitors (Yamaha HS5, Adam Audio T5V) will serve you better long-term.
- MIDI controller: Entirely optional for mixing. Useful for automation rides and fader control, but not a priority.
DAW options for beginners:
Any modern DAW will teach you the same core mixing skills, so do not agonise over the choice. Here is a quick read on the four most common starting points:
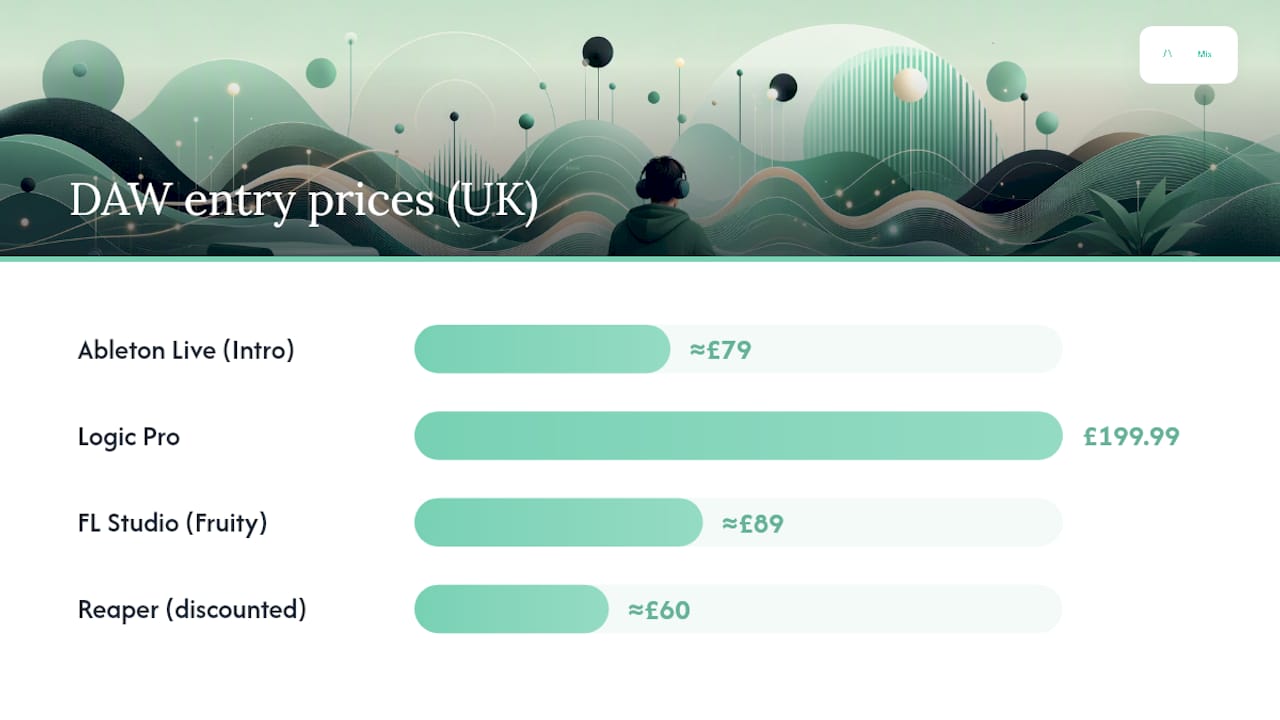
- Ableton Live: Excellent for electronic music and loop-based production. Its Session View makes it easy to audition ideas, and the built-in effects are genuinely capable. Intro licence starts at around £79 in the UK.
- Logic Pro: Mac-only, but outstanding value at a one-off £199.99 from the Mac App Store. The stock plugin library is deep enough that most beginners will not need third-party tools for months.
- FL Studio: Popular with beatmakers and electronic producers. The Fruity edition starts at around £89, and crucially, all future updates are free. Its step sequencer and pattern-based workflow suit producers who think in loops.
- Reaper: The most affordable full-featured option at around £60 for a discounted licence (personal use). It is less immediately intuitive than the others, but its routing flexibility is exceptional and the community tutorials are extensive.
Monitoring advice: Headphones are fine for learning, but they can exaggerate stereo width and make low-end decisions tricky. If you are mixing on headphones, check your mix on a phone speaker and a cheap pair of earbuds before you export. Room treatment (even a few acoustic panels or a duvet behind your monitors) makes a bigger difference to your decisions than any plugin upgrade.
Core techniques explained: EQ, compression, panning, and bussing
Applying just a handful of core techniques — EQ, compression, reverb, delay, and panning — can dramatically improve a beginner mix. You do not need to master all of them at once. Learn them in the order they appear in the workflow above.
EQ: carve space, do not paint colour
The most useful EQ move for a beginner is the cut, not the boost. Start by applying a high-pass filter (also called a low-cut) to every track that does not carry meaningful bass energy. For a rhythm guitar, set the high-pass around 100–120 Hz. For a vocal, try 80–100 Hz. For a piano or synth pad, 60–80 Hz often works well. This alone removes a surprising amount of mud.
For the kick drum, a gentle boost around 60–80 Hz adds weight; a cut around 300–400 Hz removes boxiness. For the bass guitar, keep the fundamental (around 80–100 Hz) intact and cut any harshness around 500–700 Hz. Vocals often benefit from a cut around 200–300 Hz to reduce muddiness and a gentle presence boost around 3–5 kHz for clarity.
Pro Tip: Always cut before you boost. If a track sounds dull after cutting, a small boost at the right frequency will feel more natural and controlled than boosting first and cutting later. Your ears will thank you.
Compression: control, not crush
Compression reduces the dynamic range of a track, making the loud parts quieter so the overall level can sit more consistently in the mix. For a beginner, the most important settings are ratio, attack, and release.
- Ratio: 2:1 to 4:1 for most tracks. Higher ratios (6:1 and above) are for heavy limiting or special effects.
- Attack: How quickly the compressor clamps down after the signal exceeds the threshold. A slower attack (20–50 ms) lets the initial transient through, preserving punch. A faster attack (1–5 ms) tames sharp peaks.
- Release: How quickly the compressor lets go. Too fast creates a pumping sound; too slow makes the track feel squashed. Start around 60–120 ms and adjust by ear.
Avoid compressing every track by default. Use it to solve a specific problem: a vocal that jumps in volume, a bass that disappears in the chorus, a snare that is inconsistent. Sound On Sound's mixing essentials guidance makes the point clearly: reach for EQ or compression when you have a clear reason, not as a reflex.
Panning and stereo width
Keep your low-frequency anchors — kick, bass, and lead vocal — centred. These elements carry the most energy and need to be mono-compatible for club systems and phone speakers. Spread rhythm guitars, hi-hats, backing vocals, and atmospheric pads outward. A simple rule: the more central a sound is to the song's identity, the closer to the centre it should sit.
Bussing and aux sends
Routing related tracks to a shared bus simplifies session control and creates a more cohesive sound. Create a drum bus, a bass bus, a vocal bus, and an instrument bus. Apply a gentle glue compressor to the drum bus to make the kit feel like one instrument. Set up one reverb and one delay on separate aux channels, then send individual tracks to those aux channels at varying levels. This approach uses far less CPU than inserting a reverb on every track, and it makes your mix sound like it exists in a single, coherent space.
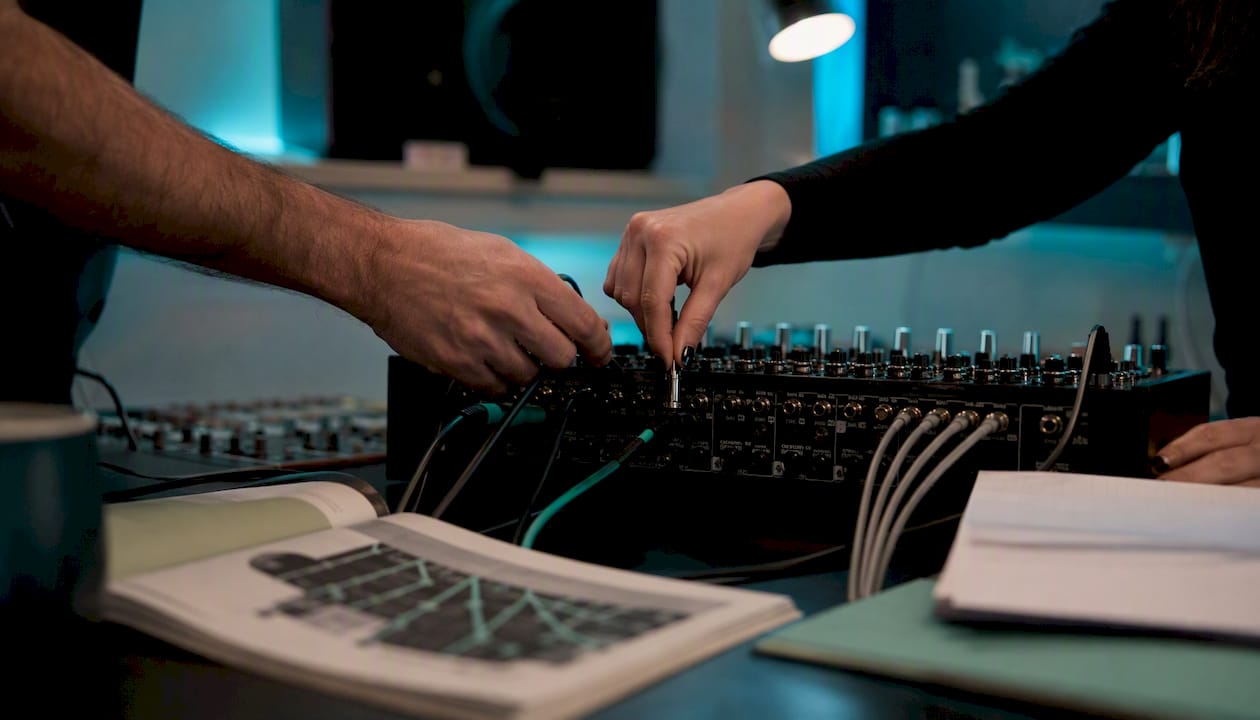
For a deeper look at organising your processing chain, the principles of signal flow apply whether you are working in Ableton, Logic, FL Studio, or Reaper.
A one-page checklist and session template you can use right now
This template is designed to be lean. Copy it into a text file and keep it open alongside your DAW.
Session template structure:
- Reference track (muted, level-matched to your mix)
- Drums: kick, snare, hi-hats, overheads, room → Drum Bus
- Bass: bass guitar or synth bass → Bass Bus
- Instruments: guitars, keys, synths → Instrument Bus
- Vocals: lead vocal, backing vocals → Vocal Bus
- Aux 1: shared reverb (medium room or hall)
- Aux 2: shared delay (tempo-synced, quarter or eighth note)
- Master bus: light limiting only, no heavy processing
Processing order per track:
- High-pass filter → EQ cuts → EQ boosts (if needed) → Compressor → Saturation (optional)
Timeboxed session checklist:
- Load session, import reference track (5 min)
- Gain-stage all tracks to peaks around -10 dBFS (10 min)
- Set anchor track, build rough balance (20 min)
- Apply high-pass filters across the session (10 min)
- EQ cuts on problem frequencies (20 min)
- Compression on dynamic tracks where needed (20 min)
- Pan elements, create buses, route aux sends (15 min)
- Add automation on lead vocal and key moments (15 min)
- Final reference check and export (10 min)
Keep the template simple and iterate it per song. If a track does not need compression, do not add it. If the song has no backing vocals, remove that bus. The template is a starting point, not a rule.
Pro Tip: Save your template as a blank DAW project file with all the buses, aux channels, and track order already in place. Opening a pre-built session at the start of every mix saves 15–20 minutes and removes the decision fatigue of setting up from scratch each time.
How mix-feedback tools speed up your learning
Ear training takes time, and one of the traps beginners fall into is mixing in circles — making a change, undoing it, making it again — because they have no objective reference point. This is where visual metering and automated feedback tools become genuinely useful.
Calibrating your ears with reference tracks and using visual tools like spectral analysers and tonal balance displays gives you a repeatable target and breaks the cycle of indecision. Here is what the key metrics actually tell you:
- LUFS (integrated): The overall perceived loudness of your mix. Aim for around -14 to -16 LUFS integrated for a mix heading to streaming, leaving room for the mastering engineer to work.
- Peak level: The highest instantaneous level in your mix. Keep this below -3 dBFS before mastering.
- Spectral balance: A visual display of energy across the frequency spectrum. A healthy mix has a gentle downward slope from low to high, with no dramatic spikes or holes.
- Masking indicators: Flags where two instruments are competing in the same frequency range, making both sound unclear. Common culprits are bass and kick, or lead vocal and guitars in the 1–3 kHz range.
- Stereo width: Shows how wide your mix is across the stereo field. A mix that is too wide can collapse to mono on phone speakers; too narrow sounds flat.
The most effective way to use a feedback report is a simple loop: listen, identify one issue, apply one change, recheck the report. Trying to fix five things at once based on a report is as confusing as mixing without one.
Pro Tip: Do not let a feedback tool replace your ears. Use it to confirm what you already suspect, or to catch something you missed. If the spectral balance display shows a spike at 200 Hz and your mix sounds muddy, that is useful confirmation. If the display shows a spike but your mix sounds great on every playback system, trust your ears and move on.
For more on interpreting and acting on mix feedback, the key is treating each report as a conversation starter, not a verdict.
How long does it take to learn, and what will it cost in the UK?
Most beginners hear a noticeable improvement in their mixes within a few weeks of consistent practice. Confident, repeatable results across different genres typically take several months of regular sessions, though the timeline shortens significantly when you follow a structured workflow and get objective feedback on each mix.
Typical learning milestones:
- Weeks 1–4: Gain staging, rough balance, and basic EQ feel natural. Mixes are cleaner but still lack polish.
- Months 2–3: Compression and panning decisions become more intuitive. Reference-track comparisons start to feel useful rather than discouraging.
- Months 4–6: Bussing, automation, and effects feel manageable. Mixes translate reasonably well across different playback systems.
UK cost bands for a minimal mixing setup:
| Tier | What you get | Approximate UK cost |
|---|---|---|
| Minimal | Entry-level audio interface, closed-back headphones, free DAW (GarageBand or Reaper trial) | £100–£200 |
| Mid | Studio monitors, treated listening position, mid-range DAW licence | £400 |
| Recommended upgrade | Near-field monitors, acoustic panels, full DAW licence, quality headphones | £800 |
The single best use of a limited budget is a quality pair of headphones or monitors. Expensive plugins will not fix a mix made on poor monitoring; good monitoring will improve every decision you make. If you are choosing between a £200 plugin bundle and a £200 pair of studio headphones, buy the headphones.
On DAW pricing: Logic Pro's one-off £199.99 purchase is outstanding value for Mac users. Reaper's discounted personal licence (around £60) is the most affordable route to a full-featured DAW on any platform. FL Studio's free-updates-for-life model means your initial purchase covers every future version.
One practical tip for practice: if you do not have recorded material to mix, using premade loops and construction packs is a perfectly valid way to build mixing skills. Sites like Splice and Loopmasters offer royalty-free stems specifically for this purpose.
Why a simple workflow beats chasing gear
There is a pattern I see repeatedly among producers who are not improving as quickly as they could: they are spending more time researching plugins than actually mixing. A new compressor plugin will not teach you how to use compression. A new reverb will not teach you how to create space. The workflow will.
The producers who improve fastest are the ones who commit to a consistent process, use reference tracks religiously, and get honest feedback on every mix. Gear is a tool; the workflow is the skill. I have heard genuinely impressive mixes made entirely with stock DAW plugins, and I have heard expensive plugin chains produce muddy, confused results because the fundamentals were skipped.
Aubiomix fits naturally into this learning loop. Upload a mix, receive a detailed report across 15+ areas, and use that report to identify the one or two things to fix before the next session. That feedback loop, repeated consistently, is what builds a reliable ear faster than any gear purchase.
The one behaviour worth adopting immediately: after every mix session, run through the checklist in this guide and note what you changed and why. That small habit of reflection compounds quickly. Within a few months, you will start recognising the same problems earlier in the session and fixing them faster.
Get faster feedback on every mix with Aubiomix
You have the workflow. Now the question is how quickly you can close the gap between where your mixes are and where you want them to be.

Aubiomix is a mix-analysis tool built for exactly this stage of your development. Upload your audio file and receive a detailed written and visual report covering 15+ areas: compression, EQ balance, frequency masking, stereo width, phase, loudness, noise, clipping, and mastering preparation, among others. Each report includes specific, actionable steps rather than vague observations, so you know precisely what to fix and where in the signal chain to fix it. You can track your progress across multiple mixes, compare your results on a leaderboard, and download a PDF report to reference during your next session. Slot it into your workflow right after the export step: upload, read the report, make one or two targeted changes, and re-export. Start your first mix analysis at Aubiomix and see exactly where your mix stands.
Sources
These resources are worth bookmarking as you build your mixing skills:
- 5 Essential Mixing Techniques | A Beginners Guide
- Mixing Essentials
- How to mix for beginners
- How to mix music: the essential guide for beginners