
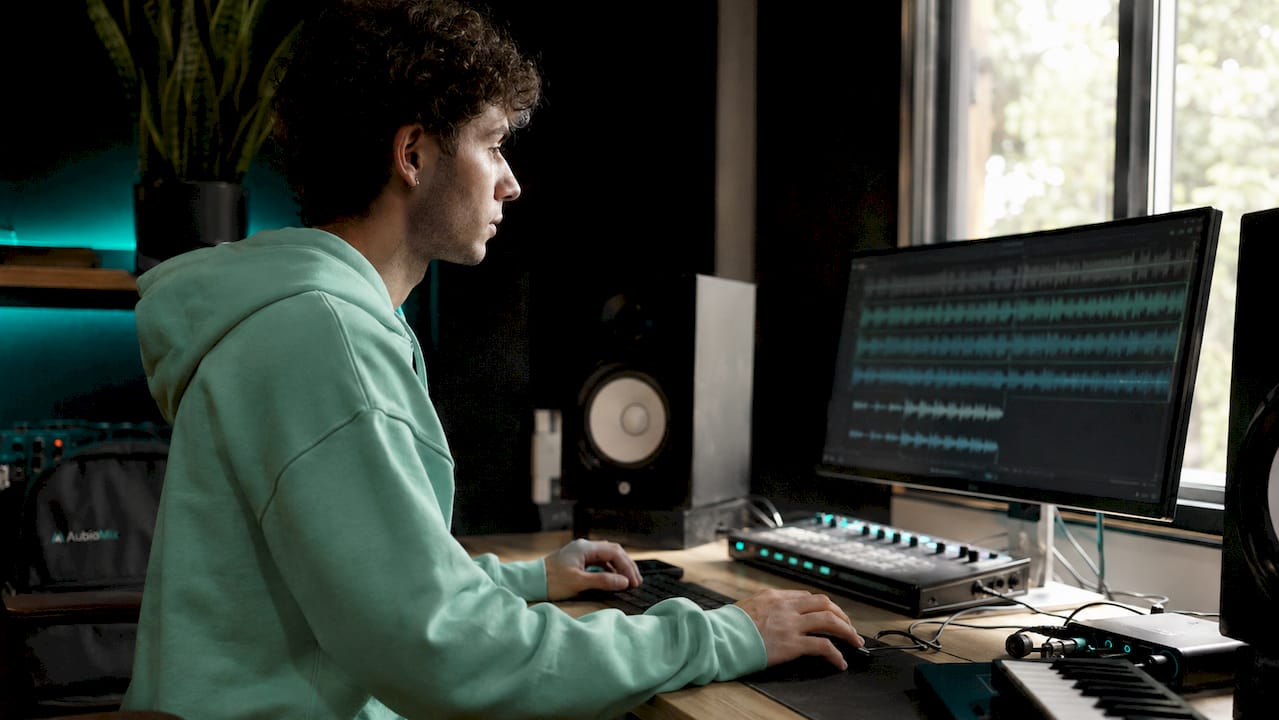
Mastering is defined as the final stage of audio post-production, where a stereo mix is prepared and optimised for distribution across every playback system imaginable. It covers tonal balance, loudness control, dynamic processing, stereo imaging, and format preparation, making it the difference between a track that sounds professional and one that sounds unfinished. Tools like iZotope Ozone, FabFilter Pro-L2, and metering plugins such as Youlean Loudness Meter 2 are the industry standard for this work. The primary goal of mastering is translation: getting your music to sound consistent and compelling whether it plays through earbuds, a car stereo, or a club PA system. Understanding this goal changes everything about how you approach the process.
What are the key technical steps in mastering a track?
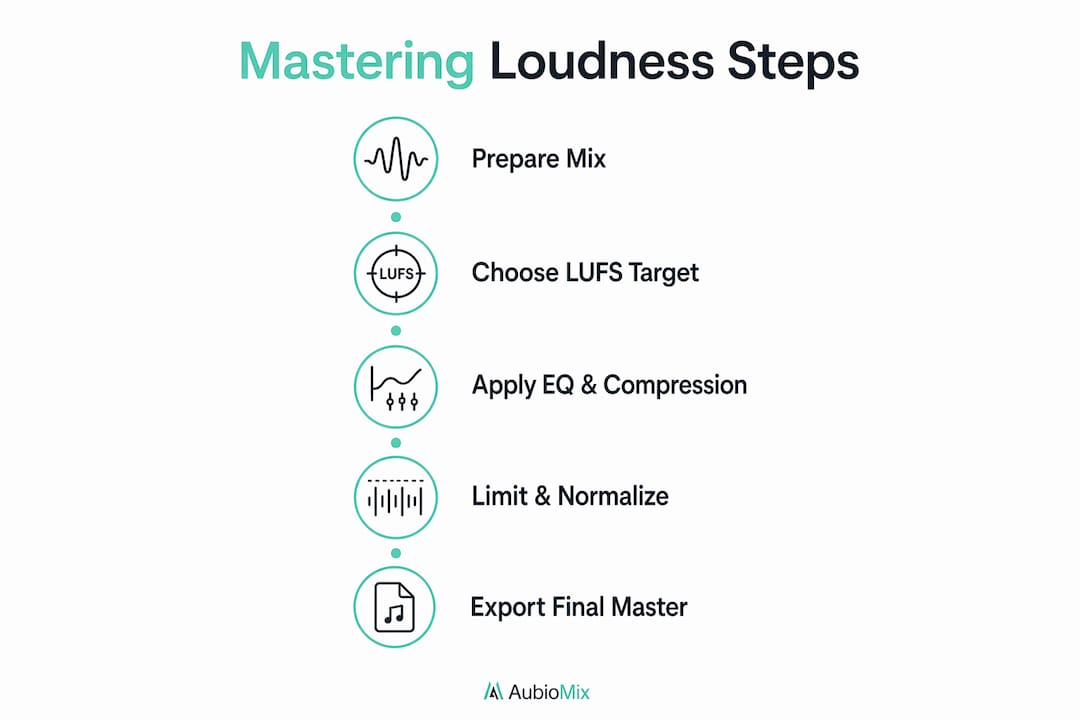
The mastering signal chain follows a logical sequence, and understanding each stage is the foundation of achieving mastery in this craft. A well-ordered chain typically runs: corrective EQ, compression, saturation or stereo enhancement, additive EQ, and finally a brickwall limiter. Each stage serves a specific purpose, and subtlety is the operating principle throughout.
Here is a breakdown of the standard mastering chain:
- Corrective EQ — Identify and reduce problem frequencies before anything else. This might mean taming a harsh 3 kHz spike or rolling off unnecessary sub-bass below 30 Hz. Think of it as cleaning the canvas before you paint.
- Compression — A gentle ratio of 1.5:1 to 2:1 adds cohesion and controls dynamics without squashing the life out of the track. You are gluing the mix together, not rewriting it.
- Saturation or stereo enhancement — Subtle harmonic saturation adds warmth and perceived loudness without raising the peak level. Stereo widening tools can open up the image, but always check mono compatibility before committing.
- Additive EQ — After compression and saturation, you may want to add a gentle high-shelf boost for air, or a low-shelf lift for warmth. This is the creative polish stage.
- Brickwall limiter — FabFilter Pro-L2 or iZotope Ozone's Maximizer are the go-to choices here. Set your true peak ceiling to -1 dBTP to prevent intersample clipping when your audio is encoded to lossy formats like MP3 or AAC on streaming platforms.
Before you even open a mastering session, file preparation matters enormously. Export your mix at 32-bit floating point and 96 kHz to preserve full mathematical precision through processing, then deliver the final master at 16-bit/44.1 kHz for streaming distribution. Your mix should arrive with peaks between -3 dBFS and -6 dBFS, giving the mastering chain room to breathe and process without immediately hitting a ceiling.
Pro Tip: Disable any limiting or heavy compression on your mix bus before exporting for mastering. A mix bus that is already clipping or heavily limited leaves no headroom for mastering processing, and no amount of clever plugin work will fix that.
How do loudness standards and distribution platforms affect mastering?
Streaming platforms use loudness normalisation to level-match all tracks on playback, and this single fact should reshape your entire approach to mastering decisions. Spotify targets -14 LUFS and Apple Music targets -16 LUFS for integrated loudness. If your master is louder than the platform's target, it gets turned down automatically. This means chasing extreme loudness is not just unnecessary; it actively harms your track by reducing dynamics without any gain in perceived volume.
Here is a quick reference for loudness targets across common formats:
| Format | Integrated LUFS target | True peak ceiling |
|---|---|---|
| Spotify streaming | -14 LUFS | -1 dBTP |
| Apple Music streaming | -16 LUFS | -1 dBTP |
| CD (Redbook) | -9 to -12 LUFS | 0 dBFS |
| Broadcast (EBU R128) | -23 LUFS | -1 dBTP |
| Vinyl | -12 to -14 LUFS | Format dependent |
The practical implication is clear: masters for streaming should target around -14 LUFS integrated, with enough dynamic range preserved to sound natural at that level. Genre plays a role too. Electronic and hip-hop tracks often sit closer to -9 to -11 LUFS for CD or download releases, while acoustic and classical music benefits from greater dynamic range at -16 to -18 LUFS.
"The loudness war is over. Streaming normalisation has made it irrelevant. The producers who understand this are the ones making music that actually sounds better on every platform."
The differences between streaming, CD, vinyl, and broadcast mastering are real and worth understanding. Vinyl mastering requires specific attention to low-end mono compatibility and high-frequency sibilance, since the cutting lathe translates these directly into physical groove width. Broadcast mastering follows EBU R128 at -23 LUFS, a dramatically quieter target that demands a completely different dynamic approach. Knowing your format before you start mastering is not optional; it is the first decision you make.
What common mistakes should you avoid when mastering?
The most costly mistake in mastering is attempting to fix a bad mix. Mastering cannot repair muddy low end, buried vocals, or a poorly balanced stereo image. If your master requires heavy corrective EQ or aggressive compression just to sound acceptable, the mix needs more work first. Mastering is subtle optimisation, not reconstruction.
Here are the most common pitfalls to watch for:
- Insufficient headroom on the mix export. Most producers export mixes that are too loud, leaving no room for mastering processing. Recommended headroom is 3 to 6 dB, with peaks sitting between -3 dBFS and -6 dBFS.
- Heavy bus processing left on the mix export. Limiters, multiband compressors, or saturators on the mix bus can mask problems and restrict what the mastering chain can do. Remove them before exporting, or at least bypass the limiter.
- Overcompression and excessive limiting. Smashing the limiter to achieve maximum loudness destroys transients, reduces punch, and makes tracks sound fatiguing. With streaming normalisation in place, this trade-off has no upside.
- Skipping reference tracks. Mastering without references is like painting without looking at the canvas in daylight. Use at least three reference tracks: one genre-specific, one you admire sonically, and one successful streaming release. Match references within 0.5 LU for accurate comparison.
- Ignoring mono compatibility. Always check your master in mono before finalising. Phase cancellation in mono causes low-end collapse and level drops, which is a serious problem on phone speakers, club PA systems, and any device that sums to mono.
- Missing metadata. A mastered file without embedded ISRC codes, artist name, and track information is incomplete for professional distribution. This step is often overlooked but is part of a complete mastering workflow.
Pro Tip: Use a mix readiness checklist before you even open your mastering session. Catching problems at the mix stage saves hours of frustration and produces far better results.
How can you develop mastering skills effectively?
Mastering new skills in audio production follows the same principles as any technical discipline: deliberate, focused practice with clear feedback loops produces results far faster than passive listening or random experimentation. Deliberate practice accelerates skill acquisition by roughly 50%, and functional competence in mastering takes approximately 20 hours of focused work. That is not 20 hours of playing around; it is 20 hours of targeted, intentional practice on specific micro-skills.
Follow these steps to build mastering competence efficiently:
- Start with one process at a time. Spend a full session working only on EQ decisions, comparing your choices against reference tracks. Then move to compression. Isolating each stage builds genuine understanding rather than guesswork.
- Use reference tracks obsessively. Load three reference tracks into your mastering session and match loudness within 0.5 LU before comparing. Your ears adapt quickly to what they hear, so objective comparison is the only reliable feedback tool.
- Rest between sessions. Sleep consolidates technical skills, with research showing a 20 to 30% performance boost after rest. Trying to master a track when your ears are fatigued is counterproductive. Take a break of at least an hour between mixing and mastering the same track.
- Use metering as a learning tool. Youlean Loudness Meter 2 and iZotope Insight 2 give you objective data on LUFS, true peak, and dynamic range. Comparing your metering readings to commercial masters teaches you what numbers actually sound like in practice.
- Balance AI tools with human judgement. Automated mastering services are useful for demos and quick turnarounds, but they lack the nuance for complex or unconventional mixes. Use them as a reference point, not a final answer. The mix engineer workflow that precedes mastering has a direct impact on how much AI tools can actually help.
Monitoring environment matters as much as plugin choice. Accurate studio monitors, ideally calibrated with a tool like Sonarworks SoundID Reference, give you a truthful picture of what your master actually sounds like. Mastering on headphones alone introduces bias that even experienced engineers struggle to compensate for.
Key takeaways
Mastering requires a clean mix with adequate headroom, a logical signal chain, and loudness decisions informed by the distribution format, not personal preference.
| Point | Details |
|---|---|
| Mastering goal is translation | A great master sounds consistent across earbuds, car stereos, and club systems. |
| Signal chain order matters | Run corrective EQ, compression, saturation, additive EQ, then a limiter in sequence. |
| Target platform loudness | Aim for -14 LUFS for Spotify and -16 LUFS for Apple Music to avoid normalisation penalties. |
| Fix the mix first | Heavy corrective work in mastering signals a mix problem, not a mastering opportunity. |
| Deliberate practice builds skill | Twenty focused hours on specific mastering micro-skills builds functional competence. |
The honest truth about mastering that most guides skip
Here at Aubiomix, we have listened to thousands of tracks at every stage of production, and the pattern is consistent: most mastering problems are actually mix problems wearing a mastering costume. Producers reach for iZotope Ozone or FabFilter Pro-L2 hoping the tools will do the heavy lifting, and then wonder why the result still sounds off. The tools are excellent. The issue is almost always upstream.
The other thing I want to say plainly is this: fresh ears are not a luxury, they are a technical requirement. I have heard producers spend six hours mixing, then immediately open a mastering session on the same track. The result is almost always over-processed. Your auditory system adapts to what it hears, and after hours of mixing, you genuinely cannot hear your track accurately anymore. Walk away. Sleep on it. Come back the next morning and your ears will tell you things the plugins never could.
On the question of AI mastering: I think it is genuinely useful for demos, reference comparisons, and quick client previews. But for a final commercial release, especially anything with unusual dynamics, heavy low end, or unconventional arrangements, human judgement is still irreplaceable. AI tools optimise for the average. Your music is not average, and it should not be treated as such.
Invest in accurate monitoring before you invest in more plugins. A well-calibrated pair of monitors, or even a calibrated headphone setup using Sonarworks SoundID Reference, will teach you more about mastering than any plugin bundle. You cannot fix what you cannot hear accurately.
— Aubiomix
Get pro-level feedback on your mixes before you master
Before you open your mastering session, your mix needs to be ready. That is where Aubiomix comes in.

Aubiomix is an online app built for music producers and mix engineers who want honest, detailed feedback on their tracks before they reach the mastering stage. Upload your audio file and receive pro-level mix analysis covering tonal balance, dynamics, stereo imaging, and specific steps to improve your mix. Whether you are preparing a track for a professional mastering engineer or handling the process yourself, Aubiomix gives you the clarity to know your mix is genuinely ready. It works for beginners learning the craft and experienced producers who want a second set of ears before the final stage.
FAQ
What is mastering in music production?
Mastering is the final stage of audio post-production where a stereo mix is optimised for tonal balance, loudness, dynamics, and stereo imaging before distribution. The primary goal is translation: ensuring the track sounds consistent and professional across all playback systems.
What LUFS should I target when mastering for streaming?
Spotify targets -14 LUFS and Apple Music targets -16 LUFS for integrated loudness normalisation. Masters louder than these targets are turned down automatically, so targeting these levels preserves your dynamics without any loss in perceived volume.
How much headroom should I leave in my mix before mastering?
Export your mix with peaks between -3 dBFS and -6 dBFS, leaving 3 to 6 dB of headroom. This gives the mastering chain room to apply EQ, compression, and limiting without immediately clipping or distorting.
Can mastering fix a bad mix?
Mastering cannot fix fundamental mix problems such as muddy low end, buried vocals, or poor stereo balance. If mastering requires heavy corrective processing just to make the track sound acceptable, the mix should be revised first.
How long does it take to learn mastering?
Deliberate, focused practice on specific mastering micro-skills produces functional competence in approximately 20 hours. Rest between sessions is equally important, as sleep consolidates technical skills and improves performance by 20 to 30%.