

Mix at a calibrated reference in a practical working range generally between moderate and moderately high sound pressure levels, with a value around 83 dB SPL often cited in professional contexts and a lower EBU test-signal figure noted in technical documents. The exact number matters less than you'd think. What actually moves your mixes forward is picking one level, measuring it properly, and returning to it every single session. Get that habit right and the rest of this guide shows you how to lock it in.
TL;DR:
- Calibrate your monitoring level using band-limited pink noise at approximately 83 dB SPL to ensure consistency across sessions.
- Measure with C-weighted, slow response settings to match professional standards and account for room acoustic effects.
- Avoid listening above 90 dB SPL to prevent auditory fatigue, which can distort your perception of the mix within 30 to 40 minutes.
- Match your reference track loudness within 0.5 LUFS to your mix before comparing to avoid level bias and focus on tonal balance.
- Use a dedicated SPL meter instead of phone apps for accurate readings, especially when rechecking calibration after spatial or gear changes.
Table of Contents
- What is the ideal mix reference level SPL?
- How do you measure and calibrate your monitoring level?
- How do reference tracks fit into your mix SPL workflow?
- How long can you mix before ear fatigue affects your judgement?
- Why does your mix get louder as you add more tracks?
- Why do calibration readings disagree between sessions?
- What is AubioMix's approach to genre benchmark validation?
- How does SPL affect the accuracy of your mixing decisions?
- Should you reference your mix on headphones or monitors?
- How does your room affect the SPL you should actually use?
- What habits protect your hearing beyond just session length?
- When do experienced engineers deliberately break from the standard reference?
- Use AubioMix to check how your calibrated mix actually translates
- Where to check the standards and safety guidance behind this
- Sources
What is the ideal mix reference level SPL?
There's no single magic number here, and I'll be upfront about that because too many articles pretend otherwise. What you're really choosing is a working range, and where you land in it depends on your room, your genre, and how your ears are holding up that day.
Here's how the common targets break down and why each one exists:
- 75–85 dB SPL is the practical working range most engineers settle into for general reference listening and A/B comparisons against commercial tracks. It's loud enough to hear low-end detail properly but quiet enough that you won't be fried after two hours.
- 83 dB SPL gets cited constantly as "the" pro reference, largely because it sits in the sweet spot where human hearing perceives frequency balance fairly evenly across the spectrum, without the ear's natural bass and treble roll-off you get at quieter levels.
- 73 dBC SPL is the figure the EBU actually specifies in its technical documentation on reference listening level, tied to a programme loudness reference of −23 LUFS using a band-limited noise signal between 500 Hz and 2000 Hz.
That gap between 73 and 83 dB trips people up. The EBU number isn't a casual listening level. It's a calibration test condition, measured under very specific signal conditions, designed for broadcast environments where the loudness target is fixed at −23 LUFS. Most producers working on music rather than broadcast audio will find 75 to 85 dB SPL a more useful everyday range.
The weighting matters too. C-weighting flattens the frequency response curve closer to how we perceive loudness at higher volumes, which is why EBU-style checks specify dBC rather than dBA. A-weighting rolls off bass more aggressively, mimicking how quiet listening levels affect perception. It's a poor choice for calibrating a mixing reference where you need accurate low-end representation.
Room size pushes the number around as well. ATSC guidance on loudness notes that smaller rooms, under roughly 1,499 cubic feet, generally call for a lower listening level than larger control rooms, because reflected energy builds up faster in a tight space and pushes the perceived loudness higher than the meter suggests.
Pick a target inside that range, write it down, and treat it as fixed. The value of a reference level comes almost entirely from repeatability, not precision to the decibel.
How do you measure and calibrate your monitoring level?
This is the part most home studios skip, and it's the part that actually pays off. A calibrated reference is only useful if you can return to the exact same volume tomorrow, next week, and six months from now when you've forgotten what "loud" felt like on this particular day.
What you'll need:
- A dedicated SPL meter, ideally one compliant with IEC standards, though a smartphone app will do for a rough first pass.
- A band-limited pink noise file, restricted to roughly 500 to 2000 Hz, rather than full-range pink noise.
- Your DAW and monitor controller (or interface volume knob) with a marker pen or a note of the exact position.
The calibration procedure:
- Load the pink noise file into your DAW and set the digital output level to a known reference, commonly −20 dBFS RMS, which mirrors common alignment practice used alongside K-System monitoring conventions.
- Play the pink noise through one monitor at a time, not both together, so reflections and stereo summation don't skew your reading.
- Set your SPL meter to C-weighted, slow response, which is the setting the EBU specifies for reference listening level checks.
- Stand or sit at your actual mixing position, ear height, in the sweet spot between the monitors, and hold the meter at that spot rather than pointing it at the speaker.
- Adjust the monitor gain (not the DAW fader) until the meter reads your chosen target, whether that's 83 dB or another figure inside the 75 to 85 dB range.
- Repeat for the second speaker so both sides match.
- Mark the physical position on your monitor controller or interface knob with tape or a paint pen, and note the digital reference level you used, so you can rebuild this exact setup from scratch if your gear changes.
Using band-limited rather than full-range pink noise matters more than people realise. Full-range pink noise carries a lot of low-frequency energy that gets exaggerated by room modes, especially in smaller untreated rooms, and that throws your reading off before you've even started.
Pro Tip: Run the calibration twice, a week apart, without looking at where the knob was marked the first time. If you land within a couple of decibels of your original mark, your procedure is solid. If you're off by more than that, check whether your room's temperature or furniture has changed, since both affect how sound behaves at your listening position.
Phone-based SPL meter apps vary wildly in accuracy, and some testing on measurement consistency shows they can be off by several decibels depending on the phone's microphone and internal processing. Use one for a rough sanity check, but if precise reference monitoring is part of your daily workflow, a dedicated meter is worth the modest cost.
How do reference tracks fit into your mix SPL workflow?
Here's the trap almost everyone falls into at some point: you A/B your mix against a commercial reference track, the reference sounds bigger and punchier, and you conclude your mix needs more compression or a louder master. Nine times out of ten, the reference track is simply louder, and louder tricks your brain into hearing "better" even when the actual balance and dynamics are worse.
This is why level-matching reference tracks before you compare anything is arguably the single most important habit in this entire guide.
The practical process looks like this:
- Calibrate your monitors first, using the procedure above, so your comparison baseline is fixed and repeatable.
- Measure the LUFS of your reference track using a loudness meter plugin, then measure your own mix at the same point in the signal chain.
- Trim the louder of the two down until they sit within roughly 0.5 LU of each other, rather than trying to match them by ear.
- Only then run your A/B comparison, switching between the two at the identical calibrated SPL, listening for tonal balance, stereo width, and dynamic feel rather than raw loudness.
You don't need expensive tools for this. Any LUFS-capable meter plugin will show you the number, and a simple gain trim on the reference track's channel gets you close enough. Building a reference-track workflow around loudness matching, rather than gut feel, changes how useful the whole exercise becomes, because you're finally comparing like with like.
Skip this step and you'll chase loudness instead of quality for the rest of the session, adding limiting and compression to compete with a reference track that was never actually better, just louder.
How long can you mix before ear fatigue affects your judgement?
Your ears lie to you well before you notice it happening, and volume is the main reason why.
Listening above roughly 90 dB SPL causes measurable auditory fatigue within 30 to 40 minutes, and that fatigue doesn't announce itself. It shows up as a gradual shift in how you perceive frequency balance, which is exactly why engineers who've been cranking the monitors for an hour tend to overcompensate, pulling back bass that was never actually excessive or adding treble that the mix didn't need.
Fatigue risk: the CDC identifies rapid onset of listening fatigue within 30 to 40 minutes once SPL climbs above 90 dB, a window far shorter than most producers assume when they're deep into a session.
That's the practical argument for staying inside the 75 to 85 dB range for most of your working time, and treating anything near 90 dB as an occasional, deliberate choice rather than your default.
A few habits protect you across a long session:
- Work at a genuinely quiet level, well below your calibrated reference, for the bulk of detail work like editing, comping, and rough balancing.
- Return to the calibrated reference level only for critical decisions, such as final level checks, tonal balance calls, and reference-track comparisons.
- Take a proper break every 45 to 60 minutes rather than pushing through, since your ears recover fairly quickly once the level drops.
- Rotate tasks so you're not making the same type of judgement (bass balance, vocal presence, stereo width) for hours at a stretch, which compounds fatigue-driven mistakes.
Why does your mix get louder as you add more tracks?
This catches out a lot of newer engineers, and it's pure physics rather than a mistake on your part. When you combine two identical signals, the waveforms add together and you get a theoretical +6 dB increase in peak level, a fact confirmed in Audacity's own documentation on mixing. Real mixes rarely hit that exact figure because tracks aren't identical, but the underlying trend holds: every fader you push up, every layer you stack, pushes your overall level higher through summation.
That's why a mix that sounded perfectly reasonable at eight tracks can be clipping the master by the time you've built it out to thirty, even though you never touched the master fader.
A few habits keep this under control:
- Leave headroom on the master bus from the start, aiming for peaks well below 0 dBFS rather than letting the mix creep toward clipping as you add elements.
- Use clip gain or individual track gain, not just faders, to bring hot tracks down before they hit the bus, so your fader positions stay in a sensible working range.
- Align your session to a consistent operating level, with −20 dBFS RMS a common reference point among engineers who follow K-System monitoring conventions, giving you predictable headroom regardless of how many tracks you're running.
- Check your summed level periodically through a project, not just at the final mixdown, so a slow creep towards clipping gets caught early.
Solid gain staging habits upstream of the mix bus solve most of this before it ever becomes a problem, which is far easier than fixing a clipped master after the fact.
Why do calibration readings disagree between sessions?
Three culprits cause almost every calibration mismatch you'll run into.
Signal type. Full-range pink noise picks up room modes that skew low-frequency readings, particularly in small or untreated rooms. Switching to band-limited pink noise between 500 and 2000 Hz, as the EBU procedure specifies, removes most of that variability.
Meter settings. A meter left on A-weighting or fast response will give you a different number to one set to C-weighted, slow, even measuring the identical signal at the identical spot. If your readings drift from session to session, check the weighting and response settings before you assume your monitors have changed.
Placement. Measuring at the speaker rather than at ear height in your actual mixing position produces a reading that has nothing to do with what you actually hear while working.
- Cross-check any phone app reading against a dedicated meter at least once before trusting it for calibration work.
- If your room has a stubborn bass buildup at your mixing position, moving your listening position or the monitors slightly, alongside basic acoustic treatment, usually does more than chasing a perfect SPL number.
- Recheck your calibration mark whenever you change monitors, move furniture, or relocate your desk, since all three shift the acoustic conditions you calibrated against.
Pro Tip: If two calibration attempts a week apart disagree by more than 2 or 3 dB and nothing in the room has physically changed, suspect the meter or the app before you suspect your ears.
What is AubioMix's approach to genre benchmark validation?
Calibrating your monitors gets your listening level right. It doesn't tell you whether the mix itself is actually competitive against other tracks in your genre, and that's a separate problem worth solving with objective data rather than gut feel alone.
AubioMix's genre benchmark reports compare measured metrics from real released tracks, LUFS, spectral balance, stereo width, against your own upload, so you can see whether your low end sits where techno or deep house tracks typically sit, or whether your vocal presence matches what's normal for a jazz mix.
Used this way, benchmarks aren't a replacement for calibrated monitoring, they're a check on top of it. Once your SPL reference is locked in and you trust what you're hearing, comparing your LUFS and spectral curve against genre data confirms whether your ears and your calibration are actually leading you somewhere useful, or whether a translation problem is hiding in a frequency range your room happens to mask.
How does SPL affect the accuracy of your mixing decisions?
Your ears don't respond to volume the same way at every level, and that has a direct, measurable effect on the decisions you make while mixing.
At quiet volumes, human hearing rolls off both bass and treble perception, a well-documented feature of how our auditory system responds to loudness. Mix at a whisper and you'll almost certainly add more bass and top-end than the track needs, because your ears are underselling both ranges. Push the volume too high, past roughly 90 dB, and the opposite risk appears: fatigue sets in fast, and your perception of the whole frequency spectrum starts to shift and flatten.
The 75 to 85 dB range sits in the middle for a reason. It's loud enough that your ears represent bass and treble fairly accurately relative to the midrange, without tipping into the fatigue zone that distorts judgement within the first half hour.

There's a psychological layer here too: using Music Composition Software for Songwriters & Producers | The DeputIE helps engineers mix at a consistent, moderate level, training your ear to trust a stable reference point rather than chasing whatever feels exciting in the moment. Mixing at a consistent, moderate level trains your ear to trust a stable reference point rather than chasing whatever feels exciting in the moment. Engineers who mix at wildly different volumes from session to session often end up second-guessing decisions that were actually correct, simply because the mix sounds different at a different SPL. Consistency in level breeds consistency in judgement, which is really the whole point of calibrating in the first place.
Should you reference your mix on headphones or monitors?
Both have a place, but they solve different problems, and calibrated SPL applies to each a little differently.
Studio monitors in a treated room, calibrated to your chosen reference, give you the most accurate picture of stereo imaging, low-end behaviour, and how the mix will translate to speakers generally. That's your primary reference for critical decisions.
Headphones remove room acoustics from the equation entirely, which makes them genuinely useful for catching detail problems, such as clicks, distortion, or a phase issue, that a room might mask. They're also a practical necessity late at night or in a space you can't treat properly.
The catch is that calibrating headphones to a specific SPL is harder to do reliably than calibrating monitors, since headphone SPL depends heavily on the seal against your ear and the specific model's sensitivity. Rather than chasing an exact decibel figure on headphones, aim for a comfortable, moderate volume that matches roughly how loud your calibrated monitors feel, and use headphones as a cross-check rather than your main reference.
A sensible workflow uses monitors for the bulk of tonal balance and level decisions, then switches to headphones periodically to catch anything the room is hiding. Never make your final loudness or balance call on headphones alone if you have calibrated monitors available, since the absence of room interaction changes how bass in particular is perceived.
How does your room affect the SPL you should actually use?
The number on your SPL meter and the number your ears believe can drift apart fast in an untreated room, and that gap is entirely down to acoustics.
Small rooms build up reflected energy quickly, which is exactly why ATSC guidance recommends lower listening levels for rooms under roughly 1,499 cubic feet. A boxy bedroom studio at 83 dB SPL can feel considerably louder and muddier than a well-treated control room at the same reading, because early reflections and bass buildup are adding energy your meter can't distinguish from the direct signal.
Bass response is the biggest variable. Room modes, the resonant frequencies that build up between parallel walls, can boost or cancel specific bass notes by several decibels at your exact listening position, which means your calibrated SPL reading might be accurate while your perception of the low end is still badly skewed.
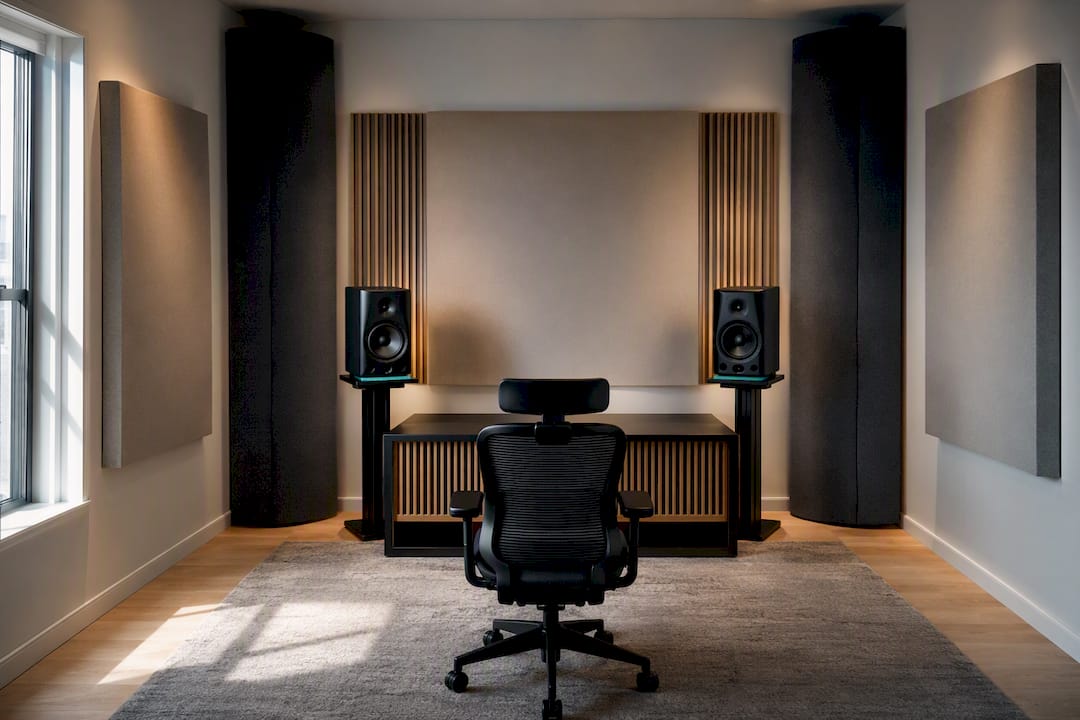
Basic treatment, corner bass traps, absorption panels at first reflection points, and sensible monitor placement away from walls and corners, narrows that gap considerably. You don't need a fully treated room to mix well, but you do need to know where your room lies to you, so you can compensate consciously rather than chasing ghosts in the low end that only exist at your desk.
What habits protect your hearing beyond just session length?
Session length is only part of the picture. How you vary your listening level across a project matters just as much as how long any single session runs.
- Deliberately mix at a level below your calibrated reference for long stretches of detail work, saving the full reference level for moments that genuinely need it, such as final balance checks.
- Build short breaks into your routine every 45 to 60 minutes, since a few minutes of quiet is often enough for your ears to reset noticeably.
- Vary the type of listening you're doing, alternating focused critical listening with quieter background tasks like organising sessions or tagging files, so your ears aren't under sustained load the entire day.
- Get a baseline hearing check periodically, particularly if you mix professionally, so you have an objective record of any change over time rather than relying on how your ears feel.
- Treat any ringing, dullness, or muffled sensation after a session as a signal to lower your working level immediately, not as a normal part of the job.
Protecting your hearing isn't separate from good mixing practice, it's a precondition for it. Fatigued, damaged ears simply can't make the fine tonal judgements this work depends on.
When do experienced engineers deliberately break from the standard reference?
Calibration gives you a home base, not a cage. There are legitimate moments to step away from it deliberately.
Checking a mix at club or PA-level loudness makes sense for dance material, since bass behaviour and perceived punch genuinely change at higher SPL, and a track destined for a system with a serious subwoofer needs a proper loud check. Extreme dynamic-range material, film scores or ambient work with huge quiet-to-loud swings, sometimes needs auditioning at a lower level to judge whether the quiet passages will register at all on typical playback systems. Artistic checks, playing a mix unusually loud just to feel the excitement of it, have their place too, as long as you know that's what you're doing.
The rule that matters is returning to your calibrated level before making the actual decision. Use these deviations to gather information, not to finalise a fader move.
— AubioMix
Use AubioMix to check how your calibrated mix actually translates
Calibrating your monitors tells you what you're hearing is accurate. It doesn't tell you whether your mix stacks up against other tracks in your genre, and that's where a second, data-driven check earns its place in your workflow.

You can use an online mix analysis service to get measured comparisons against real genre benchmarks, covering LUFS, spectral balance, stereo width, and how your track is likely to translate across different playback devices. It's a way of confirming that what you calibrated your ears to hear is actually landing correctly in the mix itself, whether you're working in techno, deep house, or something further from four-on-the-floor entirely.
Think of it as validation on top of calibration, not a replacement for it. Your SPL reference gets your ears into a consistent, trustworthy state. AubioMix's genre benchmark reports then show you, in hard numbers, whether the mix you built while trusting those ears actually holds up against the competition. Upload a mix and see where it sits.
Where to check the standards and safety guidance behind this
For the technical detail behind reference listening levels, the EBU's Tech 3343 document is the primary source. Sound On Sound's guide to project-studio calibration covers the practical procedure in more depth. ATSC's loudness guidance addresses room-size nuance, and the CDC's hearing resources cover fatigue and hearing safety directly.
Sources
- Establishing project‑studio reference monitoring levels — Sound On Sound
- EBU technical document on reference listening level (Tech 3343)