
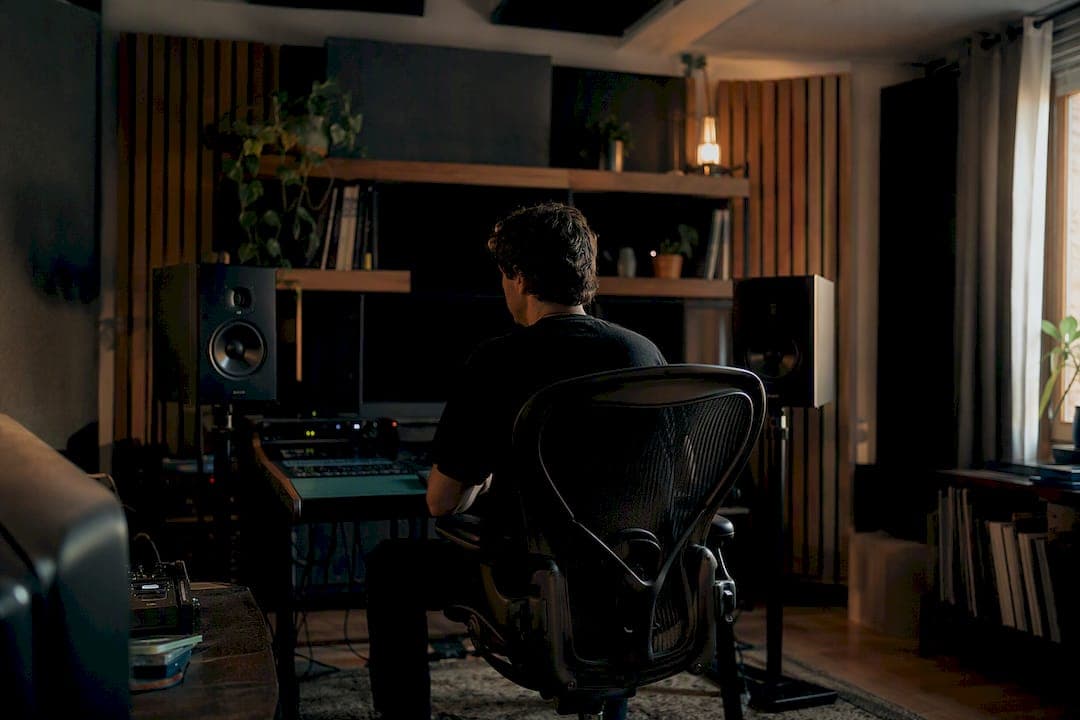
Start here: put your monitors and your head in an equilateral triangle, tweeters at ear height, both cabinets toed in so their axes cross right around your listening spot. That single move fixes more mixes than any plug-in ever will.
Three numbers to grab a tape measure for right now:
- Triangle side length: roughly a typical nearfield distance between each monitor and your ears, allowing optimal stereo imaging and controlled room reflections.
- Toe-in angle: aim for roughly a 60° angle at the listener, meaning each monitor points inward toward your head, not straight ahead.
- Front-wall distance: keep the monitor baffle either under 0.5 m from the wall behind it or beyond 1.5 m. Anything in between is the danger zone.
Once you've got the geometry roughly right, play a reference track you know intimately, something with a wide stereo image and a bassline you'd recognise blindfolded. If the vocal snaps into a tight, stable centre image and the bass doesn't lurch or vanish as you shift your head slightly, you're close. If it doesn't, the sections below will tell you exactly what to move.
Key Takeaways
Accurate monitoring starts with correct geometry and boundary distance, and no amount of digital correction can substitute for getting the physical setup right first.
| Point | Details |
|---|---|
| Set the triangle first | Position monitors and your head in an equilateral triangle, sides of 1 to 1.5 metres, tweeters at ear height. |
| Respect the front-wall rule | Keep monitor baffles under 0.5 m or over 1.5 m from the wall behind them to avoid SBIR-related bass problems. |
| Run the mirror test | Find and treat first-reflection points on side walls and ceiling to fix smeared stereo imaging. |
| Fix physically before EQ | Move monitors, add panels, or reposition your seat before reaching for corrective plug-ins. |
| Confirm changes with AubioMix | After placement and calibration, upload a mix to AubioMix to check whether masking and balance actually improved. |
Table of Contents
- Studio monitor placement geometry: triangle, distance, and the 38% rule
- How far should monitors sit from the front wall?
- Getting tweeter height and orientation right
- Fixing imaging with the mirror test and symmetry check
- Where to put your subwoofer
- Should you decouple your monitors from the desk?
- How to calibrate and verify your studio monitor setup
- Quick troubleshooting checklist for placement problems
- AubioMix and studio monitor placement: where automated feedback fits in
- Room treatment basics that support good monitor placement
- Common studio monitor placement mistakes and what they sound like
- How room shape and size change your ideal monitor placement
- A practical habit for long mixing sessions
- Verify your placement work with a genuine second opinion
- Sources
Studio monitor placement geometry: triangle, distance, and the 38% rule
The equilateral triangle exists for one reason: it gives both ears equal path length and equal arrival time from each speaker, which is the foundation of a stable stereo image. Move one monitor six inches closer to you than the other and the whole soundstage tilts, subtly at first, then obviously once you're comparing panned elements.
For most nearfield setups in home studios, a triangle side of 1 to 1.5 metres works well, and that range is the one most practical guides converge on for two reasons: it keeps you far enough from the cabinets that the drivers integrate acoustically, but close enough that room reflections stay quieter than the direct sound hitting your ears. Larger monitors with bigger woofers (8 inch and up) often want a touch more distance, since their driver spacing needs room to blend. Bigger rooms can accommodate a wider triangle too, but don't stretch much past 1.5 m in a typical bedroom studio or you'll be fighting the room more than the speakers.
Where should the whole triangle sit in the room? A useful starting rule:
- Measure your room's length from front wall to back wall.
- Position your listening seat at roughly 38 percent of that length, a placement guideline that helps reduce the audible impact of the room's main standing waves.
- Adjust from there by ear. If bass feels bloated or thin, nudge your chair forward or back a few inches before touching anything else.
Treat the 38% rule as a launchpad, not gospel. Odd-shaped rooms, alcoves, and asymmetric ceilings all shift the maths.
How far should monitors sit from the front wall?
This is where boundary interference, known as SBIR (speaker boundary interference response), quietly ruins otherwise decent mixes. When sound leaves the back or sides of your monitor cabinet, bounces off the nearby wall, and arrives back at your ears slightly delayed, it cancels certain frequencies and reinforces others. The damage usually lands in the low-mids, exactly where you're making critical decisions about bass guitar, kick drum body, and vocal warmth.
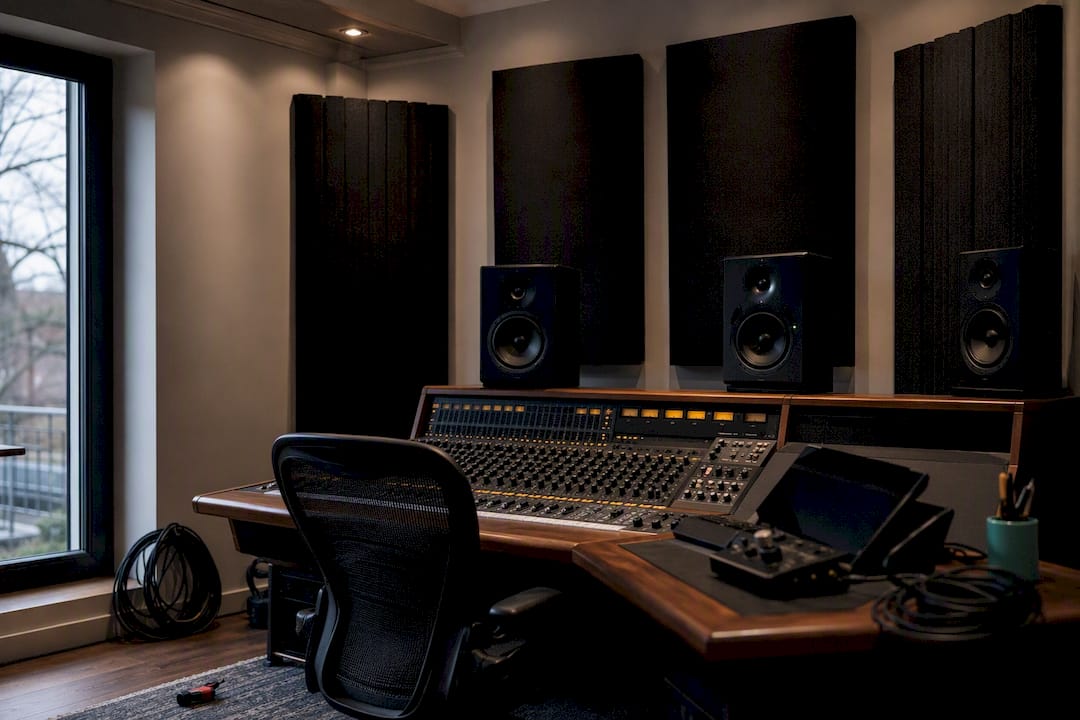
Manufacturer guidance is consistent here, and worth following rather than guessing. Genelec advises keeping nearfield monitors fairly close to the front wall if the model is designed for near-wall use, and leaving sufficient clearance behind any rear-ported cabinet so the port can breathe properly. ADAM Audio goes further, warning that intermediate distances from the wall tend to produce problematic low-mid response errors and are best avoided if possible.
Practical takeaways:
- Measure from the wall to the front of the cabinet, not the desk edge.
- If you're stuck in that 0.5 to 1.5 m no-man's-land because of desk depth, pull the monitors forward on stands rather than accepting the compromise.
- Rear-ported monitors need real airspace behind them. Sealed or front-ported designs are more forgiving against a wall.
- Try the move physically before reaching for EQ. A parametric cut at the offending frequency can tame a boundary problem, but it won't fix the smearing and phase issues that come with it.
Pro Tip: Before you touch a single knob on an EQ plug-in, walk your monitors forward and back in 10cm increments while a bass-heavy reference track loops. Boundary problems are often more audible as position changes than as anything you can hear in a static frozen mix.
Getting tweeter height and orientation right
Your tweeter should sit at the same height as your ears when you're seated in your normal mixing position, not an inch above, not resting on a shelf below desk level. Genelec's own placement guidance flags a specific trap: avoid positioning the acoustic axis at exactly half your room's height to prevent problematic reflections from floor and ceiling.
Measure your seated ear height with a tape measure, then use stands, isolation pads, or a slight forward tilt to bring the tweeter level to match. A few centimetres out rarely matters. Half a metre does.
- Two-way nearfields are designed and voiced for vertical orientation. Rotate them onto their sides without the manufacturer's blessing and you risk collapsing the stereo image, since the tweeter and woofer no longer disperse evenly across the horizontal plane where your head moves.
- MusicRadar's setup guidance makes the same point: horizontal placement changes crossover behaviour and dispersion in ways that aren't obvious until you're comparing mixes on other systems and wondering why the stereo width feels off.
- If your desk forces monitors too low, don't accept it. Angled stands, monitor isolation pads that add height, or wall-mounted brackets all solve the problem without touching the speaker's orientation.
Fixing imaging with the mirror test and symmetry check
Left-right symmetry isn't a nice-to-have, it's the difference between a stereo image you can trust and one that's quietly pulling to one side because your desk sits three feet from a bare wall on the right and eight feet from a bookshelf on the left. Uneven reflective surfaces around each monitor throw off the balance between direct and reflected sound, and your ears adjust to it without telling you.
Run the mirror test to find your first-reflection points:
- Sit in your normal mixing position and have someone slide a small mirror along the side walls, desk surface, and ceiling.
- Mark every spot where you can see the reflection of either monitor in the mirror from your seated position.
- Those marked spots are your first-reflection points, the places sound bounces off before reaching your ears alongside the direct signal.
Treat those points with a small absorption panel, roughly 30 to 60 cm square, mounted flush at each marked spot. Aim to make the left and right sides of the room mirror each other reasonably closely: matching furniture, matching treatment, matching distances. A room where one side is glass and the other is a stuffed bookshelf will never image cleanly no matter how precisely you've measured the triangle.
Pro Tip: If you can't treat both sides equally, a bare window on the right and a soft couch on the left, close curtains or add a portable gobo when you mix. Ten minutes of setup beats a mix that translates wrong on every other system.
Where to put your subwoofer
Bass behaves unlike anything else in the room, which is why sub placement gets its own process. The crawl test remains the fastest way to find a workable spot: put the sub roughly where your listening position sits, then physically crawl around the room's perimeter on your hands and knees, listening for where the bass sounds fullest and most even. Sonarworks recommends placing the sub permanently at whatever spot passes that test, since it's usually where standing waves reinforce rather than cancel.
- Run the crawl test with a bass-heavy loop, not a single note, so you catch problems across the whole low-frequency range.
- Two smaller subs, positioned asymmetrically, generally even out the room's bass response far better than one larger sub ever will.
- Set your crossover frequency to hand off cleanly to your mains, typically 80 to 100 Hz, and check for overlap or gaps by ear as you sweep it.
- If your ideal main-monitor triangle forces the sub into a bad corner, prioritise the mains' geometry and treat the sub's position as the second-priority compromise.
Should you decouple your monitors from the desk?
A monitor resting directly on a hard desk surface transmits vibration straight into the wood, which colours the sound with resonances that have nothing to do with your mix. Decoupling breaks that physical connection.
- Isolation pads (foam or rubber) are the cheapest fix and handle most desktop resonance problems.
- Mechanical decouplers with spring or elastomer suspension go further, useful on lightweight or hollow desks that ring audibly.
- Stands solve isolation and height in one move, ideal when your desk simply isn't deep enough for correct front-wall distance.
Whichever you choose, check stability before you walk away. A monitor that can be nudged or wobbled isn't just an accuracy risk, it's a monitor waiting to fall.
How to calibrate and verify your studio monitor setup
Physical placement comes first, always. ADAM Audio is blunt about this: no amount of digital room correction fixes a fundamentally poor mechanical setup. Calibration is the final 10 percent, not a substitute for the geometry above.
- Place a measurement microphone at your seated ear height, exactly where your head sits when mixing.
- Take several readings in a small cluster around that spot, not just one, since overlaying multiple nearby positions reveals how much the response shifts as your head naturally moves during a session.
- Measure each monitor individually before measuring both together. This isolates which speaker is causing an anomaly.
- Overlay the left and right responses on the same graph. Any large mismatch between the two usually points straight back to asymmetric placement, not a faulty speaker.
- Fix what you can physically, moving a monitor, adding a reflection panel, before reaching for correction software. Use software as the final polish once the room and geometry are as good as they'll get.
Keep your monitoring level roughly consistent between sessions, ideally checked with an SPL meter rather than by feel, since your ears perceive frequency balance differently at different volumes. A mix that sounds balanced at 85 dB can sound thin or boomy at 70 dB purely because of how human hearing works at varying levels, not because anything in the mix changed.
Calibration aims for honesty over flattery. If your corrected monitors suddenly sound harsher or thinner than you're used to, that's usually the room's previous colouration disappearing, not a fault in the correction.
Quick troubleshooting checklist for placement problems
Match what you're hearing to the likely cause before reaching for a fix:
- Boomy, undefined bass → monitor too close to the front wall or a wall-boundary interaction. Try the SBIR distance rules first.
- Bass disappears at certain notes → a room mode null at the listening position. Shift your seat a few inches, don't EQ it, since narrow nulls are frequently phase-related and boosting them can worsen phase problems instead of solving them.
- Smeared, unstable stereo image → untreated first reflections or an asymmetric room. Rerun the mirror test.
- Mix sounds different from side to side → check triangle symmetry and toe-in angle before assuming your ears are lying.
Give each fix 10 to 30 minutes before judging it. If three or four physical changes haven't resolved a problem, that's the point to bring in measurement software or a second set of trained ears.
Pro Tip: Keep a simple log of what you moved and when. Placement problems often stack, and without notes it's easy to "fix" something twice or undo a good change by accident.
AubioMix and studio monitor placement: where automated feedback fits in
Accurate monitoring doesn't fix your mix, it reveals what actually needs fixing. Once your triangle, height, and boundary distances are dialled in, the frequency masking, stereo width issues, and level imbalances you're hearing are real, not artefacts of a wonky room.
That's the point where an automated second opinion earns its keep. Upload a mix to AubioMix after you've placed your monitors and run a basic listening check, and you'll get a quantified read on the same issues you were listening for: masking between elements, stereo balance, loudness targets, whether the low end will translate to smaller speakers.
- Use it to confirm a placement change actually helped, not just felt different.
- Use it as a sanity check when you're second-guessing your own ears after a long session.
- Don't use it as a substitute for fixing an obviously wrong room setup first. Garbage monitoring in, unreliable feedback out.
Room treatment basics that support good monitor placement
Placement and treatment aren't separate jobs, they're the same job worked from two angles. Get the geometry right and you reduce how much treatment you need. Skip treatment entirely and even perfect placement will fight a room that's actively working against you.
Three categories matter most for a nearfield setup. Bass traps belong in corners, particularly where two walls meet, or where a wall meets the ceiling, since low frequencies build up hardest at room boundaries. A pair of corner bass traps behind the listening position often does more for perceived clarity than any monitor swap. Absorption panels handle the first-reflection points you found with the mirror test, and they're also worth placing on the wall directly behind your listening seat if it's close enough to cause a slap-back reflection into your ears. Diffusers matter less in small nearfield rooms than in larger mixing spaces, but a diffusive rear wall can help stop a small room from sounding boxy without deadening it completely.
Don't over-treat. A room stripped of every reflection sounds unnaturally dead and makes reverb decisions genuinely harder, since you lose your sense of how much space you're actually adding. Aim for a room that sounds neutral and controlled, not a padded cell. Start with corners and first reflections, listen for a week, then add more only if a specific problem persists.
Common studio monitor placement mistakes and what they sound like
Most placement problems trace back to a handful of repeat offenders, and each one has a distinct audible signature once you know what to listen for.
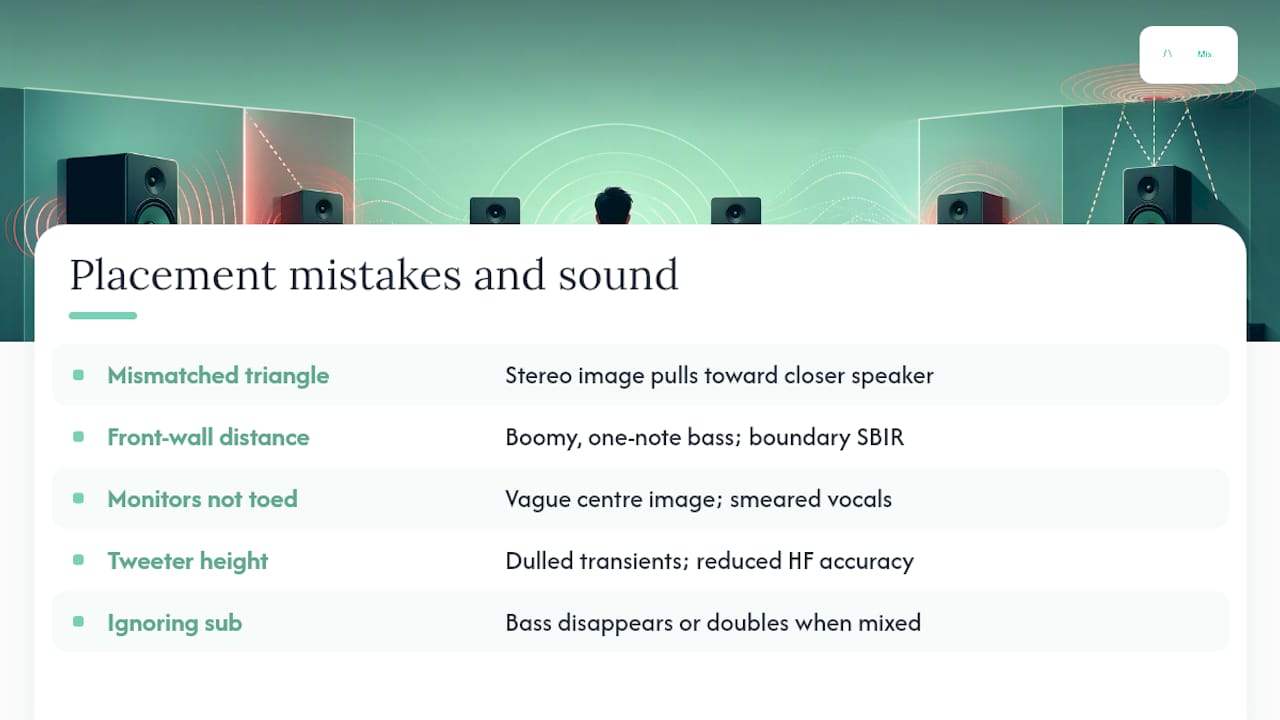
Mismatched triangle sides are the most common, usually because one monitor got pushed closer to make room for a keyboard or interface. The result is a stereo image that pulls subtly toward the closer speaker, and you'll often compensate by panning things slightly off-centre without realising why.
Wrong front-wall distance shows up as boomy, one-note bass that doesn't seem to match what you hear on headphones or in the car. This is SBIR doing exactly what the earlier section described, and it's often misdiagnosed as a room mode problem when it's really a boundary problem.
Monitors angled flat instead of toed in produce a vague, unfocused centre image, vocals and lead lines that feel smeared rather than locked in place. Producers sometimes leave monitors facing straight ahead because it looks tidy on the desk, not realising the toe-in angle is doing real acoustic work.
Tweeter height mismatched to ear level dulls transient detail and high-frequency accuracy without an obvious cause, since you're now listening slightly off-axis without knowing it.
Ignoring the sub entirely and just placing it wherever it fits under the desk is the last common mistake, and it usually produces bass that sounds fine solo but disappears or doubles up once mixed with the mains.
How room shape and size change your ideal monitor placement
A small square room and a long rectangular room demand genuinely different approaches, and treating them identically is where a lot of home studio setups go wrong.
Square or near-square rooms concentrate standing waves at the same frequencies along both axes, which makes bass problems more severe rather than more manageable. If you're working in a square room, prioritise corner bass trapping heavily and be prepared to experiment more with the 38% rule, since the usual sweet spot may land somewhere unexpected.
Long, narrow rooms, common in converted bedrooms and box rooms, generally give you a more forgiving low end if you set up along the room's length rather than across its width, since the extra distance to the back wall pushes the first strong axial reflection further out. Low ceilings compress everything, both literally and acoustically, and often make ceiling reflections a bigger problem than side walls, worth checking in the mirror test even though it's easy to overlook a surface directly above your head.
Irregular rooms, with alcoves, sloped ceilings, or exposed brick on one wall, break the tidy symmetry this guide has leaned on throughout. In that situation, prioritise measured verification over visual symmetry. A room that looks lopsided but measures evenly between left and right will out-perform a symmetrical-looking room with one hidden problem wall every time.
A practical habit for long mixing sessions
For long sessions, I lean toward toe-in that crosses just slightly behind my head rather than exactly at it. It softens fatigue over hours without meaningfully hurting imaging, and it's a fair trade when a session runs collaborative with someone sitting just off-centre.
The habit that matters more than any single setting: check your SPL before you start, and open with a reference track you know cold. Placement drifts. Ears adapt. A five-minute check catches both before they cost you a mix.
— AubioMix
Verify your placement work with a genuine second opinion
You've done the physical work: triangle set, tweeters at ear height, boundary distances checked, first reflections treated. AubioMix gives you a way to confirm that work actually paid off in the mix itself, rather than just trusting your ears after a long session.

Upload a track to one of AubioMix's genre benchmark pages, and you'll get a breakdown of masking, stereo width, loudness, and translation across playback systems, the exact issues that accurate monitoring is supposed to help you catch by ear. If your placement changes worked, the report should reflect a cleaner, more balanced result than before. If it doesn't, you'll know precisely which element still needs attention rather than guessing. Head to the full benchmarks page and run your latest mix through it before you call the session finished.
Sources
- How to place your monitors? — Genelec
- How to position studio monitors in your room — ADAM Audio
- Setup your studio monitors the right way — Sonarworks
- How to calibrate studio monitors for accurate mixing — Wisseloord