
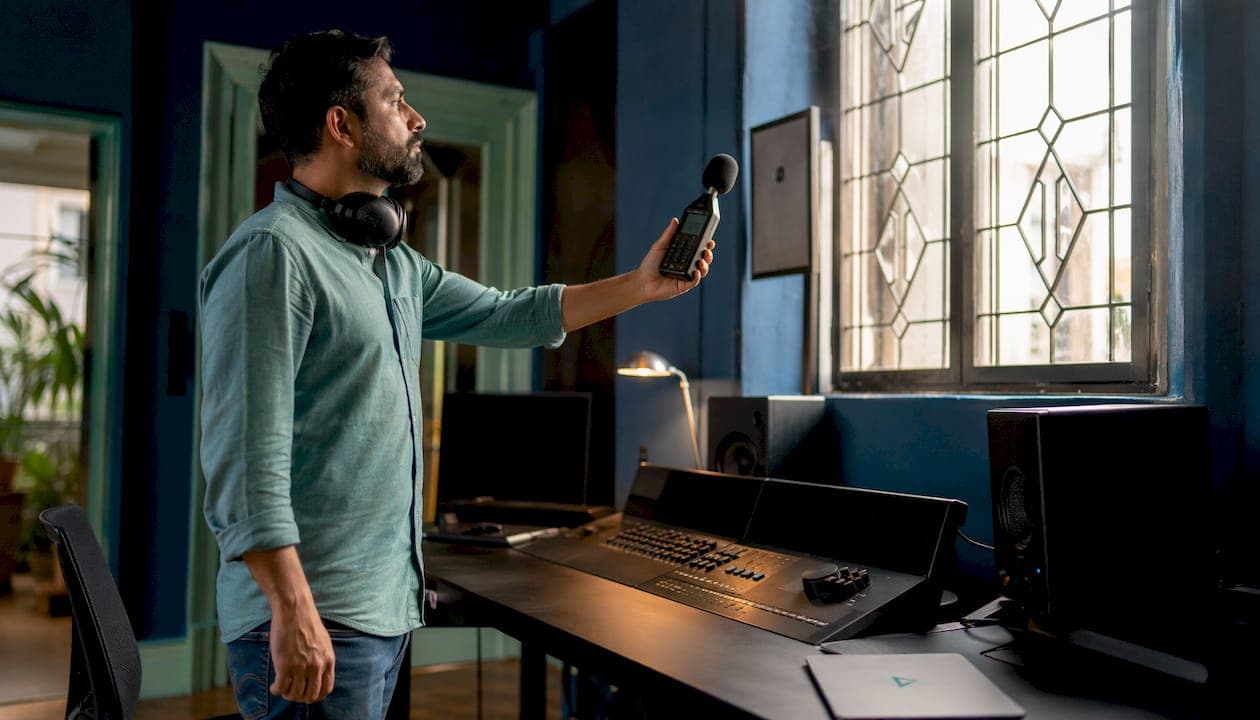
SPL stands for Sound Pressure Level, the objective measurement of air-pressure variations caused by sound waves, expressed in decibels relative to a reference pressure of 20 micropascals (20 µPa). In plain terms, it tells you how much physical force a sound exerts on the air around you, with no opinion attached. For mixing, that objectivity is exactly what makes it useful: your ears lie when you are tired, but a calibrated SPL meter does not.
The single most important thing you can do with this knowledge right now is set a consistent monitoring reference level and stick to it. Professional mix engineers commonly target 83–85 dB SPL as a daily reference, which gives a reliable frequency balance and keeps ear fatigue manageable across a session.
Quick actions to take today:
- Measure your current monitoring level with an SPL meter or a calibrated measurement app
- Calibrate your monitors to a reference target using pink noise (83–85 dB SPL is a solid starting point)
- Monitor your exposure time, especially above 85 dB SPL, where hearing risk increases with prolonged listening
Table of Contents
- What does SPL actually measure?
- How SPL differs from loudness, volume, and dBFS
- How to measure SPL accurately in a studio
- Why consistent monitoring SPL matters for your mixes
- How to calibrate your studio monitors to a target SPL
- Common SPL mistakes and how to fix them fast
- Key takeaways
- Why SPL discipline is the foundation of every good mix
- Check how your mix translates after you calibrate
- Useful sources and further reading
What does SPL actually measure?
SPL is an objective measurement of the pressure fluctuations that sound waves create in the air. The reference point, 20 µPa, represents the quietest sound a healthy human ear can detect under ideal conditions. That threshold is defined as 0 dB SPL, the theoretical lower limit of human audibility.
The decibel itself is a logarithmic ratio, not a linear one, which is why the numbers can feel counterintuitive at first. A useful rule to keep in your back pocket: every time you double the physical sound pressure, the SPL reading rises by 6 dB. So 66 dB SPL carries twice the pressure of 60 dB SPL. That relationship matters enormously when you are calibrating monitors or comparing levels across different rooms.
Key reference: 0 dB SPL = 20 µPa, the threshold of human hearing. Every +6 dB doubles the physical pressure. The theoretical atmospheric peak sits at roughly 194 dB SPL, a figure that exists mainly to illustrate the scale of the measurement, not as a practical mixing concern.
A few anchoring examples help make the scale concrete:
- 0 dB SPL — threshold of hearing (near silence in an anechoic chamber)
- 60 dB SPL — normal conversation at about one metre
- 85 dB SPL — the level at which prolonged exposure begins to carry hearing risk
- 194 dB SPL — theoretical maximum sustainable atmospheric peak
Understanding where your monitoring level sits on that scale is the foundation of everything else in this article.
How SPL differs from loudness, volume, and dBFS
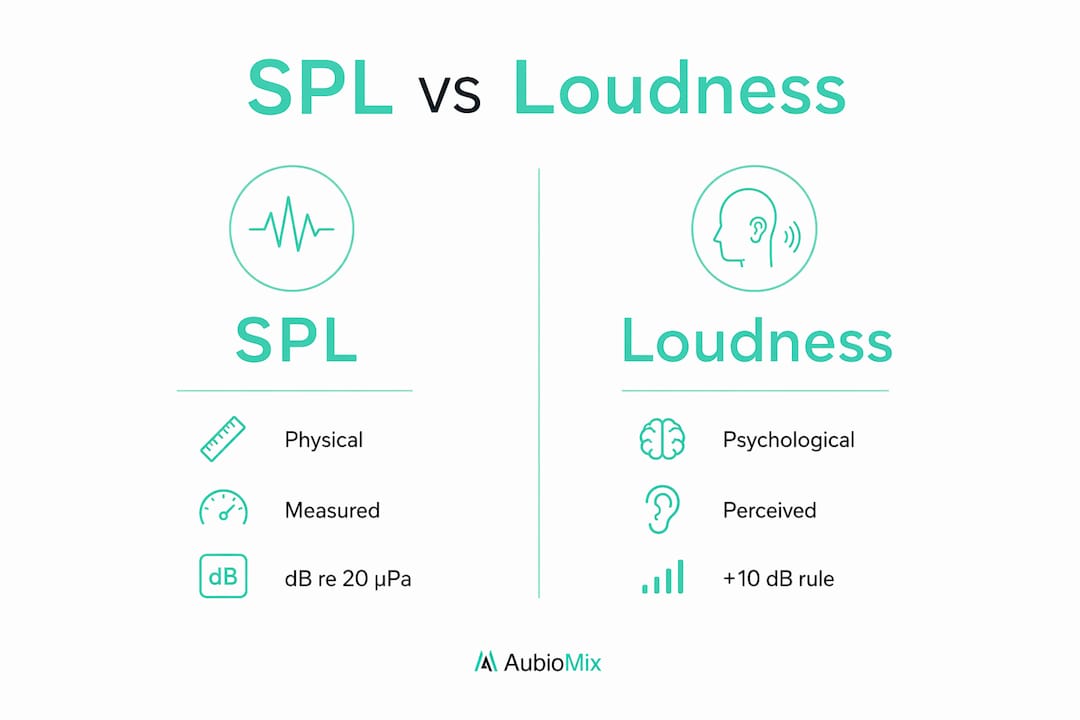
SPL is a physical measurement. Loudness is a psychological experience. Those two things are related, but they are not the same, and confusing them is one of the most common sources of poor mix decisions.
Your perception of loudness depends heavily on frequency. At lower listening levels, your ears become less sensitive to low and high frequencies, which is the basis of the equal-loudness contours first described by Fletcher and Munson. That means a mix that sounds balanced at 85 dB SPL can sound thin and bass-light at 70 dB SPL, even though the signal has not changed at all.
Frequency weightings exist precisely to bridge the gap between objective pressure and perceived loudness:
- A-weighting (dBA): Mimics the ear's reduced sensitivity to low and high frequencies at moderate levels. Used widely for occupational noise exposure assessments and general loudness correlation. However, A-weighting can significantly under-represent subwoofer energy, which is a real problem when mixing bass-heavy music.
- C-weighting (dBC): Flatter across the low-frequency range, giving a better picture of total acoustic energy including sub content. Useful for peak measurements and for calculating C minus A (C-A), which reveals how much low-frequency energy is present relative to perceived loudness.
- Z-weighting (flat): No frequency shaping at all, measuring the true physical pressure across the full spectrum. Used for detailed acoustic analysis and measurement work.
SPL vs dBFS is another distinction worth getting clear. Your DAW meters display dBFS (decibels relative to full scale), a digital domain measurement with 0 dBFS as the ceiling. dB SPL is an acoustic measurement in the physical world. The two are only related once you introduce a calibrated gain structure: a specific dBFS reference level in your DAW corresponds to a specific SPL at your listening position, and that relationship is set by your monitor volume control and amplifier gain. Without calibration, the numbers on your DAW meter tell you nothing reliable about what your ears are actually receiving.
For a deeper look at how loudness metering for distribution relates to SPL, the LUFS explained guide covers the connection clearly.
Pro Tip: A doubling of physical sound pressure is +6 dB. But perceived loudness doubling typically requires around +10 dB. That gap explains why a mix that feels "twice as loud" is actually far more than twice the acoustic pressure — and why small SPL changes at high levels feel dramatic.
How to measure SPL accurately in a studio
Getting a reliable SPL reading requires the right tool, the right settings, and the right technique. A reading taken with the wrong weighting or a poorly positioned microphone can be several decibels off, which defeats the purpose of measuring at all.
Tools for studio SPL measurement:
- Handheld SPL meters (such as the Galaxy Audio CM-130 or similar calibrated devices) are the most practical option for most studios. They are portable, affordable, and accurate enough for monitor calibration.
- Calibrated measurement microphones paired with measurement software (such as Room EQ Wizard, or REW) give more detailed data and are useful for acoustic analysis beyond simple level checks.
- Smartphone apps can work for rough checks, but their accuracy depends entirely on the phone's microphone, which is rarely calibrated. Use them as a guide, not a reference.
Weighting and time constant settings:
- Use C-weighting for monitor calibration in a studio. It captures low-frequency content more accurately than A-weighting and gives a truer picture of total acoustic energy at your listening position.
- Use A-weighting when assessing exposure risk, as it aligns with occupational health guidelines.
- Fast mode responds quickly to transient peaks, useful for checking peak levels during loud passages. Slow mode averages over a longer window, giving a more stable reading for calibration work. Leq (equivalent continuous sound level) averages energy over a defined period and is the most useful setting for long-term exposure assessment and consistent level checks during a session.
Pro Tip: Point the measurement microphone upward rather than directly at your speakers. Pointing the mic upward captures the room's total energy rather than emphasising the high-frequency output of a single speaker, which gives a more representative reading in a typical studio environment.
For correlation metering and other meter types that complement SPL measurement, it is worth understanding how different meters serve different diagnostic purposes.
On C minus A: When you subtract your A-weighted reading from your C-weighted reading, the result tells you how much low-frequency energy is present relative to perceived loudness. A C-A value of 20 dB or more in a live music environment suggests subwoofer levels could be dangerously high even if the A-weighted reading seems acceptable.
Why consistent monitoring SPL matters for your mixes
Mixing at a consistent SPL is not about following a rule for its own sake. It is about removing a variable that would otherwise corrupt every decision you make about EQ, compression, and balance.
Your ear's sensitivity to different frequencies shifts with level. At higher SPLs, bass and treble feel more prominent relative to the midrange. At lower SPLs, the opposite happens. If your monitoring level drifts by even 3–4 dB between sessions, or between the start and end of a long session, your frequency balance judgements become unreliable. The mix that sounded right at 11 PM after six hours of work may sound completely different the next morning at a fresh listening level.
Recommended monitoring targets for studio mixing:
- 83–85 dB SPL: A commonly used broadcast and film mixing reference level works well for detailed critical listening and gives a good balance between clarity and ear safety over a full session.
- 79–83 dB SPL: A slightly lower range that many engineers prefer for longer sessions, reducing fatigue while still providing enough level for accurate frequency judgements.
- 65 dB SPL: A useful secondary check level. Mixes that still sound balanced and full at this quieter level tend to translate well across smaller playback systems.
Mixing at low volumes for part of your session is a genuinely useful habit, not just a precaution. Details that disappear at high SPL often reveal themselves at quieter levels.
Studio vs live and PA levels:
Live PA systems and car audio environments routinely operate at 90–110 dB SPL. Those levels are appropriate for their context, where the goal is impact and coverage across a large space. In a studio, 90 dB+ is generally too loud for mixing: it accelerates ear fatigue, skews frequency perception, and makes it harder to hear fine detail in the midrange. The monitoring target for mixing is not about volume preference; it is about maintaining a controlled, repeatable listening condition.
UK hearing safety context:
The Health and Safety Executive (HSE) sets daily noise exposure limits for workplaces in the UK. The lower exposure action value is 80 dB(A) averaged over an eight-hour day, with an upper action value of 85 dB(A). For professional engineers working long sessions, exposure above 85 dB SPL with prolonged listening carries a genuine risk of cumulative hearing damage. Treating your monitoring level as a professional discipline, not just a creative preference, is part of looking after your most important tool.
How to calibrate your studio monitors to a target SPL
This is the practical part. Follow this routine once, document your settings, and you will have a repeatable reference for every session going forward.
Pre-checks before you start
- Allow your monitors to warm up for at least 15–20 minutes before measuring
- Set your room to its normal working state (same furniture, same acoustic treatment in place)
- Check your signal chain: gain staging should be set so that a reference level in your DAW (typically around -18 dBFS to -20 dBFS RMS) corresponds to your target monitoring SPL
- Set your DAW master fader to 0 dB and your monitor controller to a fixed position you will use as your daily reference
Choose your test signal and meter settings
- Use pink noise as your calibration signal. Pink noise gives a stable average across the audible spectrum and avoids the standing-wave artefacts that sine tones create in real rooms.
- Set your SPL meter to C-weighting and Slow time constant for calibration work
- A calibrated handheld meter is ideal; a measurement microphone with REW is more detailed but not required for basic calibration
Positioning and microphone orientation
- Place the meter at your mix position, at ear height
- Point the microphone capsule upward toward the ceiling, not at the speakers
- Sit in your normal mixing position and hold the meter steady, or use a stand
Step-by-step calibration routine
- Route pink noise to the left speaker only at your DAW reference level
- Read the SPL meter on Slow/C-weighted and note the reading
- Adjust the left monitor's trim control until the meter reads your target (83 dB SPL is a reliable starting point)
- Repeat for the right speaker only, matching it to the same reading
- Play pink noise through both speakers simultaneously and verify the combined reading is approximately 6 dB higher than each individual speaker (roughly 89 dB SPL if your target is 83 dB per speaker)
- Switch to a short piece of familiar music and confirm the level feels appropriate and consistent with your expectations
- Note the monitor controller position and DAW reference level in a session log or on a piece of tape on your desk
Printable calibration checklist:
- Monitors warmed up (15+ minutes)
- Gain staging set, master fader at 0 dB
- Pink noise routed to left speaker only
- SPL meter: C-weighted, Slow, mic pointing up
- Left speaker trimmed to target SPL
- Right speaker trimmed to match
- Both speakers combined: ~6 dB above single-speaker reading
- Musical verification complete
- Settings logged
Pro Tip: Re-check your calibration every few weeks, and always after moving furniture, changing acoustic treatment, or adjusting your monitor controller. Room conditions shift more than you might expect, and a 2–3 dB drift in your reference level is enough to affect mix decisions.
Common SPL mistakes and how to fix them fast
Even engineers who understand SPL in theory make consistent measurement errors in practice. Here are the ones worth watching for.
Frequent errors:
- Using sine tones instead of pink noise: Sine waves excite room modes and create extreme peaks and nulls at specific positions. A reading taken with a sine tone can be 10 dB or more off from the true average level. Switch to pink noise immediately.
- Wrong meter weighting: Using A-weighting for monitor calibration under-represents bass energy and gives a misleading picture of total SPL at your listening position. Use C-weighting for calibration.
- Meter not calibrated or checked: Inexpensive meters can drift. If you have not verified your meter against a known reference recently, treat its readings as approximate. A professional calibration check is worth doing annually if you rely on the meter for critical work.
- Measuring from the wrong position: SPL readings vary significantly across a room. Always measure from your actual mix position, at ear height. A reading taken from a metre away or at a different height is not your monitoring level.
- Ignoring ear fatigue: After two or more hours of continuous listening, your ears adapt to the level and you naturally reach for more volume. That level creep compounds across a session and can push you well above your reference without you noticing.
Quick fixes:
- Switch to pink noise and Leq for averaged, stable readings
- Reorient the meter to point upward
- Log your monitor controller position at the start of every session and return to it after breaks
- Take a 10-minute break every 60–90 minutes and step away from the speakers entirely
When to trust your ears vs the meter:
Meters define the envelope; ears make the artistic call. Use SPL measurement to set and maintain consistency, then trust your listening for the creative decisions about balance, depth, and emotion. The meter tells you that you are working within a controlled, repeatable condition. What you do within that condition is entirely yours.
Pro Tip: Schedule a level check every hour using a simple alarm. Glance at the meter, confirm you are still at your reference, and reset if needed. It takes ten seconds and prevents the slow level creep that quietly ruins long sessions.
Key takeaways
SPL (Sound Pressure Level) is the objective physical measure of sound, expressed in dB re 20 µPa, and calibrating your monitors to a consistent reference level (83–85 dB SPL) is the single most reliable way to make mix decisions you can trust across sessions.
| Point | Details |
|---|---|
| SPL definition | Sound Pressure Level in dB re 20 µPa; 0 dB SPL is the threshold of human hearing. |
| Monitoring target | Use 83–85 dB SPL as your daily reference; check at 65 dB SPL for translation. |
| Calibration method | Pink noise, C-weighting, Slow time constant, mic pointing upward at mix position. |
| Hearing safety | UK HSE upper action value is 85 dB(A); prolonged exposure above this level carries real risk. |
| Aubiomix | Upload your mix to Aubiomix after calibration to verify how it translates across playback systems. |
Why SPL discipline is the foundation of every good mix
We talk a lot about tools, plugins, and techniques at Aubiomix, but the engineers whose mixes consistently translate well share one habit above everything else: they know exactly how loud they are listening, and they keep it consistent. SPL calibration is not a one-time setup task. It is a daily ritual, as automatic as setting the gain on your interface before tracking.
The thing most engineers underestimate is how much their monitoring level shapes their creative decisions without them realising it. A mix built at 90 dB SPL will almost always have too much low end when played back at 75 dB on a laptop. A mix built at 65 dB may lack the energy and punch that only reveals itself at higher levels. Working at a calibrated reference level, and checking at a secondary lower level, removes that guesswork entirely.
We recommend integrating an SPL check into your pre-session routine the same way you would check your headphone mix or your interface clock rate. Set it, log it, and protect it. Your ears are the instrument you cannot replace.
Check how your mix translates after you calibrate
Once your monitors are calibrated and you have a mix you feel confident about, the next question is whether it holds up across different playback systems. That is where Aubiomix comes in.

Aubiomix is an online mix-feedback app built for producers and mix engineers who want professional-grade analysis without booking studio time. Upload your audio file and receive detailed, specific feedback on your mix and master, covering balance, frequency distribution, dynamics, and how your decisions translate between listening environments. It is the kind of consistency check that complements SPL discipline perfectly: you set the controlled conditions, Aubiomix tells you what the mix is actually doing within them.
If you prefer to run your own translation checks manually, that works too. A/B your mix on headphones, a Bluetooth speaker, and a car stereo after your calibrated session. The calibration routine you followed above gives you the reference point to make those comparisons meaningful.
Ready to hear what your mix is really doing? Upload your track to Aubiomix and get your feedback report in minutes.
Useful sources and further reading
These are the references used throughout this article, each worth bookmarking for deeper study.
| Source | What it covers | Why it is useful |
|---|---|---|
| Svantek Academy: Sound Pressure Level | Technical definition of SPL, dB reference, and measurement fundamentals | Clear, authoritative starting point for understanding the physics |
| ProSoundWeb: On the Level | A-weighting, C-weighting, C-A technique, Leq, and live sound exposure | The most practical long-form guide to applying SPL measurement in professional audio |
| Rational Acoustics: SPL FAQ | Monitoring targets, quality-control use of SPL meters, and consistency principles | Excellent for understanding why calibration matters for session-to-session reliability |
| RealTraps: Practical SPL Measurement | Microphone orientation, pink noise vs sine tones, and studio measurement technique | The go-to reference for getting accurate readings in a real room |
| audioXpress: Practical Applications for SPL Meters | Handheld meter features, calibration, and studio monitoring applications | Practical overview of what SPL meters do and how to use them day-to-day |
| MusicProductionWiki: Mixing Bible | Gain staging, calibration routine, and multiple listening level checks | Solid practical reference for the full studio calibration workflow |
| BOSS Elite: SPL in Car Audio | Context-dependent SPL norms in car audio and live PA | Useful for understanding why studio targets differ from live and consumer environments |
| Study.com: Sound Pressure Level | Canonical short definition and educational examples | Good quick reference for the basic SPL definition and decibel explanation |
| NIDCD Noisy Planet: Too Loud, Too Long | Hearing damage risk and exposure guidance | Authoritative US health reference for understanding noise exposure risk |
| Wikipedia: Audio Mixing) | Broad overview of mixing processes, tools, and techniques | Useful background on how SPL fits within the wider mixing workflow |