
Reamping is defined as the process of sending a previously recorded clean instrument signal back through amplifiers, effects, and pedals to capture new tones without re-recording the performance. The core advantage is creative freedom: you lock in the perfect take first, then shape the tone at your leisure during mixing. This separation of performance from tone decisions is why reamping has become a standard part of professional mix engineer workflow in 2026. Whether you are working with guitar, bass, or drums, understanding the full reamping workflow gives you a level of tonal control that tracking live simply cannot match.
What equipment do you need for a professional reamping setup?
A professional reamping setup requires four core components: a clean DI recording, an audio interface with a dedicated line output, a re-amp box, and a guitar amplifier with a microphone in front of it. Each element plays a specific role, and skipping any one of them introduces problems that are easy to misdiagnose.
The re-amp box is the most misunderstood piece of the chain. Re-amp boxes convert balanced line-level DAW outputs into unbalanced instrument-level signals, which is the correct format for driving a guitar amplifier without impedance mismatch. Without this conversion, you get a weak, tonally degraded signal that sounds nothing like a properly driven amp. Producer Warren Huart describes the re-amp box as the layer that maintains your DAW's gain staging while correctly interfacing with the amp. Think of it as a translator between two devices that speak completely different electrical languages.
Here is a breakdown of the key components you need:
| Component | Purpose |
|---|---|
| Clean DI recording | Captures the performance with no colouration for later processing |
| Audio interface | Provides the line-level output to feed the re-amp box |
| Re-amp box (e.g. Radial ProRMP, Walrus Audio Canvas) | Converts and matches impedance and level between interface and amp |
| Guitar amplifier | The tone source that colours the re-amped signal |
| Microphone (e.g. Shure SM57, Royer R-121) | Captures the amp's output back into the DAW |
| Cables and connectors | XLR from interface to re-amp box; instrument cable from box to amp |
Beyond the core chain, reamping pedals add a further dimension. Stompboxes such as fuzz units, delays, and modulation effects can be inserted between the re-amp box and the amplifier to build textures that would be impossible to dial in during a live tracking session. Optional extras worth having include a patchbay for flexible routing, a ground lift switch (built into most quality re-amp boxes), and a second microphone for blending tones from different positions on the speaker cone.
Pro Tip: Record your DI at around minus 18 dBFS to leave plenty of headroom. A clean, conservative DI level gives you far more flexibility when you push the amp hard during the reamp session.
How to reamp guitar tracks step by step in your DAW
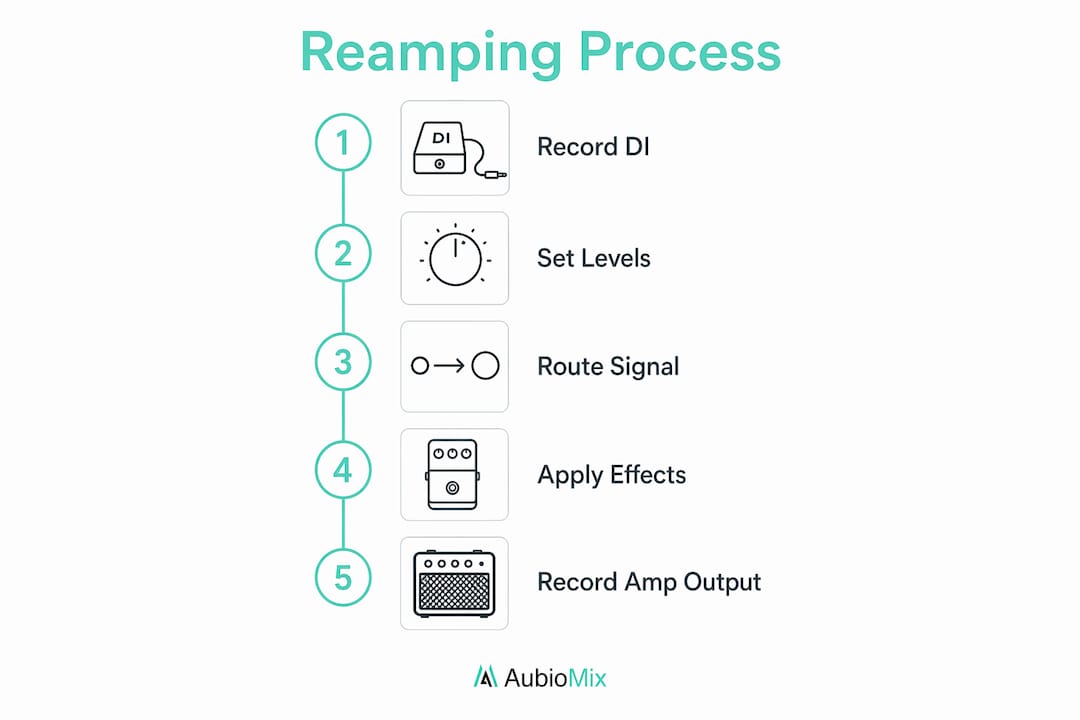
The reamping workflow follows a logical sequence, and getting each step right prevents the most common frustrations. Here is the full process from tracking to capture.
-
Record a clean DI signal. Plug your guitar directly into a DI box or your interface's instrument input. Record the performance at a conservative level, around minus 18 dBFS, with absolutely no amp simulation, EQ, or compression on the input. This is your raw material, and it needs to be pristine.
-
Set up a dedicated output bus in your DAW. Route the DI track to a separate output on your interface, not the main mix bus. In Pro Tools, Logic Pro, or Ableton Live, this means assigning the track output to a spare interface output, such as Output 3/4, which feeds directly into the re-amp box.
-
Connect the re-amp box. Run an XLR cable from your interface's line output into the re-amp box input. From the re-amp box's instrument output, run a standard guitar cable to the input of your amplifier. This core loop is the foundation of every professional reamping session.
-
Position and connect your microphone. Place a dynamic microphone such as a Shure SM57 close to the speaker cone, slightly off-centre, and run it back into a mic preamp and then into a spare input on your interface. A second ribbon microphone placed further back adds air and room character when blended with the close mic.
-
Set levels carefully. Play back the DI track in your DAW and watch the signal hitting the amp. Adjust the output level on your interface and the input gain on the re-amp box until the amp responds naturally. Avoid clipping the mic preamp on loud transients.
-
Use the ground lift if needed. If you hear a low hum in the signal, engage the ground lift switch on the re-amp box. Ground lift eliminates hum caused by grounding loops, which are extremely common in complex studio routing chains.
-
Record the re-amped signal back into your DAW. Create a new audio track, arm it for recording, and play back the DI. You now have a re-amped track sitting alongside your original DI, ready for mixing.
Pro Tip: Keep the original DI track active in your session even after reamping. Blending a small amount of the clean DI underneath the re-amped signal adds definition and attack that the amp alone often softens.
What are the most common reamping problems and how do you fix them?
Even experienced engineers run into technical headaches during reamping sessions. The good news is that the most common issues follow predictable patterns and have clear solutions.
Latency offset. There is no zero-latency reamping when passing a signal through external hardware. The signal leaves your DAW, travels through the re-amp box and amp, gets captured by the microphone, and is re-digitised by your interface. This round trip introduces a measurable sample delay. The fix is straightforward: play a sharp transient through the chain, record it, and measure the sample offset between the original and the re-amped version. Nudge the re-amped track back by that exact number of samples in your DAW.
Phase and polarity issues with pedals. When you insert stompboxes into the reamp chain, some pedals introduce a 180-degree polarity flip or a phase shift that causes comb filtering when blended with the DI. Print a clean signal with the pedals in the chain but bypassed, then compare the waveform to the original DI. If the waveform is inverted, flip the polarity on the re-amped track in your DAW. If there is a phase shift, use a plugin such as Waves InPhase or the built-in phase rotation tool in your DAW to align the signals.
Persistent hum and noise. Hum that survives the ground lift switch usually points to a cable fault, a poorly shielded instrument cable between the re-amp box and the amp, or a cheap re-amp box with inadequate transformer shielding. Iterative use of the ground lift when changing routing is more efficient than chasing noise with EQ. Swap cables one at a time to isolate the source.
Treat the re-amp box purely as an impedance and level interface layer. Noise or a weak signal in the chain is almost always a re-amp box setup error, not an amp or microphone problem. Diagnose the box first before touching anything else.
Weak or thin signal. This is almost always an impedance mismatch caused by bypassing the re-amp box or using a passive DI in reverse without proper level attenuation. A passive re-amp device such as the Walrus Audio Canvas works well for home setups, but active re-amp boxes such as the Radial ProRMP give you more control over output level in complex chains.
Can you reamp instruments other than guitar?
Reamping is not limited to guitar tracks, and some of the most interesting textures in modern production come from running unexpected sources through amplifiers and effects. Reamping supports drums, bass, and other instruments for tonal and spatial variety, and the workflow is identical to guitar reamping once your levels are matched correctly.
Here are some creative applications worth experimenting with:
- Drum bus reamping. Send a parallel drum mix through a small guitar amp, such as a Fender Champ, to add grit and harmonic saturation. Blend the re-amped signal underneath the clean drum mix for a sound that sits somewhere between a vintage recording and a modern production.
- Bass reamping. Record bass DI and reamp it through both a bass amplifier and a guitar amp simultaneously. The guitar amp adds upper harmonic content that cuts through dense mixes, while the bass amp handles the low-end weight.
- Synth and keyboard reamping. Run pad sounds or lead synths from software instruments such as Serum or Omnisphere through a clean valve amp to add warmth and subtle harmonic distortion. This technique transforms sterile digital patches into sounds with genuine analogue character.
- Vocal reamping. Sending a vocal through a spring reverb tank or a small amp at low volume creates room textures that no plugin reverb quite replicates. This works particularly well on backing vocals or spoken word elements where you want an lo-fi, intimate quality.
The key with non-guitar sources is to watch your levels carefully. Synths and drum buses often output hotter signals than a guitar DI, so pad the signal at the interface output before it hits the re-amp box.
What are the best practices for mixing reamped tracks?
Mixing reamped tracks well requires a different mindset from mixing a standard recorded performance. You have two versions of the same performance: the clean DI and the re-amped signal. Blending reamped amp tracks with clean DI signals allows you to layer articulation and dynamic range in ways that a single recorded source cannot achieve.
Pro Tip: When mixing a reamped guitar, high-pass the re-amped track at around 80 to 100 Hz and let the DI handle the low-end definition. This prevents the amp's low-frequency build-up from muddying the mix while preserving the amp's natural character in the midrange.
A few best practices that make a real difference:
- Use multiple amp tones in layers. If you reamped through two different amplifiers, treat them as separate instruments in the mix. Pan them slightly apart, EQ each one for a specific frequency range, and compress them independently before blending.
- Automate the blend between DI and amp. During quiet passages, bring up the DI for clarity and attack. During loud sections, push the re-amped signal forward for weight and sustain. This kind of automation creates a dynamic, living guitar sound that responds to the song's energy.
- Check phase on every blend. Any time you combine the DI and the re-amped track, check phase alignment. Even a small offset causes tonal thinning that EQ cannot fix. Use your DAW's phase scope or a plugin such as Nugen Audio Visualizer to confirm alignment.
- Apply compression after blending, not before. Compress the combined DI and amp blend as a group rather than compressing each track separately. This preserves the natural transient relationship between the two sources and produces a more cohesive sound.
For a deeper look at how reamping fits into a broader mixing session structure, it helps to plan your reamp passes before you begin the mix proper, so you are not interrupting your creative flow to set up hardware mid-session.
Key takeaways
Reamping gives producers and engineers the power to make hardware tone decisions during mixing rather than at the moment of tracking, which is the single most valuable thing it offers.
| Point | Details |
|---|---|
| Re-amp box is non-negotiable | It converts line-level DAW outputs to instrument level, preventing impedance mismatch and signal degradation. |
| Latency must be measured and corrected | Record a test transient, measure the sample offset, and nudge the re-amped track back to align with the original DI. |
| Ground lift solves most hum problems | Engage it as the first step when hum appears; do not chase noise with EQ or gain adjustments. |
| Phase check every blend | Polarity flips from pedals and latency offsets cause tonal thinning that EQ cannot repair. |
| Reamping works on any instrument | Drums, bass, synths, and vocals all respond to reamping, opening up textures that purely digital processing cannot replicate. |
Why reamping changed how I think about recording
Reamping taught me something that took years to fully appreciate: the performance and the tone are two completely separate creative decisions, and trying to nail both at the same time is where most tracking sessions go wrong. When a guitarist is focused on playing the right part with the right feel, asking them to also dial in the perfect amp tone is asking too much. Separating those two moments produces better results in both.
The technical side of reamping, the latency offsets, the phase checks, the ground lift troubleshooting, can feel tedious at first. But once you build the habit of measuring everything and verifying alignment before you commit to a sound, it becomes second nature. The engineers I have seen struggle with reamping are almost always the ones who skip the verification steps and then spend hours wondering why their blended tones sound thin or phasey.
My honest advice: start simple. One amp, one microphone, one re-amp box. Get that chain sounding great before you add pedals, second microphones, or parallel processing. Complexity is easy to add once the foundation is solid. And trust your ears above all else. The measurements tell you when something is technically correct; your ears tell you when it actually sounds right. You need both.
Get professional feedback on your reamped mixes

Once you have captured your re-amped tones and blended them into your mix, the next challenge is knowing whether the tonal balance is actually working in context. Aubiomix is an online app where you can upload your mix and receive detailed, professional feedback on frequency balance, tonal clarity, and any masking issues affecting your reamped instruments. It is particularly useful for spotting problems like low-mid build-up from re-amped guitar amps or high-frequency harshness from close-miked speakers that are easy to miss on a single monitoring setup. If you want to get pro feedback on your latest production quickly and without booking studio time, Aubiomix gives you the kind of specific, mix-ready guidance that helps you move forward with confidence.
FAQ
What is reamping in music production?
Reamping is the process of sending a previously recorded clean DI signal back through a guitar amplifier and effects to capture new tones without re-recording the performance. It separates the creative decisions of performance and tone, giving producers full flexibility during mixing.
Do I need a dedicated re-amp box?
A dedicated re-amp box is strongly recommended. It converts balanced line-level DAW outputs into unbalanced instrument-level signals, preventing impedance mismatch and tonal degradation that occurs when connecting an interface output directly to an amp.
How do I fix latency after reamping?
Record a sharp transient through the reamp chain, then measure the sample offset between the original DI and the re-amped recording in your DAW. Nudge the re-amped track back by that exact number of samples to restore alignment.
Can reamping be used on instruments other than guitar?
Reamping works on any recorded instrument, including bass, drums, synths, and vocals. The workflow is identical to guitar reamping once levels are correctly matched at the re-amp box output.
What causes hum during reamping and how do I stop it?
Hum during reamping is almost always caused by a grounding loop in the signal chain. Engage the ground lift switch on your re-amp box as the first corrective step before adjusting any other gain or EQ settings.