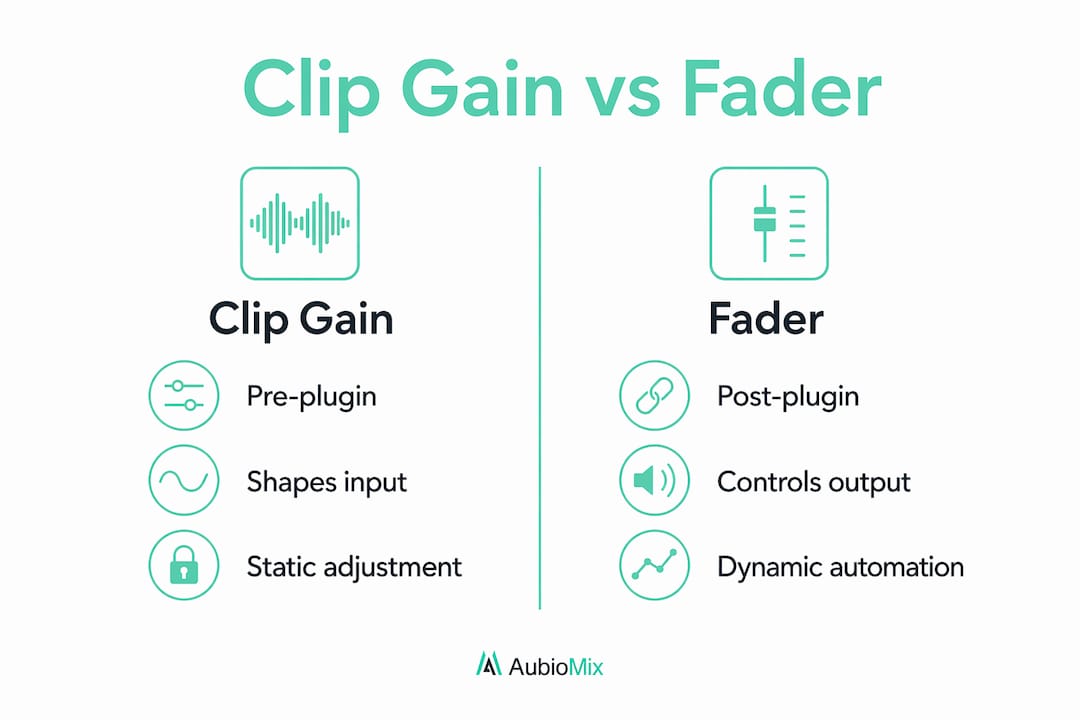
Clip gain is defined as a pre-fader, pre-plugin volume adjustment applied directly to an individual audio clip in your DAW, and it is the single most important level decision you will make in a mix session. Unlike your channel fader or volume automation, clip gain adjustments occur before any processing touches the signal, meaning your compressors, EQ, and saturation plugins receive a consistent, predictable input every time. The industry standard target is –18 dBFS RMS for plugin input levels, a figure that keeps analogue-modelled effects behaving exactly as their designers intended. Get this step right and everything downstream becomes easier, cleaner, and more musical.
What is clip gain and how does it differ from fader and automation control?
Clip gain, also known in some DAWs as event gain or clip volume, sits at the very beginning of your signal chain. Gain staging begins with clip gain, then automation and faders adjust relative mix balance afterwards. That ordering matters enormously in practice.

Here is a clear comparison of the three main audio level adjustment tools you have at your disposal:
| Control | Position in signal chain | Primary purpose | Affects plugin input? |
|---|---|---|---|
| Clip gain | Pre-plugin, pre-fader | Normalise source level | Yes |
| Channel fader | Post-plugin | Overall mix balance | No |
| Volume automation | Post-plugin | Dynamic expression over time | No |
The key takeaway from that table is simple. Only clip gain shapes what your plugins actually receive. Move your fader down to tame a loud snare, and your compressor still sees the original spike. Adjust the clip gain instead, and the compressor gets a calmer, more consistent signal to work with.
Volume automation is a powerful creative tool, but it belongs later in the process. Think of it as the fine brushwork on a painting that clip gain has already primed. Using automation to fix level inconsistencies before you have sorted your clip gain settings is working backwards, and it shows up in mixes as unpredictable compression behaviour and muddy transients.
Best practices for applying clip gain in your sessions
The most effective approach to clip gain is to treat it as an editing task, not a mixing task. Clip gain is an editing task distinct from mixing, and separating the two mentally helps you stay disciplined about when and how you apply it.
Here are the expert recommendations I follow on every session:
- Set clip gain before inserting any plugins. Your compressor's threshold and ratio settings are calibrated against an expected input level. Insert the compressor first and you will spend the rest of the session chasing a moving target.
- Divide long audio regions into smaller clips. A three-minute vocal take contains dozens of micro-level shifts. Split the region at phrase boundaries and adjust each clip individually for a far more consistent result.
- Target –18 dBFS RMS as your nominal level. Targeting –18 dBFS RMS prevents plugin distortion and ensures analogue-modelled saturation kicks in at the right threshold. Use a metering plugin like Youlean Loudness Meter or Waves PAZ Meters to confirm your levels.
- Raise quiet sections, lower loud ones. Audio segments are customised so quiet parts increase in gain and loud parts decrease before compression is applied. This is the core mechanical process of clip gain work.
- Keep adjustments non-destructive. Clip gain values are session metadata applied on-the-fly without modifying your source audio files. You can always reset to zero and start again without any loss of quality.
Pro Tip: Build a clip gain pass into your session template as a dedicated pre-mix stage. Label it clearly in your session notes and do not move on to plugin insertion until it is complete. This single habit will transform the consistency of your mixes.
Vocal tracks benefit most from this approach. A singer's performance naturally varies between verses, choruses, and ad-libs. Rather than letting your compressor work overtime to manage those swings, clip gain brings the whole performance into a tighter window before any processing begins. The compressor then handles musical dynamics rather than correcting volume errors.
What are the benefits of clip gain for dynamic range control?
Clip gain is the foundation of effective dynamic range control. Setting clip gain correctly gives compressors more musical control, preventing the over-reactive gain reduction that causes pumping, breathing, and unnatural transient behaviour.
Consider what happens without proper gain staging. A vocal clip that swings between –30 dBFS and –6 dBFS forces your compressor to apply wildly different amounts of gain reduction from phrase to phrase. The result is a vocal that sounds inconsistent and processed, even with a high-quality compressor. Bring those clips to a consistent –18 dBFS RMS first, and the compressor only needs to handle the natural expressiveness of the performance.
The numbered steps below show how dynamic range control improves at each stage of a well-executed clip gain workflow:
- Source audio is levelled. Clip gain brings all regions to a consistent nominal input level, removing gross inconsistencies.
- Compressor threshold becomes predictable. With a stable input, your compressor's threshold setting holds its meaning across the entire track.
- Gain reduction becomes musical. The compressor responds to performance dynamics rather than volume accidents, producing transparent and natural-sounding control.
- Automation becomes precise. Post-processing volume automation now shapes a signal that is already well-behaved, making subtle moves far more effective.
"The clip gain setting is often the most consequential level decision in a mix session." — MusicProductionWiki
That observation holds true across every genre and format. Whether you are mixing a dense electronic track or a sparse acoustic recording, the principle is identical. Stable input levels produce stable, musical results.
How do clip gain settings work across Pro Tools, Logic Pro, and Studio One?
Clip gain features vary between DAWs, and understanding those differences helps you work efficiently inside your preferred environment. Here is a practical overview of how the three most widely used DAWs handle this feature:
| DAW | Clip gain tool name | Access method | Key workflow note |
|---|---|---|---|
| Pro Tools | Clip Gain | Clip Gain Line overlay on clip | Adjustable directly on the clip in the Edit window |
| Logic Pro | Region Gain | Inspector panel or right-click menu | Applies per-region before channel strip processing |
| Studio One | Event Volume | Drag handle at top of event | Visible as a horizontal line on each audio event |
All three DAWs apply the adjustment pre-plugin and pre-fader, so the underlying principle is consistent. The workflow differences are cosmetic rather than functional. Pro Tools users tend to work with the clip gain line directly in the Edit window, which makes visual comparison between clips very fast. Studio One's event volume handle is similarly visual and intuitive for producers who prefer a drag-and-drop approach.
Emerging AI-based tools like Sonible's pure:level and 4LO Digital's autolevel offer automatic levelling as a faster alternative. AI-powered levelers are useful for speed but manual gain remains superior for detailed control. These tools work well for dialogue stacks or instrument buses where broad consistency is the goal, but they lack precision for artistic mixing where nuance and expression matter. Use them as a starting point if you are short on time, then refine manually.
Pro Tip: In Pro Tools, hold Ctrl and drag the clip gain line to adjust multiple selected clips simultaneously. In Logic Pro, select all regions on a track and use the Inspector's Region Gain field to apply a uniform offset. Both shortcuts save significant time on dense sessions.
For producers working across electronic music mixing formats, where sample libraries and recorded audio sit side by side, clip gain is the most reliable way to unify wildly different source levels before your processing chain begins.
Practical workflow: implementing clip gain step by step
A clear, repeatable workflow is what separates producers who use clip gain occasionally from those who use it consistently and effectively. Here is the step-by-step process I recommend for every new session:
- Import and organise your audio. Arrange all tracks and regions before touching any levels. A tidy session makes the clip gain pass faster and less error-prone.
- Set up a reference meter. Insert a metering plugin on your master bus or use your DAW's built-in level display. You need to see RMS levels clearly as you work.
- Start with the most important element. For most productions, that is the lead vocal or the kick drum. Set its clip gain to –18 dBFS RMS and use it as your reference point for everything else.
- Work through each track systematically. Adjust clip gain region by region, splitting clips at natural phrase boundaries where level shifts are significant.
- Insert plugins only after clip gain is complete. This is the discipline that makes the whole system work. Refer to the mix engineer workflow for a full breakdown of how this fits into a professional session structure.
- Use volume automation for expression, not correction. Once your clip gain pass is done, automation becomes a creative tool rather than a repair job.
Good clip gain results in easier volume riding and cleaner mixes. That is not an abstract benefit. It translates directly into fewer automation nodes, faster mix decisions, and a final result that holds up at every playback volume. For a deeper look at how this integrates with your full session structure, the guide on how to structure a mixing session covers the broader workflow in detail.
Key takeaways
Clip gain is the pre-plugin level adjustment that determines how every processor in your chain behaves, making it the most consequential gain decision in any mix session.
| Point | Details |
|---|---|
| Clip gain is pre-plugin | Adjust clip gain before inserting any effects to give processors a consistent input signal. |
| Target –18 dBFS RMS | This nominal level prevents distortion and ensures analogue-modelled plugins behave predictably. |
| Split regions for consistency | Divide long audio takes into smaller clips and adjust each individually for tighter level control. |
| Faders and automation come later | Channel faders and volume automation shape mix balance after processing, not before it. |
| Manual beats automatic | AI levellers offer speed but manual clip gain preserves nuanced dynamics and artistic expression. |
Why clip gain is the unsung hero of every great mix
I have reviewed hundreds of mixes through Aubiomix, and the single most common issue we flag is not poor EQ or weak compression. It is inconsistent gain staging before the plugin chain. Producers spend hours tweaking compressor settings and wonder why the mix still sounds uneven, when the real problem is that the compressor is receiving a wildly inconsistent input signal.
Clip gain is genuinely unglamorous work. There is no satisfying visual transformation, no dramatic before-and-after moment. You are just methodically levelling regions, one by one, before the creative mixing begins. But that discipline is exactly what separates a mix that translates well across systems from one that only sounds good on the speakers you mixed it on.
My honest recommendation for newer engineers is to spend at least as much time on your clip gain pass as you do on your compression settings. For experienced engineers, the lesson is to resist the temptation to skip this step when you are under time pressure. Though clip gain can be time-consuming, the payoff in mix clarity and ease of automation is real and measurable. Every minute you invest here saves you three minutes of chasing problems later in the session.
— Aubiomix
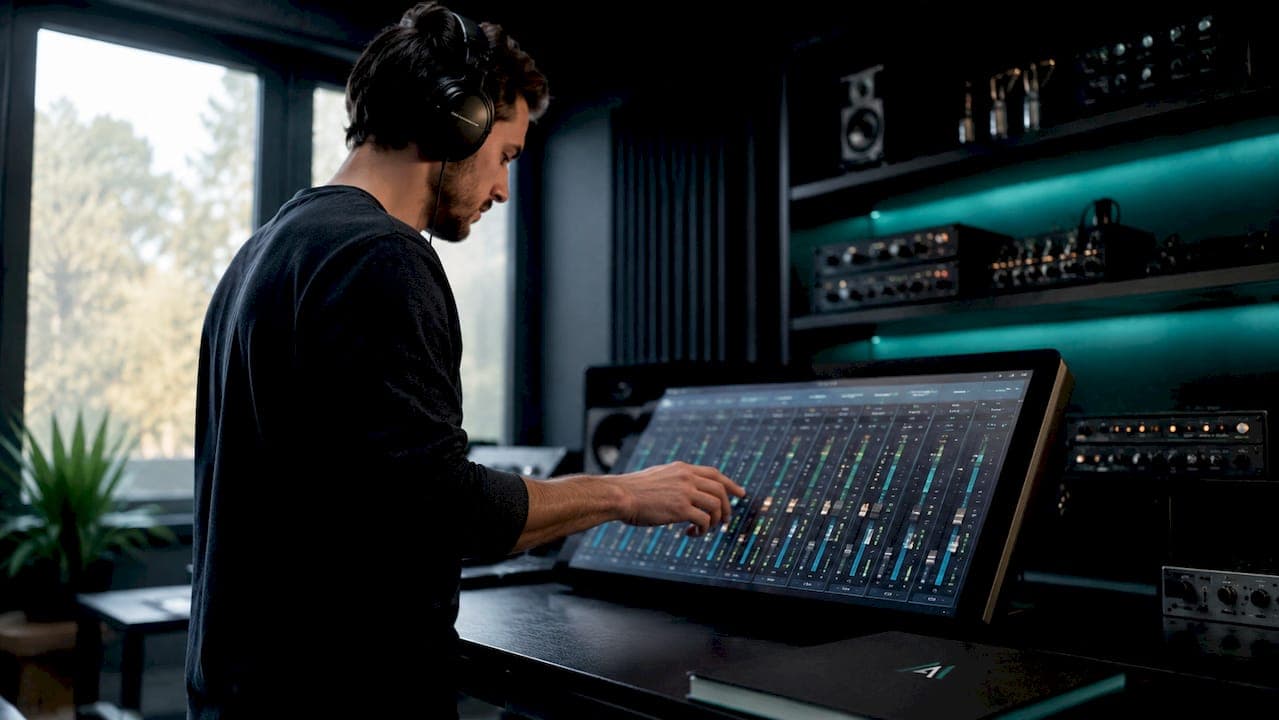
Get expert feedback on your gain staging with Aubiomix
Knowing the theory behind clip gain is one thing. Hearing exactly how your gain staging decisions are affecting your actual mix is another.

Aubiomix is an online app where you upload your audio file and receive detailed, pro-level feedback on your mixing and mastering, including specific analysis of your gain staging, dynamic range control, and level balance. Rather than guessing whether your clip gain pass is working, you get clear, actionable mix evaluation that tells you precisely what to fix and how. Whether you are working on your first serious production or your hundredth, objective feedback accelerates your progress faster than any tutorial. Upload your mix at Aubiomix and hear what your gain staging is really doing.
FAQ
What is clip gain used for in a DAW?
Clip gain is used to adjust the volume of an individual audio clip before any plugins or fader changes affect the signal. It is the primary tool for gain staging, ensuring processors receive a consistent, predictable input level.
Does adjusting clip gain change my original audio file?
No. Clip gain values are session metadata applied in real time during playback, leaving your original audio files completely unchanged. You can reset or modify the value at any time without any loss of quality.
What level should I target when setting clip gain?
The standard target is –18 dBFS RMS for plugin input levels. This nominal level prevents distortion in analogue-modelled plugins and ensures compressors respond musically rather than reactively.
How does clip gain vs track gain differ in practice?
Clip gain adjusts individual regions before processing, while track gain (your channel fader) adjusts the overall output level after all plugins have processed the signal. Use clip gain for gain staging and the fader for mix balance.
Should I use an AI leveller instead of manual clip gain?
AI levellers like Sonible's pure:level are useful for speed, but manual clip gain remains superior for preserving nuanced dynamics and artistic expression. Use AI tools as a rough starting point, then refine manually for professional results.