

Stem mixing is the practice of grouping related tracks into premixed subgroups, called stems, then balancing and processing those groups rather than individual raw tracks. Think of it as organising your mix into tidy bundles: a drums stem, a bass stem, a vocals stem, guitars, synths/keys, and an FX stem. Each bundle is exported as a single stereo (or mono) file, and when all stems are aligned from the same start point and played back together, they reproduce the full mix exactly. It sits neatly between sending a single stereo bounce and handing over hundreds of raw multitracks, which is precisely why so many producers and engineers reach for it.
When should you use stems? Here are the most common scenarios:
- Remote collaboration: you want to send a manageable file set to an engineer without sharing every raw recording.
- Revision control: a client needs the vocals louder without triggering a full session reopen.
- Pre-master flexibility: your mastering engineer wants a little room to breathe across groups before the final chain.
- Remix and alternate versions: a remixer needs isolated groups to rework the arrangement.
- Budget or time constraints: a full multitrack mix is overkill, but a stereo bounce gives the engineer no room to manoeuvre.
Table of Contents
- What is a stem in mixing, exactly?
- Why mixing from stems beats a stereo bounce
- How does stem mixing compare to stem mastering and multitrack mixing?
- How to prepare your stems: the export checklist
- How to print stems in your DAW and verify they are correct
- Techniques for mixing with stems and pitfalls to avoid
- When is stem mixing the right choice?
- Key takeaways
- The organisation gap nobody talks about
- Get objective feedback on your mix before you print stems
- Useful sources and further reading
What is a stem in mixing, exactly?
A stem is a premixed subgroup exported as a single audio file, mono or stereo, that sums with the other stems to recreate the final mix when all files are aligned from the same start point. The routing path is straightforward: individual tracks feed into a subgroup bus, processing is applied on that bus (compression, EQ, saturation), and the result is printed to a new audio file. That processing is now "baked in" to the stem.
This is where a lot of producers get tripped up. A stem is not the same as a raw track, and it is not the same as a bus in your session. Here is a quick way to think about it:
- Track: a single recorded or programmed element (one kick drum, one vocal take, one synth layer).
- Bus: a routing channel inside your DAW that sums multiple tracks in real time.
- Stem: a printed audio file that captures the output of a bus, with all processing baked in, ready to be imported into any DAW or session.
Many producers confuse stems with multitracks; multitracks are the individual unprocessed recordings, while stems are premixed subgroups with processing already printed. Sending multitracks gives an engineer total control. Sending stems preserves your sonic decisions while still giving them meaningful room to work.
Common stem groupings used in practice: Drums (kick, snare, toms, cymbals summed), Bass (bass guitar or synth bass), Lead Vocals, Backing Vocals, Guitars, Synths/Keys/Pads, FX (reverb tails, delays, risers, atmospheres). Four to six stereo groups is the most common count for a typical music production.
The groupings are chosen for both sonic and workflow reasons. Drums and bass are grouped because they share low-end energy and are often processed together for glue. Vocals are separated because they almost always need independent level and tonal adjustments. FX get their own stem so a mastering engineer can tame reverb tails without touching the dry signal.
Why mixing from stems beats a stereo bounce
The core benefit is control without complexity. Rather than handing an engineer a single locked stereo file or overwhelming them with 80 individual tracks, stems give both parties a workable middle ground.
Here are the practical advantages:
- Faster revisions: raising the entire vocal group takes seconds rather than reopening every channel.
- Consistent results across mixes: the producer's internal balance is preserved, so the engineer polishes rather than rebuilds.
- Easier alternate versions: a radio edit, an instrumental, or a TV mix can be created by muting or adjusting individual stems.
- Smaller file sets for engineers: six stereo WAV files are far more portable than a full session folder.
- Mastering prep flexibility: a mastering engineer can apply targeted processing to the drum stem or the vocal stem rather than fighting the stereo bus.
Producers report that the biggest win is reduced revision fatigue: stems let them request broad changes without forcing an engineer to reopen hundreds of tracks. That translates directly into lower costs and faster turnaround on small adjustments.
Consider a real-world scenario: a self-producing artist in Manchester records and arranges everything at home, then sends stems to a mix engineer in London. The engineer receives six clean stereo files, imports them in minutes, and has enough control to fix the low-end relationship between kick and bass without touching the producer's carefully crafted drum processing. Everyone wins.

Pro Tip: Structure your stems to preserve creative intent without overbaking. A gentle glue compressor on the drum bus is worth printing. Aggressive pitch correction on individual vocals is not — leave corrective repairs as editable elements in your session and only print the stem once you are happy with the underlying performance.
How does stem mixing compare to stem mastering and multitrack mixing?
These three approaches are often conflated, and choosing the wrong one costs time and money. Here is a concise breakdown.
- Multitrack mixing: the engineer receives every individual track, unprocessed or lightly processed. Maximum control, longest turnaround, highest cost.
- Stem mixing: the engineer receives premixed subgroups. Moderate control, faster turnaround, lower cost than multitrack.
- Stem mastering: the mastering engineer receives a small number of grouped stems (often 4–6) alongside or instead of a stereo mix. More creative options than a single stereo file, but less control than a full mix session.
| Approach | Control granularity | Revision ease | Typical turnaround | Best for |
|---|---|---|---|---|
| Multitrack mixing | High (track-level) | Complex | Longer | Full creative remixes, corrective work |
| Stem mixing | Medium (group-level) | Quick | Moderate | Collaboration, client revisions, budget projects |
| Stem mastering | Low-medium (group-level) | Limited | Fast | Final polish with a little extra flexibility |
| Stereo master | None | None | Fastest | Finished, approved mixes only |
Ask for stems when:
- You need to make group-level adjustments without a full session reopen.
- You are collaborating remotely and do not want to share raw recordings.
- Your mastering engineer has requested them for additional processing flexibility.
- You are delivering to a sync licensing context where a music-and-effects (M&E) stem is required separately from dialogue.
- You want to create alternate versions (instrumental, TV mix, clean edit) efficiently.
Stem mastering, by contrast, is a mastering-stage decision. The stems give a mastering engineer limited multichannel processing across groups, but it remains distinct from a full mix. Do not send stems to a mastering engineer expecting them to fix mix-level problems — that is a stem mixing job, not a mastering one.
How to prepare your stems: the export checklist
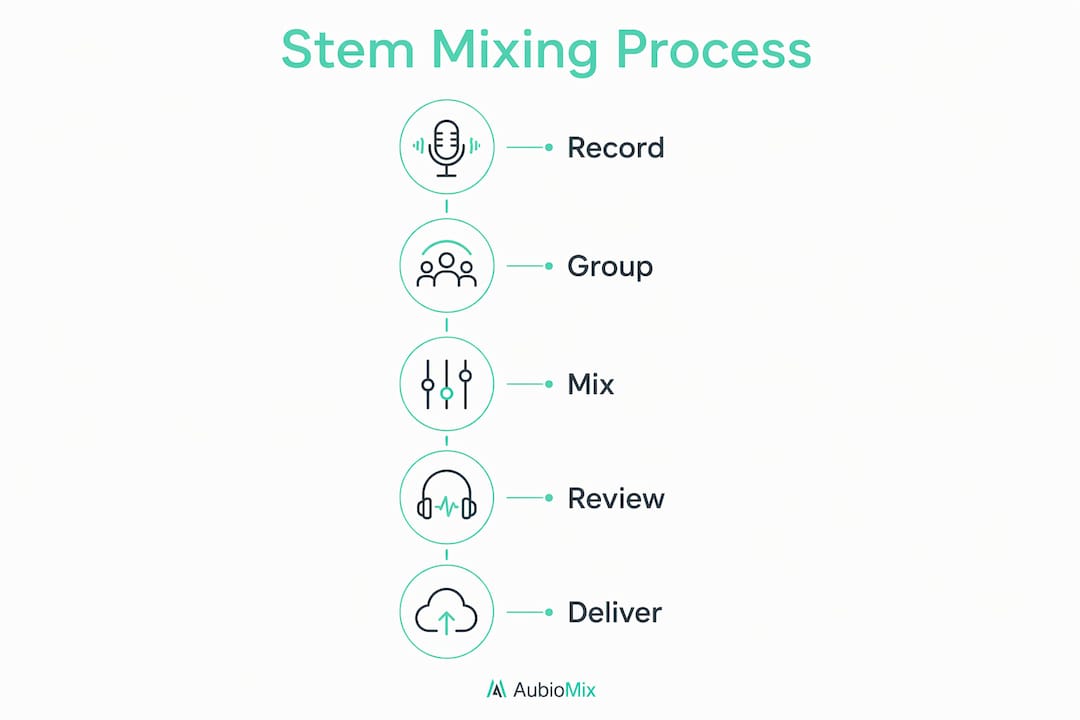
Good stem prep is the difference between a smooth session and a frustrated engineer asking for reprints. Follow this numbered checklist before you send anything.
- Back up your session first. Save a full project backup before you start bouncing. Label it clearly with the date and version number.
- Clean up unused tracks and regions. Remove any muted, disabled, or placeholder tracks. Tidy regions so there are no stray audio clips outside the arrangement.
- Confirm your routing. Check every track feeds into the correct subgroup bus. A synth accidentally routed to the drum bus will ruin both stems.
- Set your start point to bar 1 (or timecode 0). Every stem must begin from exactly the same start point, including a bar of silence before the first audio event. This is non-negotiable for sample-accurate alignment.
- Check headroom on each stem bus. Aim for peaks no higher than -3 dBFS on individual stems, with the master bus sitting around -6 dBFS before the limiter. This gives the receiving engineer room to work without clipping.
- Bypass your master bus limiter before bouncing. The engineer needs headroom, not a squashed ceiling. Print stems without the master limiter engaged.
- Choose the right file format. Export as 24-bit WAV at the session's native sample rate (typically 44.1 kHz or 48 kHz). Do not convert sample rates during the bounce.
- Name your files clearly. Use a consistent convention:
SongTitle_Drums_v1.wav,SongTitle_Bass_v1.wav, and so on. Avoid spaces and special characters in filenames. - Organise into a labelled folder. Create one folder per song, named with the song title and version. Include a brief text file listing the stem names, sample rate, bit depth, and any notes for the engineer.
- Include a rough mix reference. Export a stereo bounce of your session alongside the stems. The engineer uses this to understand your intended balance before they start.
For further detail on labelling and normalising headroom, the stem export guide on the Aubiomix blog covers the full process.
Quick DAW-specific notes:
- Pro Tools: use the Bounce to Disk or Track Freeze/Export function; confirm your session start is set to 01|01|000 and that all tracks share the same start point.
- Logic Pro: use Bounce in Place per bus, or File > Export > All Tracks as Audio Files; set the cycle range to include pre-roll silence from bar 1.
- Ableton Live: export each return/group track via File > Export Audio/Video; set the export range to include the full arrangement from bar 1.
- Reaper: use the Render Matrix to select specific tracks or buses; set the render start to the project start with silence included.
How to print stems in your DAW and verify they are correct
Printing stems is only half the job. Verifying them in a fresh session is what separates a professional delivery from a potential reprint.
Per-DAW printing approach:
- Pro Tools: route each instrument group to an Aux bus, then record-enable a new audio track assigned to that bus. Hit record from bar 1 with pre-roll. Alternatively, use Bounce to Disk with the "Offline Bounce" option for speed, but check for any plugin latency compensation issues.
- Logic Pro: solo each summing stack or bus and use Bounce in Place. Confirm the resulting file starts at bar 1 and includes the pre-roll silence.
- Ableton Live: group your tracks into Group Tracks, then export each Group Track individually. Use "Export Audio/Video" and set the loop brace to cover the full arrangement including any pre-roll.
- Reaper: open the Render Matrix (File > Render), tick the stems you want, set the render bounds to "Entire project", and render. Reaper's matrix approach is one of the fastest for multi-stem exports.
Verification checklist (run this before you send anything):
- Import all stems into a brand-new, empty session.
- Confirm every stem starts at exactly the same position (bar 1 / timecode 0).
- Solo each stem and listen for unexpected content (bleed from the wrong group, missing elements).
- Sum all stems together and compare against your reference mix. The summed result should match your reference closely.
- Check phase: flip the polarity on one stem and listen for obvious cancellation issues that indicate a routing error.
- Confirm sample rates match across all files. A mismatch will cause pitch and timing drift.
Common export pitfalls to watch for:
- Offline bounce artefacts from plugins that do not support offline rendering (certain convolution reverbs, some hardware emulations). If in doubt, use real-time bounce.
- Mismatched sample rates between stems, especially if you have imported loops or samples from external sources.
- Forgetting to bypass the master bus limiter, which compresses the stems and removes headroom.
- Printing stems with automation that references absolute time rather than bar positions, which can cause unexpected level jumps on re-import.
Techniques for mixing with stems and pitfalls to avoid
Working from stems requires a slightly different mindset than working from raw multitracks. Here is what to do and what to avoid.
Do's:
- Start with a rough balance pass across all stems before adding any processing.
- Use bus processing (glue compression, gentle EQ) on each stem to add cohesion without touching the baked-in decisions.
- Reference the producer's rough mix constantly. The stems should sum to something close to that reference before you touch a single plugin.
- Communicate with the producer about what is and is not baked in. A quick note ("the drum stem has parallel compression printed; the vocal stem is dry") saves enormous time.
- Keep automation decisions editable where possible rather than printing them into the stem.
Don'ts:
- Do not add heavy processing that duplicates what is already baked in. If the drum stem already has a compressor printed, adding another aggressive compressor on top creates double-processing and kills transients.
- Do not assume a stem is phase-coherent with the others without checking. Always run the verification checklist.
- Do not accept stems with clipping or peaks above -1 dBFS. Ask for a reprint with proper headroom.
- Do not skip the reference mix. Without it, you are guessing at the producer's intent.
Pro Tip: Deciding what to bake into a stem is one of the most important calls you make as a producer. Glue compression and broad tonal shaping on a drum bus? Print it. Corrective repairs, heavy automation, or anything you might want to revisit? Leave it editable in your session and only commit once you are certain. Think of the stem as a photograph: once it is taken, the moment is fixed.
For guidance on what to leave to the engineer versus what to commit, the mixing chain best practices guide is worth a read alongside this.
When is stem mixing the right choice?
Stem mixing is not always the answer, but it is the right answer more often than producers realise. Here are the scenarios where it consistently delivers.
Stem mixing works well when:
- You are collaborating remotely and want to preserve your internal balance without sharing raw sessions.
- Budget or time constraints make a full multitrack mix impractical.
- You are preparing for mastering and want to give the mastering engineer a little more flexibility than a stereo bounce allows.
- You need to create alternate versions (instrumental, clean edit, TV mix) without reopening the full session.
- You are delivering stems for a sync licensing context, where separate music and effects stems are a standard requirement. Understanding music licensing for film and TV makes clear why M&E stems are often contractually required.
Send stems when:
- The engineer has confirmed they work from stems and has provided a stem template or naming convention.
- Your session is too large or too DAW-specific to share as a raw project file.
- You have a clear artistic vision you want preserved but need a professional to finalise balance and cohesion.
- You are on a tight revision budget and want to minimise the cost of small adjustments.
- You are delivering to a platform, broadcaster, or sync agent that requires discrete audio groups.
When stems are not the right call: if the mix needs significant corrective work (tuning, timing, noise removal), send multitracks. Stems lock in those problems. Similarly, if the engineer is going to rebuild the arrangement from scratch, stems are too restrictive.
Stem mixing is, as Sound On Sound describes it, the pragmatic sweet spot for self-producing artists who have a clear artistic vision but lack a high-end monitoring environment. It preserves the producer's intent while allowing an engineer to add polish, which is exactly the scenario most independent producers find themselves in.
Key takeaways
Stem mixing is the most practical middle ground between a stereo bounce and a full multitrack session, and getting the prep right is what makes it work.
| Point | Details |
|---|---|
| Definition | A stem is a premixed subgroup exported as a single audio file that sums with others to recreate the full mix. |
| Common groupings | Drums, bass, vocals, guitars, synths/keys, and FX — typically 4–6 stereo stems per song. |
| Headroom rule | Aim for peaks no higher than -3 dBFS on individual stems; bypass the master bus limiter before bouncing. |
| Sample-accurate alignment | Every stem must start from bar 1, including pre-roll silence, to avoid timing drift on re-import. |
| Aubiomix for pre-print checks | Upload your mix to Aubiomix before printing stems to catch phase issues, level imbalances, and masking problems early. |
Three-item checklist before you export:
- Bypass the master bus limiter and confirm peaks are below -3 dBFS on each stem bus.
- Set the export start to bar 1 with pre-roll silence included on every stem.
- Import all stems into a fresh session and sum them against your reference mix before sending.
The organisation gap nobody talks about
Here is something worth saying plainly: most stem-related problems are not technical. They are organisational. In years of working with audio productions, the reprints and delays that cause the most friction almost always trace back to the same root causes: stems named "Final_FINAL_v3_USE_THIS.wav", start points that do not match, or a master bus limiter that was left engaged during the bounce.
The technical side of stem mixing is genuinely straightforward once you understand the routing. What trips people up is the discipline of treating the export as a deliverable, not an afterthought. A stem session is a communication between you and another professional. The quality of that communication determines the quality of the result.
We would also encourage producers to be honest about what is baked in. An engineer who knows the drum stem has parallel compression printed will work with it intelligently. An engineer who discovers it mid-session will waste time second-guessing every processing decision. A brief text file in the stem folder, listing what is printed and what is not, takes five minutes to write and saves hours of confusion.
Before you print anything, running your mix through a tool like Aubiomix to catch phase issues, frequency masking, and headroom problems is one of the smartest habits you can build. It is far cheaper to fix a problem before the stems are printed than to ask for a reprint after the engineer has already started work.
Get objective feedback on your mix before you print stems
Printing stems commits your decisions. Before you do that, it is worth knowing whether your mix actually holds up across different playback systems, whether your low end is masking the kick, and whether your stereo width is causing phase problems on mono devices. That is exactly what Aubiomix is built for.

Upload your audio file and Aubiomix analyses it across 15+ areas of mixing and mastering, including compression, EQ, frequency masking, stereo width, phase coherence, loudness, and mastering prep. You get a detailed written and visual report with specific steps to address each issue, not vague suggestions.
- Pre-print phase checks: catch polarity and phase coherence problems before they are locked into your stems.
- Headroom and loudness warnings: confirm your levels are export-ready before you bypass the limiter.
- Frequency masking analysis: identify clashes between your stem groups (kick vs bass, vocals vs synths) while you still have the session open to fix them.
Check the evaluation framework to see exactly what the analysis covers, or review a sample report to understand the depth of feedback you will receive. When you are ready, upload your mix at aubiomix.com and get your report in minutes.
Useful sources and further reading
- Stem (audio) — Wikipedia): clear foundational definition of stems in music, film, and live sound contexts, including the D-M-E (dialogue, music, effects) convention used in film post-production.
- Stem mixing and mastering — Wikipedia: covers the technical definition of stem mixing as a process that sits between multitrack mixing and mastering.
- Mix Rescue: Stem Mixing Mastering — Sound On Sound: practical scenario-based article from one of the UK's most authoritative audio publications; excellent for understanding when and why stems are used in real sessions.
- Stem mastering: How and when to use stems — iZotope: clear explanation of how stem mastering differs from stem mixing, with guidance on when to request stems from a mastering perspective.
- Mastering stem mixing workflow — SonusGearFlow: detailed workflow guide covering organisation, labelling, headroom, and sample-accurate alignment.
- How to prepare stems and files for a mixing engineer — Mark Yardley: producer-facing checklist from a working mix engineer; covers naming conventions, folder structure, and export settings.
- Stem mixing: definition and detailed explanation — Audio Drama Production: accessible glossary entry that explains the definition and benefits of stem mixing in plain language.
- The beginner's guide to mixing with stems — Joey Sturgis Tones: approachable introduction to stem concepts, portability between DAWs, and the trade-offs versus multitrack sessions.