

Exporting stems for a mixing engineer means preparing clean, properly labelled, and aligned audio files in the correct format so the engineer can work without friction. Done well, it saves hours of session prep and gives your mix the best possible start. Done poorly, it creates confusion, delays, and a mix that never quite captures what you heard in your head. Whether you are a producer sending tracks for the first time or a seasoned artist refining your workflow, getting this right is one of the most valuable skills you can build.
What file format should you use to export stems for a mixing engineer?
The professional standard for mixing engineer file exports is the WAV format at 24-bit depth, matched to your session's native sample rate. 24-bit WAV files at 44.1kHz or 48kHz are the accepted industry baseline. That combination preserves the full dynamic range of your audio and prevents the artefacts that come from format conversion.
Never send MP3s to a mixing engineer. Lossy compression permanently removes audio data, and that data cannot be recovered. Even a high-bitrate MP3 introduces subtle distortion that becomes audible once the engineer starts pushing levels and applying processing.
Here is what to check before you export:
- Format: WAV (not AIFF, not MP3, not FLAC unless specifically requested)
- Bit depth: 24-bit as standard; only drop to 16-bit if the engineer explicitly asks
- Sample rate: Match your session exactly, either 44.1kHz or 48kHz
- Avoid sample rate conversion: Exporting at a different rate than your session introduces conversion artefacts
Pro Tip: Set your DAW's export settings once, save them as a preset, and use that preset every time. A dedicated export template with predefined settings ensures consistent quality project after project without having to remember the correct values each time.
How do you align and consolidate stems correctly?
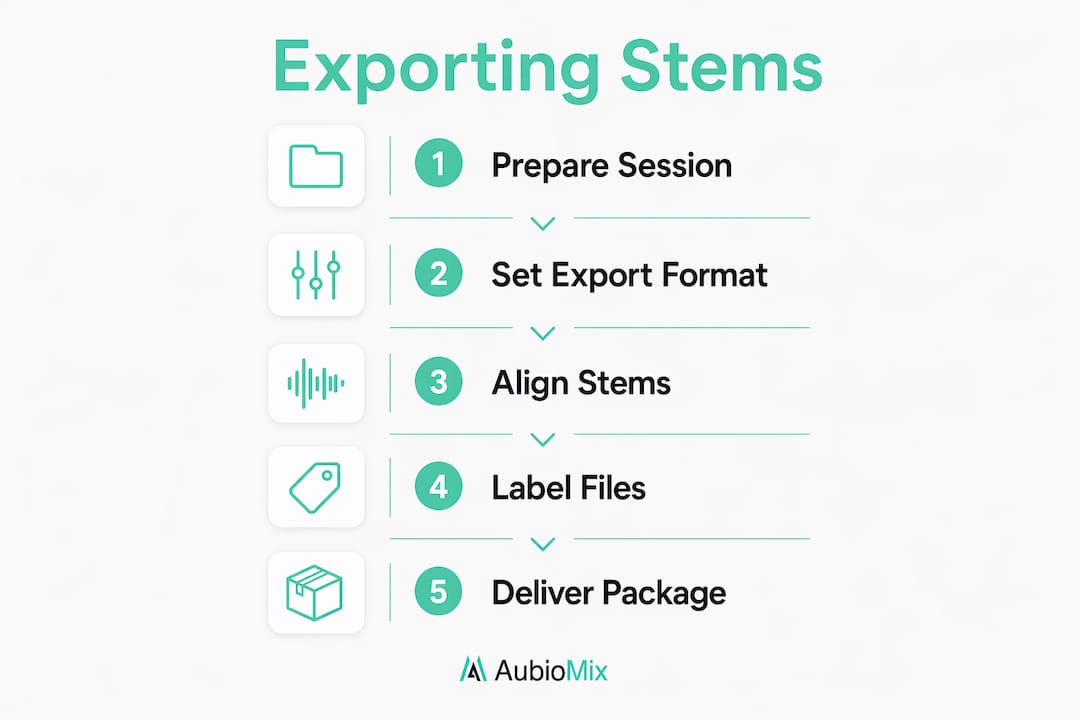
Every stem must start at bar 1, beat 1, and run for the full length of the song. This single rule is the most important technical requirement in the entire stem export process. Proper alignment from bar 1 means every file drops perfectly into the engineer's session without manual repositioning, which can save 20 or more minutes per project.

The concept goes by different names depending on your DAW. In Logic Pro it is called "consolidate." In Ableton Live you "flatten" or "export audio." In Pro Tools you use "consolidate clip." In FL Studio you render the full song length. The terminology differs, but the goal is identical: one continuous audio file from the very start of the session to the very end.
Follow these steps for clean consolidation:
- Set your export range from bar 1, beat 1 to at least 4 bars past the final note or sound in the track.
- Include silence at the start if an instrument does not enter until later. The silence is not wasted space; it is what keeps everything in sync.
- Add a tail after the last sound. At least 4 bars of post-final-note tail allows reverb and delay decays to ring out fully without being cut off.
- Bounce each track individually. Do not group unrelated instruments into a single file unless the engineer has asked for grouped stems.
- Check the file length. Every exported file should be exactly the same duration. If they are not, something went wrong.
Pro Tip: After exporting, import all your stems into a blank DAW session and check that everything lines up. This takes five minutes and catches timing errors before the engineer ever sees the files.
How should you label and organise your stem files?
Clear, consistent file names are the difference between an engineer who dives straight into the creative work and one who spends the first hour renaming files. Descriptive file names that include instrument type, take number, and dry or wet designation save mixing engineers significant time and prevent confusion.
A reliable naming format looks like this: 01_Kick_Dry.wav, 02_Snare_Dry.wav, 15_LeadVox_Dry.wav, 16_LeadVox_FX.wav. The number prefix keeps tracks in a logical order when sorted alphabetically. The instrument name tells the engineer exactly what they are looking at. The dry or wet tag tells them what processing is already applied.
Key labelling rules to follow:
- No spaces in filenames. Use underscores instead. Spaces cause import errors in some DAWs and on certain operating systems.
- No special characters. Avoid parentheses, ampersands, accented letters, and symbols. Naming consistency prevents DAW import errors across platforms.
- Number your tracks logically. Start with drums, then bass, then harmonic elements, then melodic leads, then vocals. This mirrors how most engineers build a mix.
- Label alternate takes clearly. Use suffixes like
_TakeAor_TakeBso the engineer knows which version to use and which is the backup.
Organise your files into subfolders by instrument group: a Drums folder, a Bass folder, a Synths folder, a Vocals folder. Then zip the entire package into one archive before sending. A tidy folder structure signals professionalism and makes a strong first impression.
| Folder | Example contents |
|---|---|
| Drums | 01_Kick_Dry.wav, 02_Snare_Dry.wav, 03_HiHat_Dry.wav |
| Bass | 10_Bass_Dry.wav |
| Synths | 20_Pad_Dry.wav, 21_Arp_Dry.wav |
| Vocals | 30_LeadVox_Dry.wav, 31_LeadVox_FX.wav, 32_BackingVox_Dry.wav |
Should you export stems dry or with effects?
The default answer is dry. Mixing engineers need clean, unprocessed audio to make proper decisions about EQ, compression, reverb, and spatial placement. Sending stems with heavy processing already baked in removes those choices and can make certain problems impossible to fix.
That said, some effects are part of the sound itself and should be kept. Vocal tuning (Melodyne or Auto-Tune correction) stays on, because the pitch-corrected performance is the performance. Guitar amp simulation stays on if the tone is integral to the track's character. Drum samples that have been layered and processed as a unit can be printed together. The test is simple: if removing the effect would change the fundamental identity of the sound, keep it.
When in doubt, send two versions: a dry file and a wet file. Label them clearly with
_Dryand_FXsuffixes. This gives the engineer full flexibility without forcing them to guess your intent. Reference mixes are cited as the single most valuable file after the stems themselves, so always include your rough mix as a separate stereo reference.
One thing to remove without exception: master bus processing. Any limiter, multiband compressor, or loudness maximiser sitting on your master output must be bypassed before you export. Mixing engineers require dry files without master bus processing so they can build the mix from scratch with full headroom. Sending a pre-limited mix is one of the most common and most frustrating mistakes engineers encounter.
How do you prepare and deliver the full stem package?
A complete stem package is more than just audio files. The engineer needs context to understand your vision, and that context comes from the materials you send alongside the stems. A single, centralised delivery link with all files is far better than multiple emails or expiring cloud folders.
Here is what to include in every delivery:
- Rough stereo mix. Label it clearly as
Reference_Mix.wav. This is the single most important contextual file you can send. - README or notes document. Include the BPM, the key of the song, any tempo changes, and a brief description of the vibe and references you have in mind.
- Alternate takes. If you recorded multiple vocal performances or guitar parts, include the best alternatives clearly labelled.
- A delivery checklist. Standardised checklists prevent repeated file problems and save mixing time on both sides.
Pro Tip: Use a reliable file transfer service that does not expire quickly and keeps all your files in one place. Compress everything into a single ZIP archive before uploading. Name the archive with the artist name, song title, and date, for example ArtistName_SongTitle_Stems_March2026.zip. This makes version control simple for everyone involved.
For producers working in electronic music, the electronic music mixing guide covers additional considerations specific to synthesiser-heavy productions, including how to handle layered sounds and sidechain-dependent elements.
Key takeaways
Exporting stems correctly requires WAV format at 24-bit depth, full-length consolidation from bar 1, dry files without master bus processing, and a complete delivery package with a reference mix and session notes.
| Point | Details |
|---|---|
| Use 24-bit WAV at native sample rate | Match your session's exact sample rate to prevent artefacts and preserve full audio quality. |
| Consolidate from bar 1 to song end | Every stem must be the same length, starting at bar 1, beat 1, to align perfectly in the engineer's session. |
| Export stems dry by default | Remove master bus processing and send clean files; include a wet version only for effects integral to the sound. |
| Label files with a consistent naming convention | Use numbered prefixes, instrument names, and dry or wet tags to save the engineer time and prevent confusion. |
| Send a complete package with a reference mix | Include your rough stereo mix, BPM, key, and session notes in one centralised, clearly named ZIP archive. |
What I have learned from watching stem exports go wrong
After working with producers across all genres, the pattern is clear: the biggest delays in mixing projects come not from creative disagreements but from avoidable file problems. A stem that starts two bars late. A master bus limiter left on. A vocal file named "final_FINAL_v3_USE THIS ONE.wav." These are not small inconveniences. They cost real time and break the creative momentum that makes a mix session exciting.
The habit I recommend most strongly is sending a checklist to your producer or client before they export. Not after. A simple document listing the format, bit depth, sample rate, consolidation rules, and naming conventions prevents 90% of the problems I see. It also signals to the engineer that you respect their time, which changes the entire tone of the collaboration.
One thing that surprises producers is how much the reference mix matters. Engineers are not mind readers. They need to hear what you were going for, even if your rough mix is imperfect. A rough mix with a note saying "I want the low end to feel like this but the vocals to sit higher" gives the engineer a creative target. Without it, they are guessing. The mix engineer workflow guide goes deeper on this dynamic if you want to understand how engineers actually use the materials you send.
The producers who get the best mixes are not always the ones with the most expensive gear. They are the ones who communicate clearly, prepare thoroughly, and treat the export process as part of the creative work, not an afterthought.
— Aubiomix
Aubiomix: professional feedback before you send your stems
Getting your stems right before they reach the engineer is half the battle. Aubiomix gives music producers and mixing engineers a way to upload their audio and receive detailed, professional-grade feedback on the mix and master, with specific steps to address what needs attention.

Before you zip up your stems and hit send, run your reference mix through Aubiomix to catch balance issues, frequency problems, or dynamics concerns that would otherwise land in the engineer's lap. The feedback is specific, fast, and built around the same standards professional engineers use. It is the quality check that sits between your session and the mixing engineer's inbox, and it makes every collaboration start on stronger ground.
FAQ
What file format should stems be exported in?
Export stems as 24-bit WAV files at your session's native sample rate, either 44.1kHz or 48kHz. Never send MP3s, as lossy compression permanently removes audio data.
Why must every stem start at bar 1, beat 1?
Starting every stem at bar 1, beat 1 means all files align automatically when imported into the engineer's DAW, saving 20 or more minutes of manual repositioning per project.
Should I export stems with or without effects?
Export stems dry by default. Keep effects only when they are fundamental to the sound, such as vocal tuning or guitar amp simulation, and send a separate wet version labelled with an _FX suffix.
What should I include alongside my stems?
Include a rough stereo reference mix, a README with BPM, key, and tempo information, clearly labelled alternate takes, and all files compressed into a single ZIP archive with a descriptive name.
How do I name stem files correctly?
Use a numbered prefix, instrument name, and dry or wet tag with underscores instead of spaces, for example 01_Kick_Dry.wav or 30_LeadVox_FX.wav. Avoid special characters and spaces to prevent DAW import errors.