
Compression is defined as the automatic reduction of gain above a set threshold, used in music production to control dynamic range and shape the character of sound. Every compressor, from FabFilter Pro-C 2 to a vintage hardware unit, works on the same principle: when a signal exceeds the threshold, gain reduction kicks in, and makeup gain brings the level back up. The result is a tighter, more controlled sound with greater presence in the mix. Understanding the core controls, threshold, ratio, attack, release, and knee, gives you real power over how your music feels and hits.
How do compression controls affect your sound?
Compression controls work together as a system, not as isolated knobs. Each parameter shapes a different aspect of how gain reduction behaves, and understanding all of them is what separates producers who use compression confidently from those who just copy presets.
Here is what each control does:
- Threshold: The level at which gain reduction begins. Lower the threshold and the compressor engages more often. A good starting point is to set the threshold so you see 3–6 dB gain reduction on the loudest peaks. That range gives you meaningful control without crushing the life out of the signal.
- Ratio: The degree of gain reduction above the threshold. A ratio of 4:1 means every 4 dB over the threshold results in only 1 dB of output increase. Ratios above 8:1 push into limiting territory, where peaks are clamped hard. Use lower ratios (2:1 to 4:1) for transparent glue, and higher ratios for aggressive peak control.
- Attack: How quickly the compressor responds after the threshold is crossed. A fast attack of 1–5 ms softens transients, rounding off the initial punch. A slow attack of 20–100 ms lets the transient through before gain reduction engages, preserving the snap and impact of drums or plucked instruments.
- Release: How quickly gain reduction stops once the signal drops below the threshold. A release that is too fast causes pumping, that audible breathing effect where the compressor visibly chases the signal. A slower release smoothes everything out but can make the compression feel heavy if overdone.
- Knee: Soft knee applies gain reduction gradually as the signal approaches the threshold, giving a more natural, transparent feel. Hard knee switches gain reduction on abruptly at the threshold, which sounds more aggressive and defined. Soft knee works well on vocals and acoustic instruments; hard knee suits drums and transient-heavy material.
The time-based controls do far more than just slow down or speed up the compressor. They actively sculpt the amplitude envelope of the sound, shifting the balance between the transient attack and the sustain tail. That is where the real character of compression lives.
Pro Tip: Watch your gain reduction meter rather than listening to the compressor in isolation. Aim for 3–6 dB of gain reduction on peaks as your starting reference, then adjust attack and release by ear from there.

What are the main types of compressors?
Different compressor designs produce distinctly different sounds, even at identical settings. The circuit topology, whether analogue or emulated digitally, shapes the character of the gain reduction envelope in ways that ratio and threshold alone cannot explain.
| Compressor Type | Sonic Character | Typical Use Case | Plugin Example |
|---|---|---|---|
| VCA | Fast, transparent, punchy | Drums, buses, mix glue | SSL G-Bus Compressor |
| FET | Aggressive, colourful, forward | Snare, vocals, rock guitars | UA 1176 |
| Optical | Smooth, musical, programme-dependent | Vocals, bass, acoustic instruments | Teletronix LA-2A |
| Variable-Mu | Warm, slow, vintage glue | Stereo bus, mastering | Manley Variable Mu |
VCA compressors like the SSL G-Bus are the workhorses of modern mixing. They respond quickly and add a punchy, forward quality that suits drums and full mixes. FET designs, modelled on units like the Universal Audio 1176, are more aggressive and colourful, adding a gritty energy that works brilliantly on snare and lead vocals. Optical compressors such as the LA-2A respond to average programme level rather than peak level, which gives them a musical, almost self-adjusting quality. Variable-Mu designs are the slowest and warmest of the group, best suited to mastering or gentle bus glue.
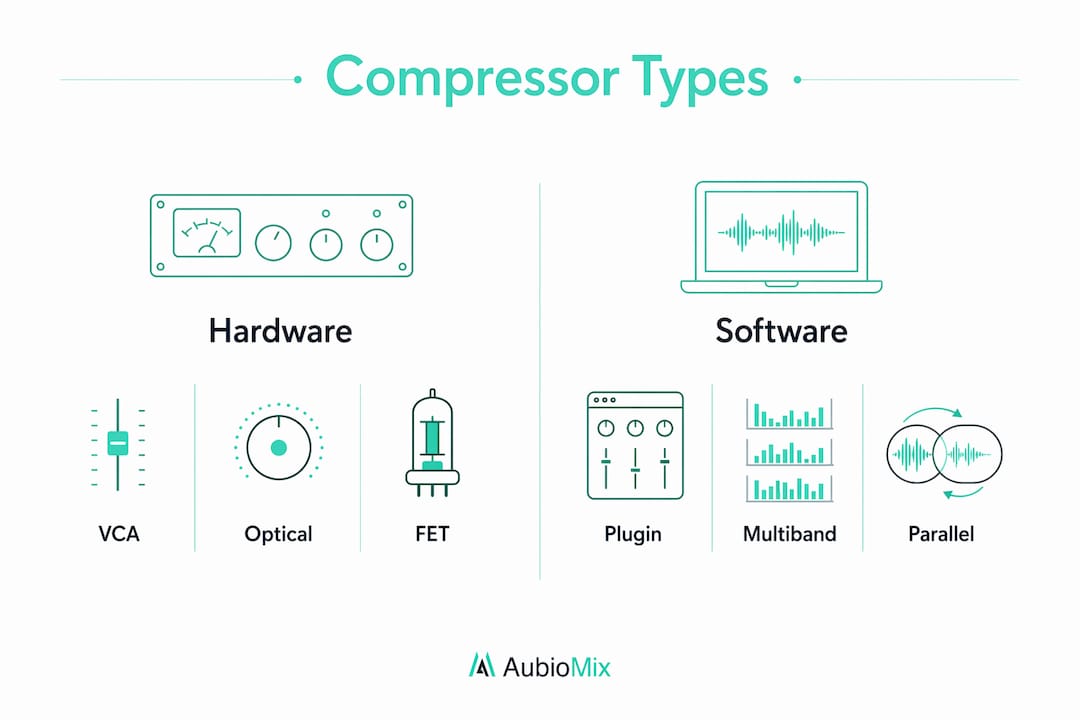
Beyond the four core types, three techniques expand what compression can do creatively. Parallel compression blends a heavily compressed signal with the dry original, preserving transient punch while adding density and sustain underneath. Sidechain compression triggers gain reduction from a separate signal, the classic example being a kick drum ducking a bass guitar to carve out low-end space. Multiband compression splits the signal into frequency bands and compresses each independently, giving surgical control over problem frequencies without affecting the whole signal.
How does compression interact with streaming loudness standards?
Compression and loudness normalisation are two separate processes, and confusing them is one of the most common mistakes producers make at the mastering stage. Loudness normalisation is a gain adjustment applied by streaming platforms based on integrated loudness measurement. It does not alter dynamics. Compression, by contrast, actively reshapes the dynamic range of your audio.
The broadcast and streaming standard is defined by EBU R128, which uses ITU-R BS.1770-based LUFS measurement. The EBU R128 target is -23 LUFS integrated loudness with a true peak maximum of -1 dBTP. Spotify normalises to approximately -14 LUFS, and Apple Music targets -16 LUFS. These platforms will turn your master down if it is too loud, which means over-compressing to chase loudness actively works against you.
| Platform | Loudness Target | True Peak Limit |
|---|---|---|
| Spotify | -14 LUFS | -1 dBTP |
| Apple Music | -16 LUFS | -1 dBTP |
| YouTube | -14 LUFS | -1 dBTP |
| Broadcast (EBU R128) | -23 LUFS | -1 dBTP |
For producers who want to check compliance in their own production pipeline, pyloudnorm is an open-source Python tool that implements ITU-R BS.1770-4 integrated loudness measurement with gating and filter controls. It is particularly useful for batch checking stems or exports before delivery. The practical takeaway is this: use compression to shape dynamics and control peaks, then check your integrated LUFS reading separately before mastering. Treat them as two distinct stages, not one.
For a broader look at how loudness decisions interact with the wider mix, the audio broadcasting setup guide from Broadcast Radio covers final-stage compression and loudness considerations in detail.
What is the best workflow for setting compressor parameters?
A repeatable, methodical workflow produces better results than guessing at settings. Here is the approach we recommend at Aubiomix, built around the gain reduction meter as your primary reference point.
- Set the threshold first. Lower it until you see 3–6 dB of gain reduction on peaks. This gives you a defined compression amount before you touch anything else.
- Choose a moderate ratio. Start at 4:1 for most material. You can push higher for drums or limiting, or pull back to 2:1 for gentle, transparent control.
- Set attack based on transient intent. If you want to preserve punch, use a slow attack (20–100 ms). If you want to tame a harsh transient, use a fast attack (1–5 ms). Listen to the first milliseconds of the sound and decide what you want to keep.
- Adjust release to match the musical rhythm. Pumping artefacts occur when the release resets gain reduction too quickly relative to the next transient. Slow the release until the gain reduction meter returns to zero just before the next hit.
- Apply makeup gain. Bring the output level back up to match the uncompressed signal. Use a bypass switch to A/B compare at matched levels. If it sounds better bypassed, you have gone too far.
- Consider parallel compression. Blend the compressed signal back with the dry signal using a mix knob or a parallel channel. This technique adds density and sustain without sacrificing the natural transient of the original recording.
Pro Tip: Quantise your attack and release times to BPM note subdivisions. The formula is simple: ms per quarter note equals 60,000 divided by your project BPM. This keeps compression rhythmically consistent with the track, especially on drums and bass.
For more on how compression fits into a broader mixing approach, the guide on dynamic contrast techniques covers how to use compression alongside other tools to shape musical energy and movement.
Key takeaways
Effective compression requires understanding all five parameters together, not as isolated controls, because attack and release shape sound character more than ratio alone.
| Point | Details |
|---|---|
| Start with gain reduction | Target 3–6 dB on peaks before adjusting ratio, attack, or release. |
| Attack shapes transient punch | Slow attack preserves impact; fast attack softens and controls harsh peaks. |
| Release prevents pumping | Match release time to musical rhythm so gain resets before the next transient. |
| Compressor type colours sound | VCA, FET, Optical, and Variable-Mu each add distinct character beyond gain reduction. |
| Compression and loudness are separate | Streaming normalisation adjusts gain post-delivery; compression shapes dynamics in the mix. |
Why attack and release matter more than you think
Here is something I have come to believe strongly after years of working with mixes: most producers spend too much time worrying about ratio and not nearly enough time on attack and release. Ratio tells the compressor how hard to work. Attack and release tell it how to work, and that distinction changes everything about how a record feels.
The creative differences you hear between records that sound alive and records that sound flat almost always come down to how the gain reduction envelope is shaped over time. A snare that hits you in the chest is not just about level. It is about a slow attack letting the transient breathe before the compressor clamps down. A vocal that sits perfectly in a dense mix is not just about volume. It is about a release time that lets the compressor recover in time with the phrase.
I have also seen producers rely heavily on presets, and I understand why. Presets are a starting point, and some are genuinely well-designed. But common tutorial presets fail when they do not account for the unique attack and sustain architecture of the specific sound you are compressing. A preset built for a close-miked snare will behave completely differently on a room drum bus. You have to develop your ear for what compression is actually doing, not just what the numbers say.
My advice: spend a session doing nothing but listening to attack and release. Set a moderate ratio and threshold, then sweep attack from 1 ms to 100 ms and really hear what changes. Do the same with release. That single exercise will teach you more than any preset ever will. Compression is a creative shaping tool, and the producers who treat it that way are the ones whose mixes genuinely stand out.
Get expert feedback on your compression and mix
Understanding compression is one thing. Hearing how it actually sounds in your mix is another challenge entirely.

Aubiomix is an online app where you upload your track and receive detailed, professional feedback on your mixing and mastering, including how your compression and dynamics are working across the full mix. The Aubiomix evaluation framework covers gain reduction, transient control, loudness targets, and overall dynamic balance, giving you specific, actionable steps to improve. Whether you are working on your first release or your fiftieth, getting a trained ear on your compression decisions can save you hours of guessing. Try Aubiomix and hear exactly what your mix needs.
FAQ
What does compression do in music production?
Compression reduces the gain of audio signals that exceed a set threshold, controlling dynamic range and making mixes sound more consistent and controlled. It also shapes the sound envelope through attack and release parameters, influencing how punchy or smooth a track feels.
What ratio should i use for compression?
A ratio of 4:1 is a solid starting point for most sources, delivering meaningful gain reduction without sounding over-processed. Ratios above 8:1 move into limiting behaviour, which is better suited to peak control than general dynamics management.
Why does my mix sound like it is pumping?
Pumping occurs when the release time is too fast relative to the musical rhythm, causing the compressor to reset gain reduction audibly between transients. Slow the release until the gain reduction meter returns to zero just before the next hit.
What is the difference between compression and loudness normalisation?
Compression actively reshapes dynamic range during mixing and mastering. Loudness normalisation is a separate gain adjustment applied by streaming platforms based on integrated LUFS measurement, and it does not alter the dynamics of your audio.
Which compressor type is best for vocals?
Optical compressors like the LA-2A are widely favoured for vocals because they respond to average programme level rather than peaks, producing a smooth, musical compression that sits naturally under a performance. FET designs like the 1176 work well when you want a more forward, energetic vocal character.