
Delay is defined as a time-based audio effect that records an incoming signal and plays it back after a set interval, creating echoes that add depth, rhythm, and spatial width to a mix. Used across every major recorded music genre since 1956, delay is one of the most powerful tools in a producer's or mix engineer's arsenal. Whether you are crafting shimmering guitar textures, punchy vocal repeats, or complex rhythmic counterpoint in electronic music, understanding delay at a technical and creative level changes how you approach every session. This guide covers the mechanics, the maths, the routing, and the creative possibilities.
What is delay and how does it shape a mix?
Delay captures an audio signal and replays it after a precisely defined time interval, producing one or more echoes that decay over time. That simple mechanism creates an enormous range of sonic outcomes, from the tight, punchy slapback delay) of 75–125ms that defined 1950s rock-and-roll production at Sun Records, to the long, evolving repeats that fill the back of a modern ambient track. The effect contributes two things to a mix simultaneously: a sense of physical space and a layer of rhythmic complexity. Both are compositional assets, not cosmetic ones.
Delay is not simply a polish effect applied at the end of a session. Delay functions as a primary compositional tool, creating rhythmic counterpoint and spatial illusion that belongs in the arrangement phase, not just the final mixdown. Producers who treat it as an afterthought miss the majority of its creative potential.

How does delay work technically?
Understanding the mechanism behind delay makes you a better operator of it. The process is straightforward once you break it down.
- Analogue-to-digital conversion. The incoming audio signal is converted to digital data and held in a memory buffer.
- Playback after a set interval. The buffer releases the stored signal after the delay time you specify, measured in milliseconds.
- Feedback loop. The output of the delay is fed back into the input, generating successive, decaying repeats. Each pass through the loop loses a small amount of level, producing the natural fade of an echo.
- Wet and dry signals. The dry signal is your original, unprocessed audio. The wet signal is the delayed output. Most delay units blend these two signals together at the output stage.
The feedback loop is where producers get into trouble. High feedback settings can cause output volume to escalate), potentially clipping your signal chain. A limiter placed after the delay unit prevents this from becoming a problem. Keep feedback below the point where repeats grow louder rather than quieter, unless you are deliberately chasing a runaway, self-oscillating effect.
Pro Tip: Set your feedback control so the last audible repeat sits just above the noise floor of your mix. That gives you a natural, musical decay without the repeats cluttering the arrangement.
The wet output can be equalised or compressed separately after the delay processing stage. This is where independent wet signal treatment) becomes a key part of professional mixing practice, and we will cover the routing for that in detail shortly.
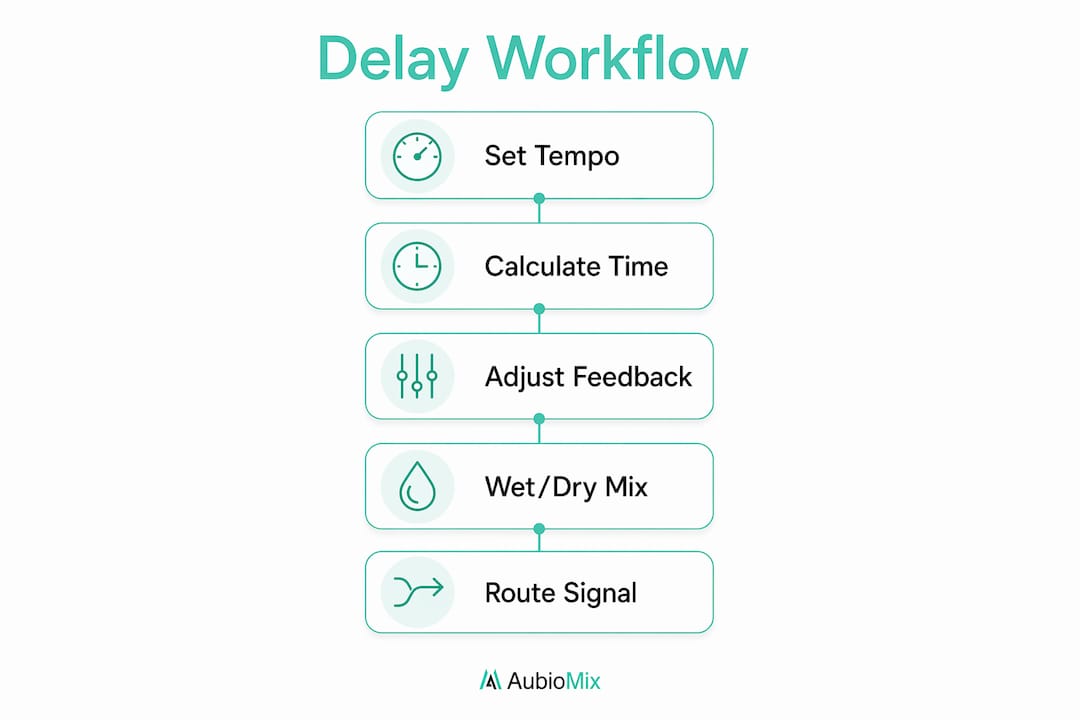
How do you calculate delay time from BPM?
Getting your delay time locked to the tempo of your track is the single most impactful technical decision you can make with this effect. A delay that sits rhythmically with the groove feels musical. One that does not creates a subtle but persistent sense of dissonance that listeners feel even if they cannot name it.
The formula is simple:
- Divide 60,000 by your BPM. This gives you the duration of one quarter note in milliseconds. At 120 BPM, that is 500ms.
- Halve it for an eighth note. At 120 BPM, an eighth note delay is 250ms.
- Multiply a quarter note by 1.5 for a dotted quarter note. At 120 BPM, that is 750ms.
- Divide a quarter note by 4 for a sixteenth note. At 120 BPM, that is 125ms.
BPM-locked delay times improve musical cohesion, particularly in pop and electronic music where the rhythmic grid is tight and any timing drift is immediately audible. Dotted eighth note delays are especially popular in pop production because they create a syncopated feel that sits between the beat, adding movement without cluttering the downbeats.
Free-running delay times, where you dial in a millisecond value by ear without reference to BPM, work well for ambient and experimental music where the goal is texture rather than rhythmic precision. For anything with a defined tempo, calculate first and adjust by ear second.
Pro Tip: Most DAWs and delay plugins offer a tap tempo or BPM sync function. Use it. Manually calculated times are accurate, but sync mode updates automatically when you change the project tempo, saving you from chasing stale values mid-session.
One common mistake is setting a delay time that sounds right in isolation but clashes with other rhythmic elements in the arrangement. Always audition your delay in the context of the full mix, not on a soloed track.
What is the best way to route delay in a mix?
Signal routing is where the gap between amateur and professional delay usage becomes most visible. The method you choose determines how much control you have over the effect and how cleanly it sits in the mix.
Direct insert vs. send-return bus
Inserting a delay plugin directly on a channel is the quickest approach, but it is the least flexible. The wet and dry signals are processed together, which makes it difficult to treat the echo independently without affecting the source.
Using a send-return bus architecture is the professional standard. You send a portion of the dry signal to a dedicated return channel, place the delay plugin on that return channel set to 100% wet, and blend the return fader to taste. The dry signal on the source channel remains completely untouched.
| Routing method | Wet signal control | Dry signal integrity | Independent processing |
|---|---|---|---|
| Direct channel insert | Limited | Affected by plugin | Difficult |
| Send-return bus | Full | Preserved | Yes, EQ and compression on return |
Setting up a delay bus in your DAW
The practical setup takes less than two minutes and pays dividends throughout the session.
- Create a new auxiliary or return channel in your DAW.
- Place your delay plugin on that channel, set to 100% wet output.
- Send the source track to the return channel using a pre-fader or post-fader send, depending on your preference.
- Adjust the return channel fader to blend the echo into the mix.
- Apply EQ and compression directly on the return channel to shape the delayed signal without touching the dry source.
Separate wet signal processing avoids frequency masking and preserves the transient clarity of the source material. A high-pass filter on the delay return, for example, removes low-frequency buildup from the echoes without muddying the original signal. This is a technique covered in depth in the mix engineer's guide to frequency masking.
Pro Tip: Set up your delay buses before you start a session, not after. Having them ready encourages you to use them correctly from the first track you work on, rather than defaulting to direct inserts out of convenience.
How can delay be used creatively in a mix?
Delay becomes genuinely exciting when you stop thinking of it as an echo machine and start treating it as a compositional instrument. The psychoacoustic space and rhythmic counterpoint it creates can transform a simple part into something that sounds like multiple performers playing together.
- Rhythmic arpeggiation. A single sustained guitar note fed through a dotted eighth note delay at moderate feedback creates a shimmering, arpeggiated texture. The repeats fill rhythmic gaps in the arrangement without requiring additional recorded parts.
- Spatial width. Panning the dry signal slightly left and the delay return slightly right creates a stereo image from a mono source. This is a classic technique for widening vocals and lead instruments without reverb.
- Filtered echoes. Rolling off the high frequencies on the delay return with a low-pass filter makes the echoes sound further away, reinforcing the illusion of physical depth. Cutting the lows prevents the echoes from competing with the kick and bass.
- Modulated delay. Adding a small amount of modulation to the delay time introduces subtle pitch variation in the repeats, creating a chorus-like shimmer. This works particularly well on synth pads and clean electric guitar.
- Ducking delay. Using a sidechain compressor on the delay return, triggered by the dry source, causes the echoes to duck in level whenever the source plays and swell up in the gaps. The result is a clean, uncluttered sound where the delay fills space rather than competing with the original signal.
Delay transforms single notes into complex, shimmering textures that simulate multiple performers. That is a compositional outcome, not a mixing one, which is why integrating delay early in the production process matters. For more on how this fits into a broader creative workflow, the guide on delay's role in mixing is worth reading alongside this one.
Adjust the wet/dry balance last, after you have set the delay time, feedback, and any filtering. The blend is the final dial, not the first.
Pro Tip: Automate the delay send level throughout the arrangement. Bring the send up during instrumental sections and pull it back when vocals or lead lines are playing. This keeps the mix clear without losing the spatial energy of the effect.
Key takeaways
Delay is a compositional tool, not a finishing effect, and its impact on a mix depends entirely on how precisely it is set up, routed, and integrated into the arrangement.
| Point | Details |
|---|---|
| Define delay time by BPM | Calculate millisecond values from your project tempo to keep echoes rhythmically locked. |
| Use send-return buses | Route delay to a dedicated return channel to preserve dry signal integrity and enable independent processing. |
| Treat wet signals separately | Apply EQ and compression on the delay return to prevent frequency masking and control echo character. |
| Integrate delay early | Use delay as a compositional element during arrangement, not as a final mixdown polish. |
| Manage feedback carefully | Keep feedback below self-oscillation unless intentional, and use a limiter to prevent clipping. |
My honest view on how producers misuse delay
Most producers I speak with treat delay as the last thing they reach for, something to add a bit of life to a vocal once the arrangement is finished. That approach consistently produces mixes where the delay feels bolted on rather than built in. The echoes sit awkwardly in the frequency spectrum, compete with other elements, and contribute nothing rhythmically useful.
The producers whose mixes genuinely impress me are the ones who set up their delay buses before they record a single note. They know the BPM, they have calculated their note divisions, and they are already thinking about how the repeats will interact with the groove. Delay is not decoration for these producers. It is structure.
The other habit I see far too often is inserting delay directly on channels instead of using buses. I understand the appeal. It is faster. But you lose the ability to EQ the echoes independently, which means low-frequency buildup from the repeats muddies the low end of your mix in ways that are genuinely difficult to fix later. Setting up a structured mixing session with buses ready from the start costs you two minutes and saves you an hour of troubleshooting.
Experiment with modulation, ducking, and filtered echoes. The standard quarter note repeat is a starting point, not a destination. The producers who get the most out of delay are the ones who treat every parameter as a creative decision rather than a default setting.
— Aubiomix
Get expert feedback on your delay and mix decisions
Knowing the theory is one thing. Hearing how your delay choices actually land in a finished mix is another.

Aubiomix gives music producers and mix engineers professional mix feedback in minutes. Upload your track and receive detailed, actionable analysis covering delay balance, frequency masking, spatial processing, and every other element of your mix. You will know exactly what is working, what is not, and what to fix. If you want to go deeper, the Aubiomix evaluation framework breaks down the specific criteria used to assess delay usage, wet/dry balance, and overall mix clarity, giving you a clear standard to work towards on every project.
FAQ
What is delay in music production?
Delay is a time-based audio effect that records an input signal and replays it after a set interval to create echoes. It has been used across recorded music since 1956 to add depth, rhythm, and spatial width to mixes.
How do I calculate delay time from BPM?
Divide 60,000 by your BPM to get the quarter note duration in milliseconds. At 120 BPM, a quarter note is 500ms, an eighth note is 250ms, and a dotted eighth note is 375ms.
What causes delay to sound muddy or cluttered in a mix?
Muddy delay most commonly results from low-frequency buildup on the wet signal and feedback set too high. Applying a high-pass filter on the delay return channel and reducing feedback resolves both issues without affecting the dry source.
What is the difference between wet and dry signals in delay?
The dry signal is the original, unprocessed audio. The wet signal is the delayed output. Blending the two at the output stage controls how prominent the echo effect is in the mix.
Why should I use a delay bus instead of a direct insert?
A send-return bus keeps the dry signal completely unaffected and lets you apply EQ and compression to the wet echoes independently. Direct inserts process both signals together, limiting your control and increasing the risk of frequency masking.