
Reverb is defined as an electronically produced echo effect used in both live and recorded music, distinct from natural acoustic reverberation by being generated through signal processing. Every great mix uses it. Whether you are placing a vocal in a vast cathedral or giving a snare drum the snap of a tiled room, reverb is the tool that makes sound feel like it exists somewhere real. Plugins like Sarum, WetReverb, and the MDV-II bring this effect into your DAW with extraordinary control, and understanding how to use them properly is what separates a flat, lifeless mix from one that breathes.
What is reverb and how does it work?
Reverb is the persistence of sound after the original source stops. In a natural space, sound bounces off walls, ceilings, and floors, creating millions of tiny overlapping reflections that blur together into what we perceive as ambience. Think of it like ripples in a pond. Drop a stone in the water and the ripples spread outward, overlap, and fade. Sound in a room behaves exactly the same way.
Digital reverb simulates this process through signal processing rather than physical acoustics. The core parameters that shape any reverb are:
- Pre-delay: The gap between the dry signal and the first reflection. A longer pre-delay keeps transients clear and gives the listener a sense of distance.
- Decay time: How long the reverb tail rings out before it fades to silence. Short decays feel intimate; long decays feel vast.
- Damping: High-frequency absorption that mimics how soft surfaces (carpet, curtains) soak up treble energy in real rooms.
- Diffusion: Controls how quickly reflections spread out. High diffusion creates a smooth, washy tail; low diffusion creates a grainier, more textured sound.
- Mix (wet/dry): The balance between the processed signal and the original. On a send/return track, you typically run this at 100% wet.
Pro Tip: Always use reverb on a send/return (aux) channel rather than as a direct insert. This gives you precise control over the wet level without touching the dry signal, and it saves CPU by sharing one reverb instance across multiple tracks.
Classic 1980s digital reverbs have a distinctive character that producers still chase today. Recreating that vintage sound requires a fixed internal sample rate near 24 kHz and 12-bit quantisation, which limits bandwidth and adds a gritty, lo-fi quality that modern high-resolution reverbs simply do not replicate.

What are the main types of reverb?
Different reverb types serve different sonic purposes. Choosing the wrong one is one of the most common mistakes producers make. Here is a breakdown of the five types you will use most often:
- Room reverb: Short decay, tight reflections. Ideal for drums, percussion, and anything that needs to feel grounded and present. Room reverb adds size without washing out transients.
- Plate reverb: A classic studio sound created by sending signal through a large metal plate. Plates are smooth, bright, and musical. They work brilliantly on vocals and snares.
- Hall reverb: Longer decay times that simulate concert halls. Use this on strings, pads, and lead instruments where you want a grand, expansive feel.
- Cathedral reverb: The longest and most diffuse of the standard types. Ethereal textures, infinite sustain, and a sense of enormous space. Best used sparingly on solo instruments or ambient pads.
- Special effects reverb: Reverse reverb, gated reverb, and modulated reverb all fall here. These are creative tools rather than spatial simulators.
Beyond the type itself, you also need to choose between algorithmic and convolution approaches.
| Type | Method | Character | Best for |
|---|---|---|---|
| Room | Algorithmic | Tight, punchy | Drums, guitars |
| Plate | Algorithmic | Smooth, bright | Vocals, snare |
| Hall | Algorithmic or convolution | Grand, lush | Strings, pads |
| Cathedral | Convolution | Vast, ethereal | Ambient, solo instruments |
| Special FX | Algorithmic | Creative, unpredictable | Sound design, transitions |
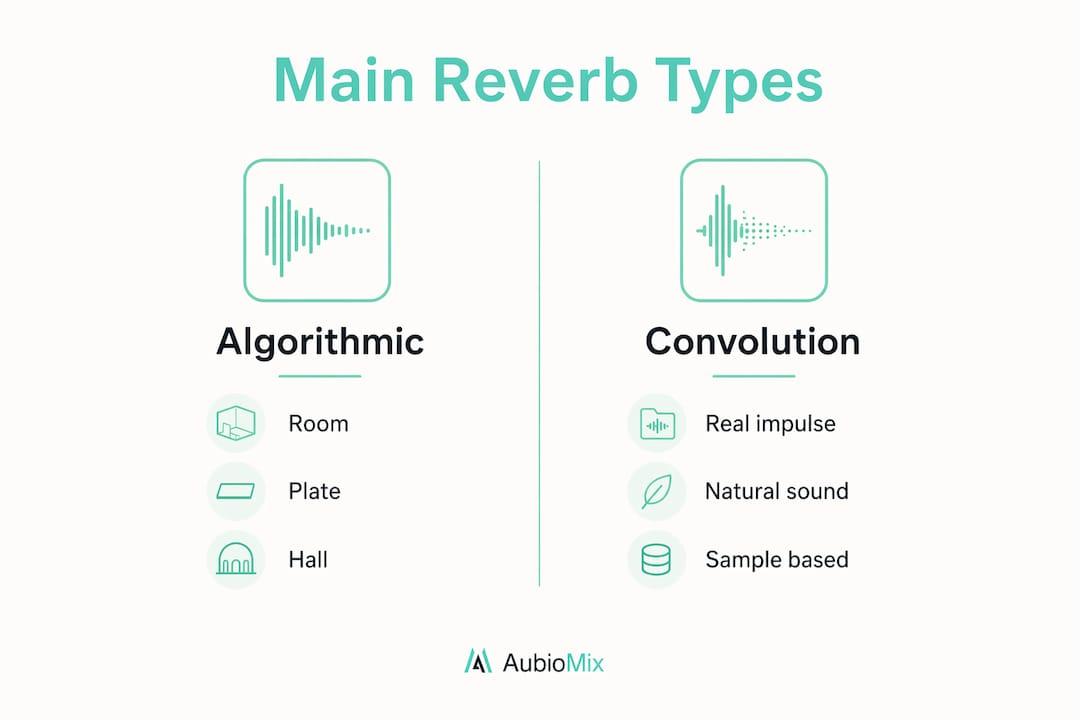
Algorithmic reverb uses mathematical models to generate reflections in real time. Convolution reverb captures the actual impulse response of a real space and plays it back. Dynamic room modelling from Universal Audio takes this further, allowing real-time repositioning of virtual microphones for deeper spatial detail than static convolution can achieve.
How to use reverb effectively in your mix
The biggest mistake producers make with reverb is adding too much of it too early. The result is a washed-out mix where nothing sits clearly in the stereo field. Common pitfalls include washed-out transients and muddy low-end buildup, and both are avoidable with the right approach.
Here is a practical process for shaping reverb cleanly:
- High-pass the reverb input. Place a high-pass filter between 80 and 140 Hz on the reverb send. This stops bass frequencies from entering the reverb and creating a boomy, indistinct low end.
- Cut the cardboard zone. Apply a 2–6 dB cut in the 250–450 Hz range on the reverb return. This frequency band is where reverb tails tend to accumulate and make mixes sound boxy and congested.
- Set your decay time deliberately. For atmospheric effects, decay times between 0.8 and 3 seconds work well. Shorter decays keep energy and punch; longer decays create cinematic space.
- Layer early reflections with a long tail. Use a short room reverb (under 0.5 seconds) to add realism and dimension, then blend a longer hall or plate reverb underneath for the tail. This combination creates depth without sacrificing clarity.
- Add a high-shelf boost above 8 kHz on the return. A gentle boost here adds air and shimmer to the reverb tail, which works especially well on vocals and acoustic instruments.
- Automate the mix level. Ride the reverb send level throughout the track. Verses often benefit from more space; choruses sometimes need less reverb to feel powerful and upfront.
Pro Tip: If your reverb is making the mix feel muddy, try cutting the reverb return rather than the send. Shaping the EQ on the return channel gives you surgical control over exactly what frequencies the reverb adds back into the mix.
Understanding EQ use for reverb shaping is one of the fastest ways to improve your mixes. Pair that knowledge with dynamic EQ techniques and you can shape reverb tails that respond intelligently to the source material.
Creative reverb sound design: beyond ambience
Reverb becomes genuinely exciting when you stop treating it as a background effect and start treating it as an instrument. Professional reverb usage involves modulating decay, pre-delay, and diffusion to craft evolving textures, using high feedback for infinite sustain, and deliberately introducing lo-fi artefacts for character and movement.
Some of the most interesting reverb sound design techniques include:
- Reverse reverb: Record the reverb tail, reverse it, and place it before the dry sound. This creates an eerie swell that leads into the note rather than following it. Kate Bush used this technique to iconic effect.
- High feedback sustain: Push the feedback parameter on a reverb until it creates an infinite, self-sustaining wash. Modulate the decay or pitch in real time for evolving, living textures.
- Broken and degraded reverb: The trend toward broken or degraded reverb embraces aliasing, noise, and digital distortion as musical effects. Intentionally introducing imperfections through circuit-bent hardware or purpose-built plugins creates textures that pristine digital reverbs simply cannot replicate.
- Gated reverb: A long reverb tail cut abruptly by a noise gate. The classic 1980s drum sound. Still devastatingly effective on snares in pop and rock productions.
"Long reverbs create overlapping reflections that blur into atmosphere, modelled as millions of tiny overlapping sound reflections rather than distinct echoes." — Peter Kappus, creator of the Sarum reverb
Vintage-style digital reverbs emulated in plugins like WetReverb use multitapped delay lines, all-pass filters, and frequency-dependent damping to recreate the band-limited, quantised sound of classic hardware. That lo-fi character is not a flaw. For many producers, it is the entire point.
Digital vs analogue reverb: which should you use?
The choice between digital and analogue reverb is not about quality. It is about character and workflow.
Analogue hardware reverbs, such as spring reverbs built into vintage guitar amplifiers or physical plate reverbs, create sound through actual physical processes. Springs vibrate. Metal plates resonate. The result is a warm, organic quality with subtle inconsistencies that digital processing struggles to fully replicate. The downside is cost, maintenance, and the inability to recall settings precisely between sessions.
Digital reverb processes signal mathematically. It is repeatable, recallable, and available in every DAW as a plugin. Modern digital reverbs range from clean and transparent algorithmic designs to deliberately lo-fi emulations of vintage hardware. The MDV-II plugin, for example, recreates the gritty character of 1980s digital reverbs through low sample rates and 12-bit quantisation.
| Feature | Analogue reverb | Digital reverb |
|---|---|---|
| Character | Warm, organic, unpredictable | Clean, precise, or intentionally lo-fi |
| Recall | Manual, imprecise | Perfect, instant |
| CPU usage | None (hardware) | Moderate to high |
| Cost | High (hardware) | Low to moderate (plugins) |
| Creative flexibility | Limited by physical design | Extensive parameter control |
| Vintage character | Inherent | Emulated via bit-depth and sample rate |
For most producers working in a DAW, digital reverb is the practical choice. Analogue hardware makes sense when you want a specific physical character, particularly spring reverb on guitar or the natural resonance of a real plate. Knowing when each approach serves the music is what matters.
Key takeaways
Reverb is the single most powerful spatial tool in a mix, and using it well requires understanding both its acoustic principles and its creative potential.
| Point | Details |
|---|---|
| Define reverb correctly | Reverb simulates millions of overlapping sound reflections to create spatial perception in a mix. |
| EQ the reverb signal | High-pass at 80–140 Hz and cut 2–6 dB at 250–450 Hz to prevent muddiness and low-end buildup. |
| Match type to source | Use room reverb for drums, plate for vocals, hall for strings, and cathedral for ambient textures. |
| Use reverb creatively | Modulate decay, apply high feedback, and embrace broken or degraded reverb for evolving sound design. |
| Digital suits most workflows | Digital reverb offers full recall and extensive control; analogue hardware adds physical character for specific applications. |
Reverb in practice: what I have learned from years at the mix
The most common mistake I see producers make is using reverb to fill silence. If a mix feels empty, reverb is not the answer. Space in a mix is earned through arrangement, not covered up with wet signal.
The second mistake is treating all reverb the same. A plate on a vocal and a hall on a pad serve completely different purposes. I always ask myself: what room would this instrument actually be played in? That question alone guides better reverb choices than any preset ever will.
What genuinely changed my approach was learning to automate reverb sends. A vocal in a verse can sit in a lush, roomy space. That same vocal in a chorus often needs to come forward, which means pulling the reverb send back, not pushing the fader up. The contrast creates energy. Producers who automate their reverb sends consistently get more dynamic, exciting mixes than those who set and forget.
Broken and degraded reverb has also become a genuine creative tool in my work. A pristine algorithmic reverb is not always the right choice. Sometimes a lo-fi, aliased, slightly wrong reverb is exactly what a track needs to feel alive and interesting. Do not be afraid of imperfection. Some of the best reverb sounds come from pushing a plugin beyond its intended use.
Treat reverb as a compositional element, not a finishing touch. The producers who do this consistently make more memorable records.
— Aubiomix
How Aubiomix helps you get reverb right
Getting reverb balance right in a mix is one of the trickiest skills to develop, especially when you are working on headphones or an untreated room. Aubiomix gives you pro-level mix feedback in minutes, analysing your uploaded track and flagging exactly where reverb and effects balance is working against your mix.

Upload your track and Aubiomix returns a detailed report covering spatial effects, frequency balance, and dynamic treatment, with specific steps you can act on immediately. You can also see how your mix compares to hit records analysed by Aubiomix to understand how professional engineers handle reverb in chart-level productions. If you want to hear what a polished, well-balanced reverb treatment sounds like in context, that is the place to start.
FAQ
What is reverb in music production?
Reverb is an electronically produced echo effect that simulates the natural reflections of sound in a physical space. It adds depth, dimension, and spatial realism to recorded and mixed audio.
What are the main types of reverb?
The main types are room, plate, hall, cathedral, and special effects reverb. Each has a distinct character and suits different instruments and production styles.
How do I stop reverb making my mix sound muddy?
High-pass filter the reverb input at 80–140 Hz and cut 2–6 dB at 250–450 Hz on the reverb return. These two steps remove the frequencies most responsible for muddiness and low-end congestion.
What is the difference between algorithmic and convolution reverb?
Algorithmic reverb generates reflections mathematically in real time, while convolution reverb plays back a recorded impulse response of a real space. Algorithmic is more flexible; convolution is more realistic.
How do I use reverb creatively in sound design?
Modulate the decay and pre-delay in real time, apply high feedback for infinite sustain, or use degraded and lo-fi reverb impulse responses to create textures that go well beyond simple ambience.