

The kick drum is the rhythmic and frequency backbone of almost every modern production. Get it right and the whole track locks in, feels powerful, and translates across every speaker system. Get it wrong and no amount of master bus processing will save you. Its primary function is to deliver rhythmic impact, sub-bass energy, and define the feel of a track within its genre and arrangement. Understanding the role of the kick drum in your mix is the single most important step before you touch a single plugin.
Table of Contents
- What does the kick drum actually do in a mix?
- Essential techniques to mix a kick drum effectively
- Advanced processing to enhance kick presence and impact
- How to balance the kick with bass and low-end elements
- How to evaluate and fine-tune your kick for translation across speakers
- Common mistakes that will kill your kick drum mix
- Key takeaways
- Get objective feedback on your kick drum mix
What does the kick drum actually do in a mix?
The kick drum does several jobs at once, and that is precisely what makes it so tricky to mix. It needs to anchor the groove, provide low-frequency weight, and remain audible on systems that cannot even reproduce its deepest frequencies. Most producers underestimate just how much the kick signals genre and era through its sub content and attack characteristics alone.
Think of the kick as occupying distinct frequency layers, each with its own job:
- Sub energy creates physical depth and movement, the felt rather than heard foundation
- Low-frequency weight gives the drum its size and power in the room
- Low-mid body adds solidity; strip too much of this and the kick sounds hollow
- Upper-mid attack defines the beater hit and cuts through dense arrangements
- High-frequency click keeps the kick audible on phones, laptops, and small speakers
Not every kick needs all five components at the same level. A deep trap or hip-hop kick leans heavily on sub weight. A metal kick needs aggressive upper-mid attack to punch through distorted guitars. An acoustic jazz kick wants a softer transient and natural body. Defining which layers matter most for your genre is the first decision you make, not the last.
The kick drum also works in tandem with the bass to create the low-end foundation of a track. These two elements share the most headroom-intensive part of the spectrum, so their relationship requires careful thought. A strong low end usually comes from complementary roles: one element provides the deepest sustained energy while the other delivers impact, rhythm, or upper harmonics.

Essential techniques to mix a kick drum effectively
Before you reach for any plugin, the source and its foundational settings matter more than anything else. Tuning, envelope, and timing must be assessed before processing begins. No compressor or EQ can fix a kick that is poorly timed, out of phase, or fundamentally the wrong sound for the track.
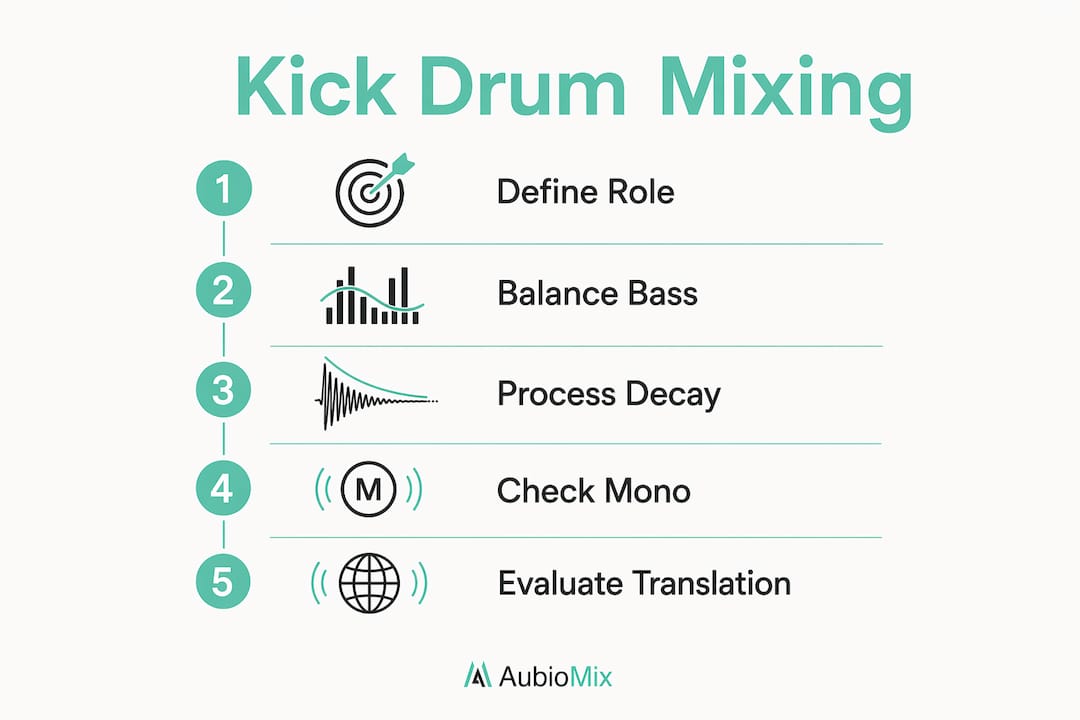
Here is the order of operations that works consistently:
- Define the kick's role first: Decide whether the kick owns the deepest sub energy or whether the bass or 808 handles that. Trying to give the kick deep sub, heavy body, aggressive click, and long sustain simultaneously consumes headroom and leaves no room for the bass.
- Set the fader level before processing: Get the kick sitting at the right level in the mix before touching EQ or compression. Phase alignment and source level greatly affect punch and presence; no processing chain compensates for a poorly balanced foundation.
- Tune the kick to the track: Match the kick's fundamental pitch to the key of the track, particularly when working alongside a bass or 808. A kick tuned a semitone away from the root note creates an unsettling low-end clash that EQ cannot fix.
- EQ with purpose: Boost the fundamental frequency (40–100 Hz) gently, cut the boxy low-mids (200–600 Hz), and enhance the click region (2–4 kHz) for punch and presence. The ideal EQ approach balances these three moves rather than chasing a single frequency.
- Compress to control, not crush: Use a moderate attack to preserve the transient, a fast-to-medium release to maintain low-end envelope, and a 4:1 ratio as a starting point. Slower attack preserves transients; releasing too fast risks losing the body of the kick entirely.
- Check phase between layers and mics: If you are blending a kick-in mic with a kick-out mic, or layering samples, phase misalignment weakens low-frequency solidity in a way that sounds like a thin, weak kick rather than an obvious phase problem.
- Consider arrangement and placement: The kick must sit dead centre in the stereo field. Wide low-frequency information creates phase and mono-translation problems. If you want width, add a touch of chorus or reverb via a send, keeping the core kick mono.
Pro Tip: Before processing anything, solo the kick and check its decay length against the track's tempo. A kick whose tail runs into the next beat creates a muddy low end that no amount of sidechain compression will fully resolve. Trim the sample or use a gate to tighten the decay first.
Advanced processing to enhance kick presence and impact
Once the fundamentals are solid, advanced processing is where the kick goes from good to genuinely powerful. The goal here is not to pile on effects but to use each tool for a specific, defined purpose.
- Transient shapers for attack and sustain control: A transient shaper lets you increase or decrease the attack independently of the sustain, giving you surgical control over the punch without affecting the body. Increase the attack to make the beater hit more defined; reduce the sustain to tighten the decay without using a gate.
- Dynamic EQ for frequency-selective processing: Dynamic EQ and volume shapers can duck specific problematic frequencies in the bass range more transparently than traditional sidechain compression. This is particularly useful when the kick and bass clash only at certain frequencies rather than across the whole low end.
- Parallel compression for punch: Send the kick to a bus, crush it with a fast attack, fast release, and an 8:1 to 10:1 ratio, then blend it underneath the dry signal. The crushed signal brings up the body and sustain without flattening the transient of the dry kick.
- Saturation for harmonic content: Saturation adds upper harmonics that allow the ear to perceive the kick even when the playback system cannot reproduce its fundamental frequency. A touch of tape or tube saturation adds low-mid heft without raising the level. Too much, though, and the kick becomes harsh and loses control.
- Layering for a full, phase-coherent sound: A multi-layer approach using separate sub, body, and transient elements creates a full kick sound without extreme EQ boosts. Layering these components gives you independent control over each element and avoids phase problems.
- Sidechain compression with bass and synths: Sidechain compression reduces the bass briefly when the kick hits, clearing a path through the low end. It works best when both elements sound good independently but mask each other during simultaneous hits. If the kick and bass clash because of poor sound selection or tuning, sidechain compression is a temporary fix, not a cure.
Pro Tip: When layering kicks, always check the combined result in mono before committing. Phase cancellation between layers is almost invisible on a stereo meter but will hollow out your low end on mono playback systems, which includes most club sound systems and phone speakers.
How to balance the kick with bass and low-end elements
The relationship between kick and bass is where most low-end problems originate. These two elements share the same frequency real estate, and without a clear plan, they will fight each other for headroom and leave the mix sounding muddy. The good news is that careful arrangement and complementary frequency roles are often more effective than any processing technique.
For solid guidance on mixing low end across kick, bass, and sub elements, the principles below apply across genres.
- Define who owns the sub: In some tracks, the bass or 808 provides the deepest sustained energy while the kick contributes punch above it. In others, the kick carries the deepest impact while the bass sits slightly higher. Choose one approach and commit to it.
- Use complementary EQ to carve space: If the bass contains a lot of low content, opt for a more midrange-focused kick. Conversely, a sub-heavy kick suits a bass with more midrange information. The idea is that kick and bass occupy different frequency ranges to avoid phasing and headroom issues.
- Apply sidechain or frequency-selective ducking: A volume shaper or dynamic EQ ducking the bass at the kick's fundamental frequency is often more transparent than full-band sidechain compression. This approach preserves the character of the bass while clearing space for the kick's attack.
- Check phase between kick and bass: When the kick and bass hit simultaneously, phase relationships between their low-frequency content can cause cancellation. Listen in mono and check whether the combined low end gains or loses energy when both hit together.
- Automate levels to fit the groove: Sometimes the kick needs a slight level push during the chorus and a pull-back in the verse. Automation keeps the kick sitting correctly in the mix without over-processing.
- Monitor on multiple systems: The low-end balance that sounds perfect on studio monitors can fall apart on a laptop speaker. Check the kick-bass relationship on headphones, small speakers, and in mono before finalising.
For genre-specific approaches to kick drum roles, the electronic music mixing guide covers how the kick-bass relationship shifts between house, techno, and drum and bass.

How to evaluate and fine-tune your kick for translation across speakers
A kick that sounds enormous in the studio but disappears on a phone speaker has a translation problem, not a volume problem. The click frequency between 3 kHz and 5 kHz is what keeps the kick audible on small speakers regardless of sub-frequency presence. If that range is missing or buried, the kick will vanish on anything other than a full-range system.
Here is a practical evaluation process:
- Check on at least three systems: Studio monitors, headphones, and a small Bluetooth speaker or phone. Each reveals a different problem. Monitors show you the low end; headphones reveal phase issues; small speakers expose whether the click and attack are translating.
- Use a reference track: Pick a commercially released track in the same genre with a kick you admire. A/B your mix against it at matched levels. If your kick sounds thin, dull, or buried by comparison, you know exactly which frequency range to address.
- Use metering tools: A spectrum analyser shows you where the kick's energy sits and whether it is competing with the bass. A correlation meter reveals phase problems that are inaudible in stereo but destructive in mono.
- Check in mono: Reduce the mix to mono and listen specifically to the kick. If it loses body or punch, there is a phase issue somewhere in the chain, either between layers, between the kick and bass, or in the processing itself.
- Refine the processing chain order: The order matters. Source, gate or cleanup, EQ, compression, saturation or parallel processing, then sidechain. Skipping or reordering steps creates problems that compound further down the chain.
- Use objective mix feedback: Tools that analyse your mix and provide detailed feedback on kick drum presence, low-end balance, and translation can catch issues that ear fatigue causes you to miss after hours of mixing.
Pro Tip: Upload your mix to Aubiomix to get detailed, objective feedback on your kick drum's role in the mix, including low-end balance, translation across systems, and specific processing suggestions. Fresh ears, even digital ones, catch what tired ears miss.
Common mistakes that will kill your kick drum mix
Most kick drum problems come down to a handful of recurring errors. Knowing them in advance saves hours of frustrating troubleshooting.
- Expecting the kick to do everything at once: The most common mixing mistake is trying to give the kick deep sub energy, heavy body, aggressive click, long sustain, and extreme loudness simultaneously. That combination consumes headroom and leaves no space for the bass. Define the role first.
- Skipping phase checks: Phase problems between kick-in and kick-out mics, or between layered samples, are one of the most common causes of a weak, thin kick. Many producers add EQ boost after EQ boost trying to fix a phase problem that EQ cannot solve.
- Over-compressing and losing the transient: Setting the compressor attack too fast crushes the initial hit, leaving the kick sounding flat and lifeless. A 50 ms attack is a sensible starting point; adjust from there based on how much transient you want to preserve.
- Ignoring the arrangement: A kick whose decay is longer than the gap between beats will create a muddy, boomy low end regardless of how well it is processed. Match the kick's length to the tempo of the track.
- Boosting low end to add impact: More low-frequency energy does not automatically create more perceived impact. Punch comes from the relationship between the transient and the body that follows it. If the kick lacks punch, look at the attack region and the transient shaper before reaching for a sub boost.
- Neglecting mono compatibility: Wide low-frequency information causes phase cancellation in mono. Keep the kick's core sub and body information mono, and check the full mix in mono before finalising.
- Applying sidechain compression as a first resort: Sidechain compression is a useful tool, but it should not be the first solution to a kick-bass conflict. Sound selection, tuning, envelope adjustments, and complementary EQ often solve the problem more naturally and with less audible pumping.
- Not referencing against commercial tracks: Ear fatigue is real after a long session. Without a reference, it is easy to over-process the kick or misjudge its level in the mix. Reference early and often.
For a deeper look at how these principles apply in a specific genre context, the trap beat mixing guide covers kick drum role definition in detail.
Key takeaways
The kick drum's role in a mix is to provide rhythmic impact, low-frequency weight, and translation across playback systems, and every processing decision should serve that defined role.
| Point | Details |
|---|---|
| Define the role before processing | Decide whether the kick or bass owns the sub range before touching EQ or compression. |
| Click frequency drives translation | Preserving the 3–5 kHz click keeps the kick audible on small speakers and phones. |
| Phase alignment comes first | Check phase between layers and mics before processing; no EQ fixes a phase problem. |
| Layering gives independent control | A sub, body, and transient layer approach avoids extreme EQ boosts and phase issues. |
| Reference and monitor on multiple systems | Check the kick on studio monitors, headphones, and a small speaker before finalising. |
Get objective feedback on your kick drum mix

Mixing a kick drum well takes practice, good ears, and honest feedback. Aubiomix gives you all three. Upload your track to Aubiomix and receive detailed, actionable feedback on your kick drum's presence, low-end balance, and translation across playback systems. You can also explore how hit records handle their kick to see exactly how professional engineers define and execute the kick's role in a mix. Stop guessing and start hearing what your mix actually needs.