
The role of vocals in a mix is to serve as the emotional and lyrical focal point of a song, the single element that everything else must support. Vocals carry the artist's message, personality, and feeling directly to the listener, which means they demand more careful treatment than any other element in your session. Getting them right requires a clear understanding of audio mixing fundamentals, a disciplined signal chain, and a willingness to shape the entire arrangement around what the voice needs. This guide covers the full picture, from placement and processing to time-based effects and advanced automation.
What is the role of vocals in a mix?
The vocal is the primary communication channel between the artist and the audience, and every mixing decision you make should serve that connection. Guitars, synths, and drums create the emotional context, but the vocal delivers the meaning. When a listener loses the words, they lose the song. That is why vocal level is the hardest and most critical parameter to get right across an entire mix.
The importance of vocals in music goes beyond simple volume. A vocal that sits too loud sounds harsh and disconnected from the band. One that sits too quiet feels buried, even if the fader position looks correct on screen. The goal is presence without dominance, clarity without stridency. Everything from your EQ decisions to your reverb tail length feeds into that single objective.

How to position and balance vocals within a full mix
Balancing vocals in a mix starts with one firm rule: never make your EQ or level decisions while the vocal is soloed. Vocal EQ decisions made in isolation almost always mislead you, because the vocal's relationship to the guitars, keys, and pads is what actually determines whether it sits or fights. Always work in full mix context.
Here are the core techniques for achieving solid vocal placement in a track:
- Volume automation (vocal riding). Volume automation adjusts the vocal level phrase by phrase, raising words with emotional weight and pulling back quieter moments. This is not a corrective tool. It is an expressive one that mirrors the lyrical arc of the song.
- Frequency carving on competing instruments. Rather than boosting the vocal at 2 to 5 kHz, cut that same range on guitars, synths, or keys. This creates an acoustic lane for the voice without making the vocal sound artificially bright.
- Sidechain compression. Sidechain compression triggered by the vocal causes competing elements to duck subtly when the voice is present. Use a fast attack of around 1 to 10 ms, a medium release of 50 to 150 ms, and aim for just 1 to 2 dB of gain reduction. The effect should be invisible to the listener.
- Low monitoring levels. Check your vocal balance at low volume, around 70 to 75 dB SPL. If the vocal disappears at low levels, it will feel buried on consumer speakers and earphones, which is where most listeners will hear your music.
Pro Tip: Reference your mix on earphones at low volume after every major automation pass. If you cannot follow the lyric comfortably, the vocal needs to come up, not the reverb.
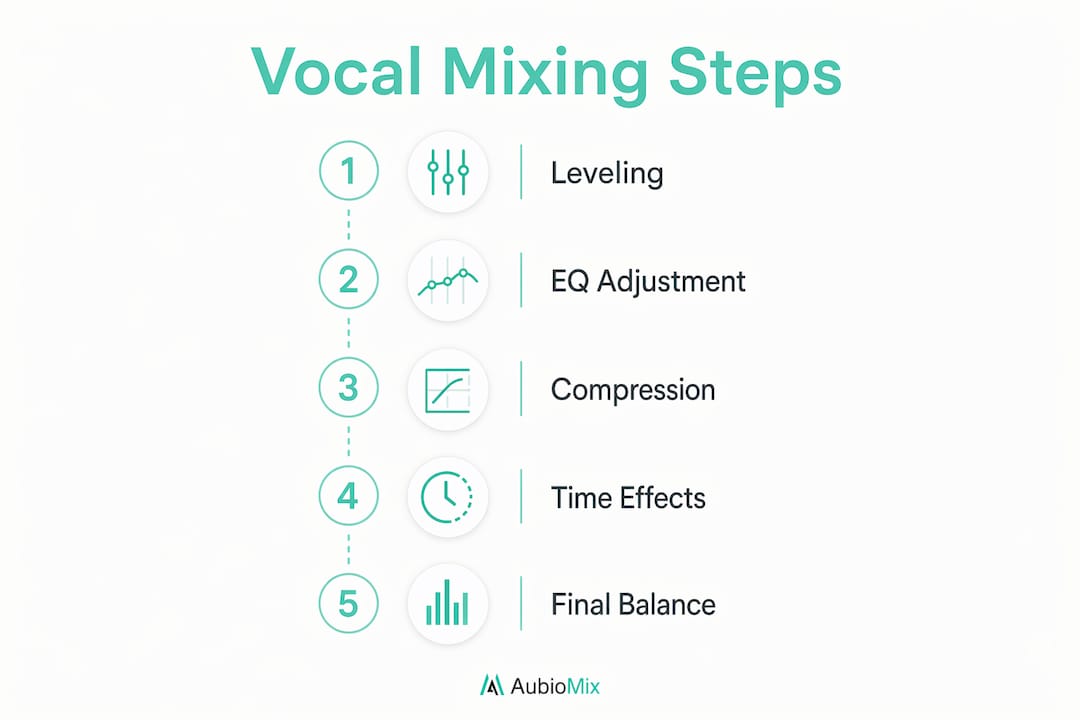
What is the correct signal chain for vocal processing?
The standard professional vocal signal chain follows a specific order for good reason. Each stage prepares the signal for the next, and changing the order changes the outcome. Here is the sequence used in professional vocal mixing:
- Pitch correction. Tools like Melodyne or Celemony handle tuning before anything else touches the signal. Correcting pitch on a processed signal introduces artefacts.
- Subtractive EQ. High-pass filter around 80 to 120 Hz to remove rumble and low-end build-up. Cut muddiness around 200 to 400 Hz. This cleans the signal before compression sees it.
- Compression. Compression evens the dynamic range and brings consistency to the performance. A ratio of around 3:1 with 2 to 4 dB of gain reduction is a solid starting point for most lead vocals.
- De-essing. Post-compression, sibilance at 4 to 8 kHz becomes more prominent because the compressor has raised the average level. A de-esser targets this range specifically without affecting the rest of the vocal.
- Additive EQ. Now you shape tone. Boost presence around 2 to 5 kHz and add air above 10 kHz. Because the two EQ instances are separated by compression, the additive EQ works on a dynamically controlled signal, which sounds far more natural.
- Saturation. A subtle harmonic saturator adds warmth and helps the vocal cut through dense arrangements without additional volume. Plugins like Soundtoys Decapitator or FabFilter Saturn work well here.
- Reverb and delay via send channels. Never insert reverb or delay directly on the vocal channel. Send channels keep the wet and dry signals separate, giving you full control over the blend without baking effects into the vocal.
Pro Tip: Run a parallel compression chain alongside your main vocal bus. Blend in a heavily compressed copy at around 20 to 30% to add density and sustain without squashing the transients on the main signal.
How do time-based effects shape vocal clarity?
Time-based effects, specifically reverb and delay, define the spatial character of your vocal. Used well, they place the voice in a believable acoustic space and add emotional depth. Used carelessly, they wash out consonants and push the vocal back in the mix.
The most impactful single parameter for vocal clarity in reverb is pre-delay. Reverb pre-delay of 15 to 30 ms separates the dry vocal from the reverb tail, giving the ear time to register the words before the space effect begins. Without it, consonants smear into the reverb and the lyric becomes unintelligible.
Here is a quick reference for time-based effect settings:
| Parameter | Recommended range | Purpose |
|---|---|---|
| Reverb pre-delay | 15 to 30 ms | Separates dry vocal from reverb tail for consonant clarity |
| Haas effect delay | 1 to 30 ms | Widens vocal without audible echo |
| Tempo-synced delay | 1/8 or 1/4 note | Adds rhythmic interest and fills space between phrases |
| Reverb high-pass filter | 200 to 400 Hz | Prevents reverb from muddying the low-mid range |
| Reverb low-pass filter | 6 to 10 kHz | Softens the reverb tail so it sits behind the dry vocal |
The Haas effect uses delays in the 1 to 30 ms range to widen the vocal by fusing a delayed copy with the original. The brain perceives width rather than a distinct echo. Push the delay above 30 ms and you risk comb-filtering, which creates a hollow, phasey quality that undermines the vocal's weight.
- Always apply reverb and delay via aux send channels, not as inserts.
- Filter the reverb return with a high-pass around 200 to 400 Hz and a low-pass around 6 to 10 kHz.
- Use tempo-synced delays at 1/8 or 1/4 note values to keep the effect rhythmically musical.
- Keep the reverb tail shorter in dense mixes and longer in sparse, emotional sections.
Advanced strategies for emotional impact and arrangement integration
Once your processing chain is solid, the real artistry in vocal mixing comes from how you integrate the voice with the arrangement as it evolves. Expressive vocal automation shapes the listener's emotional journey by subtly changing vocal volume in alignment with the lyrics and song sections, not just correcting dynamic inconsistencies. A chorus vocal should feel like it arrives with conviction. A verse vocal should feel intimate and close.
One of the most common problems producers face is a vocal that feels buried despite sitting at the correct fader level. The cause is almost always frequency masking. Competing instruments occupying the same 1 to 5 kHz range as the vocal create a wall of sound that the voice cannot cut through, regardless of volume. The solution is frequency carving on the instruments, not the vocal. A dynamic EQ keyed to the vocal can automate this process, cutting competing frequencies only when the vocal is present and restoring them during instrumental passages.
Here is how serial and parallel compression compare for vocal treatment:
| Approach | Character | Best use |
|---|---|---|
| Serial compression | Controlled, consistent, transparent | Corrective levelling across a full performance |
| Parallel compression | Dense, punchy, full-bodied | Adding weight and sustain without killing dynamics |
| Combined chain | Consistent with character | Lead vocals in dense pop, R&B, and hip-hop productions |
Genre matters here too. A sparse folk or singer-songwriter mix can afford a vocal that sits higher in the mix with more reverb and space. A dense pop or hip-hop production requires tighter processing, more aggressive frequency carving, and shorter reverb tails to keep the vocal intelligible. The mix engineer workflow always starts with understanding what the genre demands before touching a single plugin.
Pro Tip: After completing your mix, mute every track except the vocal and the kick and bass. If the vocal still feels present and the lyric is clear, your low-end and vocal balance is solid. If the vocal disappears, you have a masking problem to solve.
Key takeaways
Vocals are the emotional and communicative core of any mix, and every processing decision should serve their clarity, presence, and emotional impact.
| Point | Details |
|---|---|
| Vocal level is the hardest parameter | Balance vocals in full mix context, never in solo, to avoid misleading EQ and level decisions. |
| Signal chain order matters | Follow the professional sequence: pitch correction, subtractive EQ, compression, de-essing, additive EQ, saturation, then sends for reverb and delay. |
| Pre-delay preserves intelligibility | Set reverb pre-delay to 15 to 30 ms to separate the dry vocal from the reverb tail and protect consonant clarity. |
| Carve instruments, not vocals | Cut competing frequencies on guitars, synths, and keys in the 1 to 5 kHz range to create space for the vocal without brightening it artificially. |
| Automation is expressive, not just corrective | Ride the vocal level phrase by phrase to mirror the emotional arc of the lyric, not just to fix dynamic inconsistencies. |
Why I always start a mix with the vocal
Here is something I have found to be consistently true: the mixes that feel right are the ones where the vocal shaped every other decision. Not the drums, not the low end. The vocal. When I build a mix around the voice from the start, the arrangement naturally creates space for it. When I mix the band first and try to fit the vocal in afterwards, I am always fighting masking, level, and frequency conflicts that could have been avoided.
The biggest misconception I see from producers is treating vocal mixing as a technical checklist rather than an emotional act. Getting the signal chain right is the foundation, but the real work is in the automation. Knowing when to let a word breathe and when to push it forward is what separates a mix that sounds correct from one that actually moves people. The invisible mixing approach captures this well: the best vocal treatment is the kind the listener never notices, because it feels completely natural.
Patient, arrangement-aware mixing is the skill that takes longest to develop, and it is the one that matters most. Give the vocal the attention it deserves from bar one.
— AubioMix
Get objective feedback on your vocal mix
Knowing the techniques is one thing. Hearing whether they are actually working in your specific mix is another challenge entirely.

Aubiomix lets you upload your track and receive detailed, objective feedback on vocal clarity, frequency balance, and mix integration in minutes. Rather than guessing whether your vocal is sitting correctly against your guitars or whether your reverb tail is washing out the lyric, you get pro-level mix analysis with specific, prioritised steps to improve what matters most. Aubiomix works alongside your existing DAW and workflow, so you can act on the feedback immediately and hear the difference in your next revision. If you want to hear how your vocal treatment compares to professional references, the hit records analysis is a genuinely eye-opening place to start.
FAQ
What is the role of vocals in a mix?
The role of vocals in a mix is to serve as the primary emotional and lyrical focal point, delivering the song's message clearly above all other elements. Every mixing decision, from EQ to reverb, should support the vocal's intelligibility and emotional presence.
How do I stop my vocals sounding buried in the mix?
Buried vocals are almost always caused by frequency masking in the 1 to 5 kHz range. Cut competing instruments in that range using dynamic EQ keyed to the vocal, and check your vocal balance at low monitoring levels to catch masking problems early.
What is the correct order for vocal processing plugins?
The professional signal chain runs pitch correction, subtractive EQ, compression, de-essing, additive EQ, saturation, then reverb and delay on send channels. This order ensures each stage works on the cleanest possible signal.
Why does reverb pre-delay matter for vocal clarity?
Reverb pre-delay of 15 to 30 ms separates the dry vocal from the reverb tail, allowing the ear to register consonants and words before the spatial effect begins. Without it, the reverb smears the vocal and reduces intelligibility significantly.
Should I use reverb as an insert or a send on vocals?
Always use reverb and delay on send channels, not as inserts. Send channels preserve full wet and dry control, whereas inserts bake the effect into the vocal signal and limit your ability to adjust the blend later.