

Mix translation is how well your finished mix holds its intended tonal balance, clarity, and emotional impact across every playback system your listeners use. Here is a three-step check you can run in five minutes before any session ends:
- Level-match your reference track to your mix (within 0.5 dB LUFS) so loudness bias does not skew your judgement.
- Collapse to mono and confirm that your lead vocal, kick, and snare are still clearly audible and not thinning out.
- Play the mix on one small, unforgiving speaker — a phone, a laptop, or a single Bluetooth unit — and listen for whether the energy and vocal presence survive.
Those three checks will catch the majority of translation problems before they become expensive revisions. Monitoring at moderate loudness levels leverages the Fletcher–Munson psychoacoustic curve to help you judge core tonal balance without being fooled by exaggerated highs or sub-bass. Aubiomix can serve as an automated validation layer on top of these manual checks, flagging tonal imbalances and masking issues you might miss late in a session.
Table of Contents
- What does mix translation actually mean?
- Why do mixes translate poorly?
- Core practices that reliably improve translation
- What to listen for on each playback system
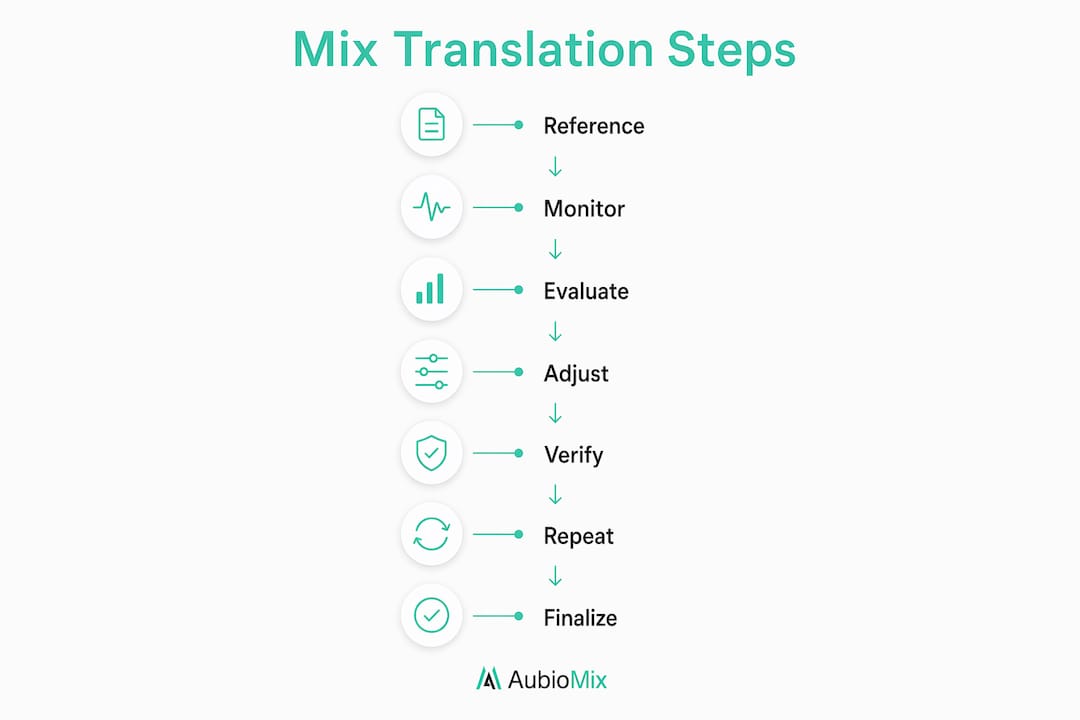
- A 7-step multi-system check routine
- Quick fixes when something fails the check
- How Aubiomix speeds up your translation checks
- Key takeaways
- Why translation is the skill most producers underestimate
- Get faster mix feedback with Aubiomix
- Useful sources and tools
What does mix translation actually mean?
Mix translation is the ability of a music mix to maintain its intended tonal balance, clarity, and emotional impact across playback systems ranging from high-end studio monitors to phone speakers and car stereos. The word "translation" is borrowed from language: just as a well-translated sentence carries the same meaning in a different tongue, a well-translated mix carries the same feeling on a different speaker.
Two examples make this concrete. Imagine you finish a vocal-led pop track on your studio monitors. The lead vocal sits perfectly, warm and present. You play the same file on your phone and the vocal almost disappears — swallowed by a harsh 3–5 kHz peak that the monitors flattered. That is a translation failure caused by a frequency-response mismatch between your monitoring environment and the phone's small driver.
The second example is subtler. A track with excessive energy in the 200–350 Hz region sounds full and punchy on your near-fields but turns boxy and congested in the car, then thin and hollow on earbuds that roll off below 100 Hz. The low-mid buildup was masking the real tonal picture the whole time.
Mix translation is fundamentally about emotional consistency: every technical decision in the mix must preserve the song's impact wherever it is heard, not just in the room where it was made.
Why do mixes translate poorly?
Most translation failures trace back to a handful of root causes. Understanding them means you can diagnose a problem quickly rather than reaching for random EQ moves.
- Room acoustics and monitor placement. Low-frequency room modes cause bass buildup at certain positions. If your mix position sits at a bass antinode, you will cut low end to compensate — and the mix will sound thin everywhere else.
- Monitor and headphone frequency response. Every speaker and headphone has its own colouration. Mixing on a pair with a hyped low end leads to under-powered bass in the final mix; mixing on headphones without crossfeed exaggerates stereo width in ways that do not translate to speakers.
- Level-matching and loudness bias. A reference track that is louder than your mix will always sound better, leading you to make incorrect EQ or balance decisions. This is one of the most common and easily fixed mistakes.
- Phase and stereo imaging issues. Wide stereo elements that rely on phase differences for their perceived power can collapse or cancel when the signal is summed to mono, leaving the mix sounding hollow.
- Perceptual and psychological factors. Ear fatigue after a long session narrows your frequency perception. The Fletcher–Munson effect means your ears become less sensitive to low and high frequencies at quieter volumes, so a mix that sounds balanced loud can feel thin and harsh at low levels. Confirmation bias — hearing what you expect to hear — compounds all of this.
Pro Tip: Take a 10–15 minute break away from the room before your final translation pass. Your ears reset faster than you think, and you will catch imbalances that fatigue had hidden.
For home studio producers specifically, chasing a mechanically flat room is often less productive than understanding your room's colouration and finding the listening sweet spot. Targeted acoustic treatment at first reflection points and behind the mix position tends to yield faster translation gains than treating every surface.

Core practices that reliably improve translation
Getting translation right consistently is about process, not luck. These are the methods that actually move the needle.
-
Set up level-matched reference tracks in your DAW. Import a commercially released track in the same genre, match its integrated loudness to your mix using a LUFS meter, and A/B between them regularly. The benefits of reference tracks go beyond tonal guidance — they recalibrate your ears to the real world every time you switch.
-
Calibrate your monitoring level. Mixing at approximately 80–83 dB SPL for critical checks gives you a more accurate picture of midrange balance. At this level the Fletcher–Munson curve is relatively flat, so what you hear is closer to what listeners will experience on average consumer devices.
-
Build in regular mono checks. Collapsing to mono is not just a phase test — it reveals masking between elements that stereo width was hiding. Make it a habit every 20–30 minutes, not just at the end.
-
Use headphone correction and crossfeed tools. Toggling headphone correction on and off reveals spectral anomalies and helps you judge whether a mix will translate. Tools that emulate speaker crossfeed reduce the stereo imaging gap between headphones and speakers, making headphone-based mixing far more reliable.
-
Treat diagnostic plug-ins as mirrors, not solutions. Spectral analysers, match EQ tools, and stabilisers are genuinely useful for revealing where your mix deviates from a target curve. They should not replace careful listening or contextual judgement — but as a diagnostic layer, they are invaluable for spotting problems you have stopped hearing.
Pro Tip: Alternate between at least two different monitoring systems during a mix session — your main monitors and a small secondary speaker or headphones. The contrast between them is one of the fastest ways to spot frequency imbalances.
What to listen for on each playback system
Every device tells you something different about your mix. Here is what to focus on for each.
- Phone speakers and earbuds. Listen for intelligibility of the lead vocal, upper-mid presence (2–5 kHz), and transient clarity on snare and percussion. If the vocal gets buried or the track sounds congested, you likely have a low-mid or upper-mid masking issue.
- Laptop speakers. Focus on midrange balance and presence. Kick and bass will be largely absent, so listen to whether the track still feels musical and whether the midrange elements — guitars, keys, vocals — sit in a coherent picture.
- Car stereo. The car is one of the most revealing environments for low-end weight and stereo image shifts. Listen for whether the bass feels controlled and punchy, and whether the stereo image narrows in a way that changes the balance of the mix.
- Bluetooth speakers and small portable units. These are your "grotbox" check. The question is simple: does the track still feel energetic and engaging, or does it lose its drive? If it sounds flat and lifeless, your mix may be over-compressed or lacking upper-mid energy.
- Mono or near-mono checks. When you collapse to mono, any element that disappears or thins dramatically is relying on stereo phase differences for its perceived power. That is a fragile foundation — real-world systems are often mono or near-mono.
Statistic callout: Monitoring during critical checks at a moderate volume level is recommended for leveraging psychoacoustic curves to judge tonal balance accurately — the point at which the Fletcher–Munson effect is least likely to mislead your low and high frequency perception.
A 7-step multi-system check routine
This routine takes 30–60 minutes and is designed to fit at the end of any mix session before final delivery. Run it on a full-resolution bounce, not a lossy preview file.
-
Export a reference bounce and create a comparison playlist. Put your mix and a level-matched commercial reference in the same playlist or DAW session. Match integrated loudness to within 0.5 dB LUFS.
-
Mono sum check (5 minutes). Collapse to mono in your DAW or via a utility plug-in. Listen for phase cancellation, thinning vocals, or disappearing elements. Pass criteria: lead vocal, kick, and snare remain clearly audible and balanced.
-
Low-volume test (3 minutes). Reduce your monitoring level to a very quiet background level. If the mix loses its sense of energy or the vocal disappears, your tonal balance needs work in the 1–5 kHz presence region.
-
Phone or earbuds check (5 minutes). Play the mix on your phone speaker or a pair of consumer earbuds. Listen for vocal clarity and whether the track feels congested or thin. Pass criteria: vocal sits clearly above the mix.
-
Car stereo or car-profile check (10 minutes). If you have access to a car, play the mix through the car stereo. If not, use a car-simulation profile in a virtual monitoring tool. Listen for low-end weight and stereo image behaviour. Pass criteria: bass feels controlled, not boomy or absent.
-
Laptop speaker check (5 minutes). Play the mix through a laptop. Focus on midrange coherence. Pass criteria: the track feels musical and balanced even without bass.
-
Bluetooth or grotbox check (5 minutes). Play on a small Bluetooth speaker. Ask yourself whether the track still has energy and drive. Pass criteria: the mix sounds engaging, not flat or lifeless.
Pro Tip: Keep a simple notepad or phone note open during the routine and jot down one specific observation per check — "vocal thin on earbuds", "bass boomy in car". This turns a vague sense of "something is wrong" into a targeted fix list.
For a deeper look at how this routine fits into a full mix engineer workflow, it helps to have a session template that includes the translation pass as a named stage, not an afterthought.

Quick fixes when something fails the check
When a specific check fails, here are the corrective recipes to reach for first.
- Muddy low-mids (200–400 Hz buildup). Apply a narrow cut (Q of 2–4) somewhere in the 200–350 Hz range on the mix bus or the offending element. Start with a 2–3 dB cut and listen in mono. This is the single most common fix for mixes that sound boxy in the car and thin on earbuds.
- Thin or buried vocal. Boost a gentle shelf at 2–4 kHz (1–2 dB) on the vocal channel, or cut the competing elements (guitars, synths) in the same range. Check the fix on phone speakers — if the vocal now sits clearly, the shelf is working.
- Harsh top end (6–10 kHz). A gentle high-shelf cut of 1–2 dB on the mix bus often resolves harshness on consumer earbuds without dulling the mix on monitors. Alternatively, identify the specific offending element (often a bright synth or overdriven guitar) and apply a narrow cut at the harsh frequency.
- Phase cancellation in mono. Use a phase correlation meter to identify the offending element, then try inverting the polarity of one layer. If the problem is in a stereo reverb or wide synth pad, try narrowing the stereo width of that element using mid-side processing.
- Over-compression killing transient punch. If the mix sounds flat on the grotbox check, check your mix bus compressor's attack time. A faster attack (under 5 ms) can kill the transient snap of kick and snare. Slow the attack to 20–40 ms and listen again.
- Masking between kick and bass. Mixing low end effectively often comes down to sidechain compression or frequency-specific EQ cuts — a gentle high-pass on the bass at 40–50 Hz and a narrow cut at the kick's fundamental on the bass channel can open up significant clarity.
For a broader list of symptoms and fixes, the signs your mix needs work guide covers ten common red flags in detail.
How Aubiomix speeds up your translation checks
Running the full 7-step routine manually is thorough, but late in a session your ears are tired and your judgement is compromised. That is exactly where automated feedback earns its place.
Aubiomix analyses your uploaded mix and generates a targeted report covering tonal balance, spectral masking, and translation flags — the specific issues that cause mixes to fail on real-world systems. Rather than a generic "your mix is too bright" note, the report points to the frequency ranges and elements causing problems, so you know where to focus your next revision.
A practical workflow looks like this: run your manual 7-step check and note the symptoms, upload your stereo bounce to Aubiomix, compare the automated report against your own observations, then make focused EQ or phase corrections based on the combined picture. Re-upload the revised bounce to confirm the fixes landed. This loop shortens the feedback cycle significantly and reduces the cognitive bias that creeps in when you have been listening to the same mix for hours.
Automated diagnostic tools are best treated as mirrors — they show where the mix deviates from a target, but they do not replace careful listening. Aubiomix is designed with that philosophy: the report gives you the diagnostic picture, and you make the creative call.
Pro Tip: When preparing your file for Aubiomix, include a short note about the reference track you used and the playback system where the mix felt weakest. That context helps the report focus on the most relevant translation issues for your specific situation.
Key takeaways
Mix translation is a repeatable skill, not a talent — and it comes down to process discipline: level-matched references, regular mono checks, and a structured multi-system routine before every delivery.
| Point | Details |
|---|---|
| Define translation clearly | A mix translates when its tonal balance, clarity, and emotional impact hold across all playback systems. |
| Level-match every reference | Match your reference track to within 0.5 dB LUFS to avoid loudness bias skewing your EQ decisions. |
| Monitor at 80–83 dB SPL | This level leverages the Fletcher–Munson curve for the most accurate tonal judgement during critical checks. |
| Mono check throughout the session | Collapsing to mono every 20–30 minutes reveals masking and phase issues before they compound. |
| Use Aubiomix for a faster feedback loop | Upload your stereo bounce to Aubiomix for a targeted report on tonal balance, masking, and translation flags. |
Why translation is the skill most producers underestimate
There is a tendency in home studio culture to treat mix translation as a finishing step — something you bolt on at the end after the "real" mixing is done. That framing is backwards. Translation is not a quality-control gate; it is the whole point of mixing. Every EQ decision, every compression choice, every stereo placement call either serves or undermines how the song will land on the listener's device of choice.
What I find most interesting about translation is that it exposes the difference between mixing for your room and mixing for the song. A mix that sounds spectacular on your monitors but falls apart on a phone is not a well-mixed track — it is a well-optimised room response. The monitors are telling you what you want to hear, not what the mix actually contains.
The habit worth building is not a longer checklist. It is the discipline of stepping outside your monitoring environment regularly — even just collapsing to mono, or playing the mix on your phone while you make a cup of tea. Those small interruptions to your listening context are where the real translation work happens, because they force you to hear the mix as a listener rather than as its creator.
Get faster mix feedback with Aubiomix
Spending 30–60 minutes on a manual translation pass is time well spent. But when you are working to a deadline or iterating through multiple revisions, the feedback loop can feel slow. Aubiomix gives you a faster route: upload your stereo bounce (WAV or AIFF, 44.1 kHz or higher), add a note about your reference track and the playback system where the mix felt weakest, and receive a detailed report covering tonal balance, spectral masking, and mono translation issues.

The report does not replace your ears — it sharpens them. You get specific, frequency-level observations that point you toward targeted fixes rather than broad guesswork. Most producers find that combining the manual 7-step routine with an Aubiomix report cuts their revision cycle in half. For guidance on how to prep your files before uploading, including stem organisation and bounce settings, that resource covers the practical details clearly.
Upload your mix and get your report at Aubiomix — and hear your track the way your listeners actually will.
Useful sources and tools
- Why your mix sounds amazing in the studio and terrible everywhere else — SoundGym. Covers the Fletcher–Munson effect, level-matching, and mono checking in practical detail. A good starting point for understanding the perceptual side of translation.
- Tips To Help Your Mix Translate — Sound On Sound. A UK-based authoritative resource on headphone correction workflows and practical monitoring technique. Useful for producers working primarily on headphones.
- Mixing with headphones: make mixes translate on speakers — Sonarworks. Explains crossfeed, virtual monitoring, and how to use headphone correction tools as diagnostic mirrors rather than automatic fixes.
- The 7-step process to make your mixes translate to any speaker — DIY Musician. A practical, producer-friendly walkthrough of the multi-system check routine, with clear pass/fail guidance for each stage.
- Aubiomix evaluation framework. Explains the scoring methodology behind the Aubiomix report — useful if you want to understand what the automated feedback is measuring and how to interpret the results.