
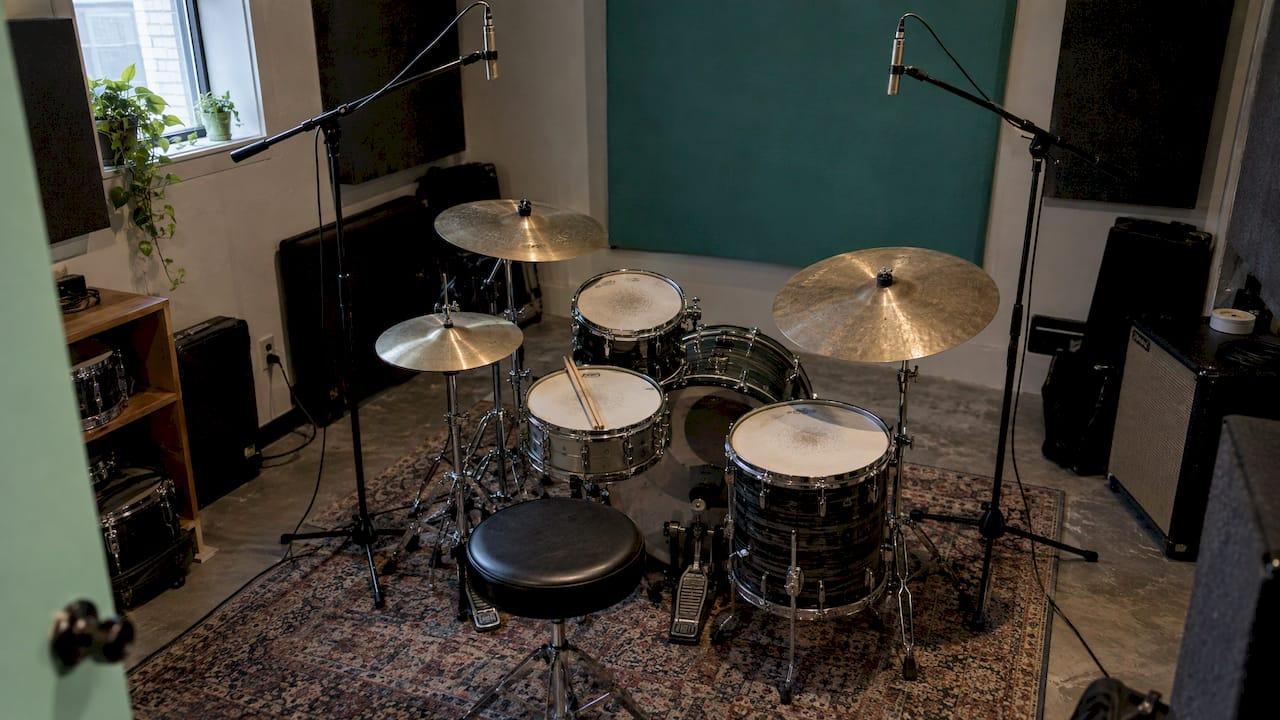
Drum overhead phase problems come from the same hit reaching two microphones at different times. The fix runs in this order: get both overheads the same distance from the snare, check the kit in mono, flip polarity on one overhead and keep whichever setting sounds fuller, then nudge timing only if polarity alone does not settle it. Done in that order, the snare regains its punch, the cymbals stop sounding thin and the kit holds together on a phone speaker.
This guide is for producers and mix engineers who either track their own drums or inherit someone else's multitrack. We cover placement, the mono test, polarity, timing and how to judge whether a change actually helped.
TL;DR
- Phase trouble happens when two mics capture the same drum at slightly different times, so some frequencies cancel when the tracks are summed.
- Keep both overheads the same distance from the centre of the snare. Measure it, don't eyeball it.
- Listen in stereo, then in mono. Flip polarity on one overhead and keep the version with the fullest low end.
- Polarity can't fix timing offsets. If flipping isn't enough, move the mic or nudge the audio in time.
- Judge every change by ear and with a correlation meter, and re-check the kit and snare mics against the overheads.
Table of Contents
- What phase actually does to a drum kit
- Getting overhead placement right before you hit record
- The mono test: find the problem in two minutes
- Fixing it in the mix: polarity first, timing second
- Judging whether the fix worked
- Common mistakes with overhead phase
- Our perspective
- Check your drums in the context of the whole mix
- FAQ
- Sources
What phase actually does to a drum kit
Every close mic and every overhead hears the same snare hit, just at a different moment. Sound travels through air at a finite speed, so a mic a few feet further away gets the hit a fraction of a millisecond later. When you sum those tracks (which happens the second you press play, and absolutely happens in mono), the delayed copy partly cancels or reinforces the original, depending on frequency.
The result is audible. Audio-Technica explains that phase issues can make the snare lose punch, the cymbals sound thin and the stereo image feel unfocused. In practice you hear a snare that has a crack but no body, hi-hats that feel papery, and a kit that seems wide but strangely hollow in the middle.
A quick vocabulary check, because people mix these up:
- Polarity is whether a waveform pushes up or down first. A polarity (or "phase") switch flips the whole signal upside down.
- Phase is a timing relationship between two signals. It changes with frequency and with distance.
- Time offset is the actual delay between two tracks of the same source.
Yamaha's explainer on the phase button makes the key point: that button reverses polarity but cannot correct slight timing differences, because phase is tied to time. Keep that in mind, because it decides which tool you reach for. If you want the theory in more depth, our guide to phase versus polarity covers the difference in five steps.
Getting overhead placement right before you hit record
The cheapest phase fix is the one you make before tracking. Every correction in the mix is a compromise, so it pays to give yourself a clean starting point.
Keep the snare equidistant
The rule that shows up across almost every serious source is simple: two mics recording the same source should be the same distance from it. Tape Op's drum recording tutorial states this as the general rule for a phase-coherent, mono-compatible stereo spread.
The snare is the reference because it sits in the centre of the image and carries so much of the kit's weight. Audio-Technica recommends keeping the snare centred and both overheads the same distance from it, measuring with tape or string. AKG's drum mic placement tips suggest holding a mic cable at the centre of the snare and running it to each overhead as a reference.
A practical routine:
- Set the first overhead where you like the cymbal balance.
- Hold a string or cable at the centre of the snare and mark the length to that capsule.
- Bring the second capsule to the same length, and keep its angle matched.
- Record a few bars and run the mono check below before you move on.
Height and starting positions
For a spaced pair of cardioid condensers, Audio-Technica gives a starting point of 3 to 4 feet above the cymbals, each mic aimed down toward the centre of the kit. Tape Op suggests starting at about six feet off the ground, directly above the drums, treating the overhead signal as the foundation of the drum sound. Treat both as starting coordinates and let your ears and the mono check decide.
If the snare still arrives slightly unevenly, Shure's overhead guidance notes you can equalise arrival times by adjusting overhead heights, from a couple of inches up to 8 to 10 inches if necessary, while confirming the snare reaches both mics together.
Why X-Y is the phase-safe option
If the room and the budget allow, a coincident pair avoids the problem almost entirely. Shure's X-Y guidance explains that sound reaches both capsules at the same moment when they sit close together, typically angled around 90 to 120 degrees, so the pair is phase-coherent by design. Tape Op also prefers a modified X-Y with the capsules as close together as possible.
The trade-off is stereo width. A spaced pair gives a bigger image, but Barry Rudolph notes that with mics spaced two to five feet apart you have to listen in mono to catch missing or overly loud elements. Wider spacing means more care.
The mono test: find the problem in two minutes
You don't need a fancy tool to find overhead phase trouble. You need a short recording and a mono button.
The method Bobby Owsinski describes is to listen to the overheads in stereo, then collapse them to mono by panning both to centre. If the kit loses body, something is fighting. Audio-Technica gives the same rule for tracking: if the drums lose too much body in mono, adjust the placement.
What to listen for when you flip to mono:
- The snare loses its low-mid weight or seems to move backwards.
- The kick drops out or goes thin.
- Cymbals turn hollow or swirly.
- One side of the kit becomes much louder than the other.
None of that is an opinion about your taste. It's what cancellation sounds like. Mike Senior's Sound On Sound write-up of an inverted overhead describes an unnaturally wide, unstable image that thins out badly in mono, and Owsinski notes that wrong overhead polarity can make the low frequencies drop out.
If you want a fuller routine for hunting this down across a whole mix, our five-step phase scope checklist and the guide to finding mono compatibility problems walk through it.
Fixing it in the mix: polarity first, timing second
Once the overheads are recorded, the order of operations matters. Reach for polarity first because it costs nothing and takes seconds.
Step 1: Flip one overhead
Solo both overheads, pan them hard left and right, then switch to mono. Flip the polarity on one overhead only (flipping both changes nothing useful). Owsinski's rule is to keep the setting that gives the fullest low end. Then compare the stereo version too, because a fix that helps mono but wrecks the image isn't a fix.
The usual outcome is one of two things. Either the snare gets more upfront and solid and you leave the switch engaged, or it fades and you flip it back. Sometimes you will hear no difference at all, which tells you the mics were already close to aligned.
Owsinski is realistic about this: you should never expect every drum mic to be perfectly in phase. The aim is to reduce the damage, not to reach theoretical perfection.
Step 2: Check the overheads against the close mics
The overheads are only half the story. Once the pair is sorted, bring in the kick and snare mics one at a time. Tape Op warns that as you add close mics you need to watch for phase cancellation, and that you may need to flip polarity on individual close mics or move the overheads closer to or further from the kit.
A sensible order:
- Overheads together (as above).
- Snare top against the overheads.
- Snare bottom against snare top. The bottom mic usually points the other way, so it often needs flipping.
- Kick against the overheads.
- Toms and room mics last.
Work on one pair at a time, flip, listen, decide. Flipping three things at once makes it impossible to know which move helped.
Step 3: When polarity isn't enough, move the audio
If flipping leaves the drums thin or swishy, the offset is a timing problem rather than a polarity one, and Yamaha's point applies: a polarity switch cannot repair it. You have two options: move the mic and re-record, or nudge the track in time so the transients line up.
Zoom in on the snare hit on the close mic and the overhead. The close mic's transient will arrive first, because it's physically nearer. Slide the close mic later (or the overhead earlier) until the attack lines up, then re-check polarity, since moving the waveform can change which polarity sounds best. Our three quick moves for phase alignment shows this workflow step by step.

A caution about aligning everything
Perfect alignment isn't always the goal. Sound On Sound's Q&A on time-aligning drum tracks points out that aligning close mics to the overheads can pull the drums backwards in the mix and make them seem to lack weight, even though the attack becomes more phase-coherent. Whether you gain or lose depends on the mix. The test is always the same: does the kit sound bigger, more solid and more natural after the move than before it?
Judging whether the fix worked
Your ears make the final call, but a meter keeps you honest when you've been staring at the same snare for an hour.
A correlation meter shows how related the left and right channels are. Apple's Logic Pro documentation explains that +1 means the channels are completely in phase (effectively mono), 0 is the widest permissible left-right divergence, and values below 0 mean out-of-phase material that can cancel and change the sound on a mono speaker. Watch it while the drums play. A reading that hovers well into negative territory on the overheads is a flag to go back and check polarity and distance.
A before-and-after checklist:
| Check | What a good result looks like |
|---|---|
| Mono fold-down | Snare and kick keep their weight; cymbals stay full |
| Correlation meter | Mostly positive, no long dips below 0 on the drum bus |
| Stereo image | Snare sits centred; kit feels wide without a hole in the middle |
| Solo vs full mix | Fix holds up with the whole arrangement playing, not just drums |
| Different speakers | Same balance on monitors, headphones and a phone speaker |
The last row matters most. A drum sound that survives translation across playback systems is one you can trust, which is why mono compatibility sits alongside phase in a proper mix check. Our guides on mono mix analysis and stereo imaging analysis show how to read those meters together.
Common mistakes with overhead phase
- Flipping both overheads. Reversing both together keeps the relationship between them unchanged. Flip one.
- Trusting the waveform alone. Waveforms look neat when aligned, but the decision is made by ear in mono and in the mix.
- Fixing in solo only. A kit that sounds great soloed can sound smaller once bass and guitars arrive. Re-check in context.
- Ignoring the snare bottom mic. It's the most common source of a hollow snare after the overheads are right.
- Moving mics after the take. A mic nudged during tracking changes the relationship mid-song. Check the beginning and end of a session.
Our perspective
Overhead phase is one of those problems that hides in plain sight. The drums sound big when you solo them, then the mix goes into mono on a club system or a phone and the snare vanishes. By then the session is closed and the drummer has gone home.
What we see as a mix engineer's habit is this: you don't trust one meter or one switch. You listen in mono, you look at correlation, you flip polarity, you check timing, and you compare the result against a reference. Each check catches something the others miss.
That's the thinking behind how we built AubioMix. Our evaluation framework looks at phase and mono compatibility alongside the other 15+ areas of a mix, including compression, EQ, frequency masking, stereo width and loudness, and every report pairs subjective guidance with objective measurement. Our founder is a multi-award winning mix engineer with 20+ years of experience, and that practical ear is part of every report.
A drum bus with a phase problem rarely has only a phase problem. Thin overheads tend to bring masking, a weak low end and a narrow image with them, and seeing those linked is what turns a vague feeling that the kit is off into specific next steps.
AubioMix
Check your drums in the context of the whole mix
Fixing the overheads is one job. Knowing whether the rest of the mix still holds up is another. With AubioMix you upload your mix and get a visual and written report with specific, actionable steps across 15+ areas, phase and mono compatibility among them, which you can also download as a PDF.

A single review costs £4.99, and a reference pass is £2.99. If you mix regularly, the Professional plan is £19.99 per month and Professional + is £34.99 per month, both with a fixed number of mix reviews included. You can see the current options on our pricing page, and track your progress across versions as you refine the drums.
FAQ
Should I flip the polarity on one drum overhead?
Only when the mono test says it helps. Solo the pair, collapse to mono, flip one overhead and keep whichever setting gives the fuller low end. If you hear no difference, leave it alone. Always confirm that the stereo image still sounds right afterwards.
How far apart should drum overheads be?
There's no single figure, but the distance to the snare matters more than the distance between the mics. Spaced pairs are commonly set two to five feet apart, and both should be the same distance from the centre of the snare. Measure it with a string or cable, then confirm with a mono check.
Is X-Y better for avoiding overhead phase problems?
X-Y is phase-coherent by design, because the capsules sit close together and sound reaches both at the same time. Shure suggests angles around 90 to 120 degrees. A spaced pair can sound wider, but it asks for more careful measurement and mono checking.
Why does my snare disappear when I switch to mono?
Usually it means the snare reaches the two overheads at different times, or one overhead has the opposite polarity, so the low-mids cancel when summed. Flip one overhead, then check distances and the snare mics. If a timing offset remains, align the transients.
Should I time-align all my drum tracks?
Not automatically. Aligning close mics to the overheads can improve attack coherence, but it may also pull the drums back in the mix and reduce perceived weight. Align, then compare against the unaligned version in the full mix, and keep whichever serves the song.
Sources
- How to Record Overhead Drums: 3 Mic Techniques, Audio-Technica
- Recording Drums, Tape Op Magazine
- Overhead Placement Techniques for Drum Miking, Shure
- Expert Drum Mic Placement Tips, AKG / Harman
- In The Studio: Checking Drum Phase By Using Your Ears, ProSoundWeb
- The Wonderful World Of Microphone Techniques For Drums In The Studio, ProSoundWeb
- What Does the Phase Button Do?, Yamaha
- Correlation Meter in Logic Pro, Apple Support
- Should I be time-aligning my drum tracks?, Sound On Sound