
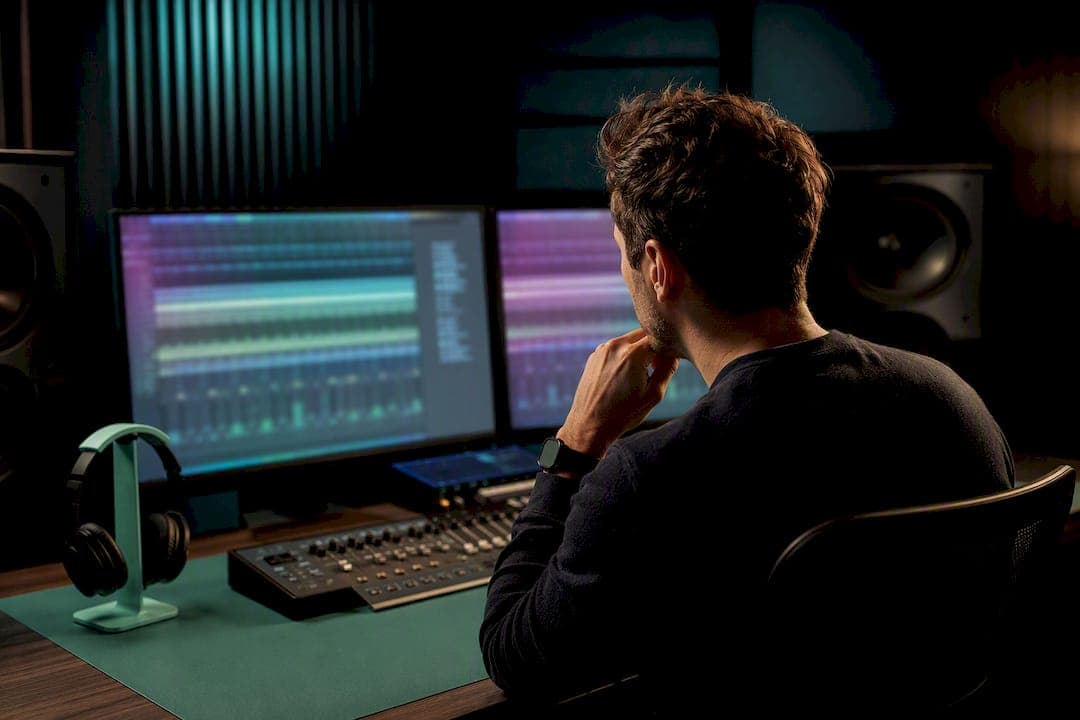
Mixing progress tracking records measurable metrics across every version of a song so you can see concrete improvement and target the problems that keep resurfacing. AubioMix builds this capability directly into its analysis reports, scoring each upload so you can compare it against the last one. What follows is the exact workflow, from checkpoints to export rules, that turns those numbers into better mixes.
TL;DR:
- Consistent upload settings, including sample rate, headroom, and notes, are crucial for accurate comparison of mix progress over time.
- Running analysis at key decision points like after arrangement, balance, and pre-master ensures measurable improvements and early issue detection.
- Monitoring trends across multiple projects reveals skill patterns, helping focus practice on recurring problems rather than individual mix fixes.
- Combining objective metrics with client feedback clarifies subjective issues like vocal clarity, leading to more targeted and effective revisions.
- Using a platform with browsable history, visualized trends, and genre-specific benchmarks makes progress tracking more reliable and actionable.
Table of Contents
- What is mixing progress tracking and why does it matter?
- Which metrics should you track, and what does each one tell you?
- When should you run progress checks during a mix?
- How do you keep uploads consistent enough to compare?
- What's the workflow for turning metrics into mix decisions?
- What should you look for in a progress tracking tool?
- How do you set realistic mixing goals from your own data?
- What common mistakes distort your progress data?
- What does effective progress tracking look like in practice?
- How should you fold client and collaborator feedback into your tracking?
- AubioMix perspective: why we built progress tracking into our workflow
- Ready to start tracking your own mixes?
- Sources
What is mixing progress tracking and why does it matter?
Mixing progress tracking means recording your mix score and its underlying metrics every time you upload a new version of a song, then reading the trend rather than a single snapshot. One upload tells you where a mix stands today. Five uploads across three weeks tell you whether your low end is genuinely tightening up or whether you just got lucky on Tuesday's mix.
The practical payoff comes down to a few things you can't get from ears alone, especially after two hours in the same room with the same speakers.
- Objective evidence replaces "I think it sounds better" with a number you can defend to a client or a collaborator.
- Faster problem detection because a metric that keeps dipping (say, stereo correlation) flags a recurring habit before it becomes a mastering headache.
- Reproducible changes since you can trace a score jump back to the exact EQ move or bus compression that caused it.
- Clearer client communication, showing a producer's revisions as a documented arc rather than an argument about taste.
This isn't a theoretical benefit. The Avid mixing guide recommends check-ins at specific stages, after arrangement, during balance building, and before finalising for mastering, precisely because catching a technical bottleneck early saves far more time than finding it during a mastering session three weeks later.
Which metrics should you track, and what does each one tell you?
Not every number in an analysis report deserves equal attention. Some tell you about loudness, some about balance, and some about problems that will actively break your mix on other systems. Knowing which is which is the difference between a useful dashboard and a wall of numbers you scroll past.
Start with the loudness and dynamics group:
- Overall mix score gives you a single comparative figure between versions, useful for tracking trend but not for diagnosing the cause.
- LUFS (integrated loudness) tells you where your mix sits relative to streaming targets, useful for spotting when you've over-compressed to chase loudness.
- Peak level and headroom flag how much room you've left for mastering, typically -3 to -6dB below full scale.
- RMS and dynamic range reveal whether a mix is breathing or has been squashed flat by bus limiting.
Then there's the technical analysis layer that catches what your ears might miss after a long session:
- Spectral balance shows frequency build-up or gaps against a reference curve.
- Masking indicators point to instruments fighting for the same frequency space, usually the culprit behind a "muddy" complaint you can't otherwise pin down.
- Stereo width and correlation confirm your mix won't collapse or phase-cancel in mono playback.
- Clipping and noise floor catch technical faults that no amount of tonal polish will fix.
Each metric should map to an action, not just an observation. A masking flag in the 200 to 400Hz range means carve one instrument, not both. A correlation reading drifting towards negative means check your phase relationships before you touch EQ at all. Frequency analysers and loudness meters exist to confirm what your ears are telling you, not to override them, so treat every metric as a second opinion rather than a verdict.
When should you run progress checks during a mix?
Running an analysis after every tiny tweak generates noise, not insight. You want checkpoints that align with genuine decision points in the mix, so the data reflects a real change rather than five minutes of fader nudging.
- After arrangement is locked. This is your baseline. Nothing about levels or tone matters yet if the arrangement is still shifting underneath you.
- After static balance. Once your faders reflect the song's intended hierarchy, this checkpoint tells you whether your gain staging and rough EQ choices are already fighting each other.
- After bus processing. Compression, saturation, and bus EQ change the mix's dynamics and spectral balance more than almost anything else. Track it separately from the raw balance stage.
- Final pre-master check. This is the version you'd hand off. It should show measurable improvement over every prior checkpoint, and any red flags here need fixing before mastering, not after.
For a single project, four checkpoints is usually enough. Across multiple projects, though, the real value shows up in the trend line. Comparing your pre-master scores month over month tells you whether your skills are actually developing or just circling the same weaknesses, which is exactly the kind of stage-based discipline the Avid resource centre recommends for catching bottlenecks early rather than late.
How do you keep uploads consistent enough to compare?
A score comparison is only as good as the consistency behind it. If version two was bounced at a different sample rate with the limiter still on the master bus, you're not comparing mix progress, you're comparing export settings.
Lock down these variables before you upload anything:
- Export settings. Bounce at a consistent sample rate and bit depth every time, and decide upfront whether you're uploading stems or a full mixdown.
- Headroom. Leave -3 to -6dB of headroom and disable any master bus limiting or maximiser when you're tracking progress, not once you're ready to master.
- Version naming. Something like
SongTitle_v3_afterBusComptells you more six weeks later thanmix_final_final2. - Mix notes. Attach a one-line note to each version explaining what changed. Documented mix notes turn a score jump from a mystery into a lesson you can repeat.
- Listening conditions. Reference the same track each session, keep playback level fixed, and note which system you checked the mix on, monitors, headphones, car.
Pro Tip: Keep a running reference track loaded in your session from day one. Comparing your metrics against the same commercial reference every single upload removes one entire variable from your progress data, and it's the fastest way to spot when your low end has drifted without touching a single analyser.
What's the workflow for turning metrics into mix decisions?
A report full of numbers is useless if it just sits there. The producers who actually improve treat every analysis as the start of a short, repeatable loop rather than a one-off verdict.
- Read the full report first, don't jump straight to the overall score. A high score with a masking flag buried in the details is hiding a problem that'll surface later.
- Compare against the previous version and your reference track. This tells you whether a change moved you closer to your target or just moved you.
- Pick your top three fixes. Trying to fix everything a report flags in one pass usually makes a mix worse, not better. Prioritise the issues affecting translation and clarity first.
- Implement the fixes with intention, one at a time where possible, so you know which change caused which score shift.
- Re-upload and log the result. This closes the loop and feeds your next comparison.
Over several projects, this loop stops being about a single song and starts revealing your own patterns. If masking on vocals shows up in report after report, that's not a mix problem anymore, it's a skill gap worth deliberately practising outside of paid work.
None of this replaces the conversation with whoever the mix is for. Reference songs and ongoing dialogue with the client remain central to professional mixing workflows, and a metric that satisfies an analyser but misses the artist's intent hasn't actually solved anything.
Pro Tip: When a client sends a reference track, run it through the same analysis tool you're using on your own mix. Matching your metrics to theirs, not to a generic loudness target, is often the fastest route to a mix they'll actually approve.
What should you look for in a progress tracking tool?
Not every analysis platform handles history the same way, and that difference matters more than people expect once you've got a dozen projects running in parallel.
- Version history that's actually browsable, not just a single "last report" you overwrite each time.
- Visualised metric trends, ideally a graph across uploads rather than a static number you have to remember from last week.
- Downloadable PDF reports for client handoffs and your own archive.
- Per-version notes, so a score sits next to the change that produced it.
- Batch upload and export presets to cut the friction that stops people tracking consistently in the first place.
Genre-specific benchmarks matter too. A mix score means little without context for what "good" looks like in your genre, and DAW-friendly export presets remove one more excuse to skip a checkpoint.
How do you set realistic mixing goals from your own data?
The temptation with any scoring system is to chase the highest possible number on every metric. That's the wrong target. A pop-rock mix and a deep house mix have different loudness expectations, different stereo width norms, and different masking tolerances, so your goals need to come from genre context, not an abstract ceiling.
Start by establishing your own baseline honestly. Pull your last five or six pre-master scores and treat the average as where you actually are, not where you'd like to be. Improvement from there should be incremental. A jump of a few points per project is realistic and sustainable; expecting a huge leap on every single track usually means you're either cherry-picking your best work or fooling yourself about what changed.
Set goals against specific metrics rather than the overall score alone. If your masking indicators are consistently weak, make "reduce masking flags by half over the next three mixes" the actual target, not "get a better score." That framing forces you towards the skill that needs work instead of tweaking whatever's easiest to move.
Benchmark against genre norms rather than generic best-practice numbers. A retrowave mix pushing wide stereo synths will read differently on a correlation meter than a singer-songwriter mix built around a centred vocal and acoustic guitar, and treating both against the same width target may send you chasing a number that was never right for the material. Track your trend against your own genre's typical range, and let the score become a tool for spotting drift, not a scoreboard against strangers.
What common mistakes distort your progress data?
The biggest bias in progress tracking isn't technical, it's psychological. Producers tend to upload their best attempt at a version and skip the messy middle ones, which quietly erases the exact data that would show what actually worked.
A few specific traps show up constantly:
Cherry-picking checkpoints. If you only upload when you already feel good about a mix, your trend line will always look like steady improvement, whether or not it's true. Upload the checkpoint even when you're unsure about it.
Chasing the score instead of the sound. Nudging a fader purely to move a metric, without listening critically to the result, produces mixes that measure well and sound worse. Objective visuals should confirm what your ears already suspect, not replace the listening step entirely.
Comparing across inconsistent exports. A score difference caused by a change in headroom or sample rate isn't progress, it's noise. Revisit your export settings before trusting any comparison.
Ignoring context collapse. A metric that's a red flag in one genre might be entirely normal in another. Treating every genre against the same benchmark set produces goals that don't fit the material.
Confirmation bias on familiar problems. If you already believe your low end is your weak point, you'll notice every low-end flag and skim past everything else. Read the whole report, every time, in the same order.
The fix for all of these is procedural, not attitudinal: fixed checkpoints, consistent exports, and a habit of reading the full report rather than scanning for the number you expect to see.
What does effective progress tracking look like in practice?
Consider a producer working through an EP across six weeks, uploading a checkpoint after arrangement, after balance, and pre-master for each of five tracks. By the third song, a pattern in the data becomes impossible to miss: every pre-master check flags stereo correlation issues in the same 2 to 5kHz range, right where the rhythm guitars and vocal harmonies overlap.
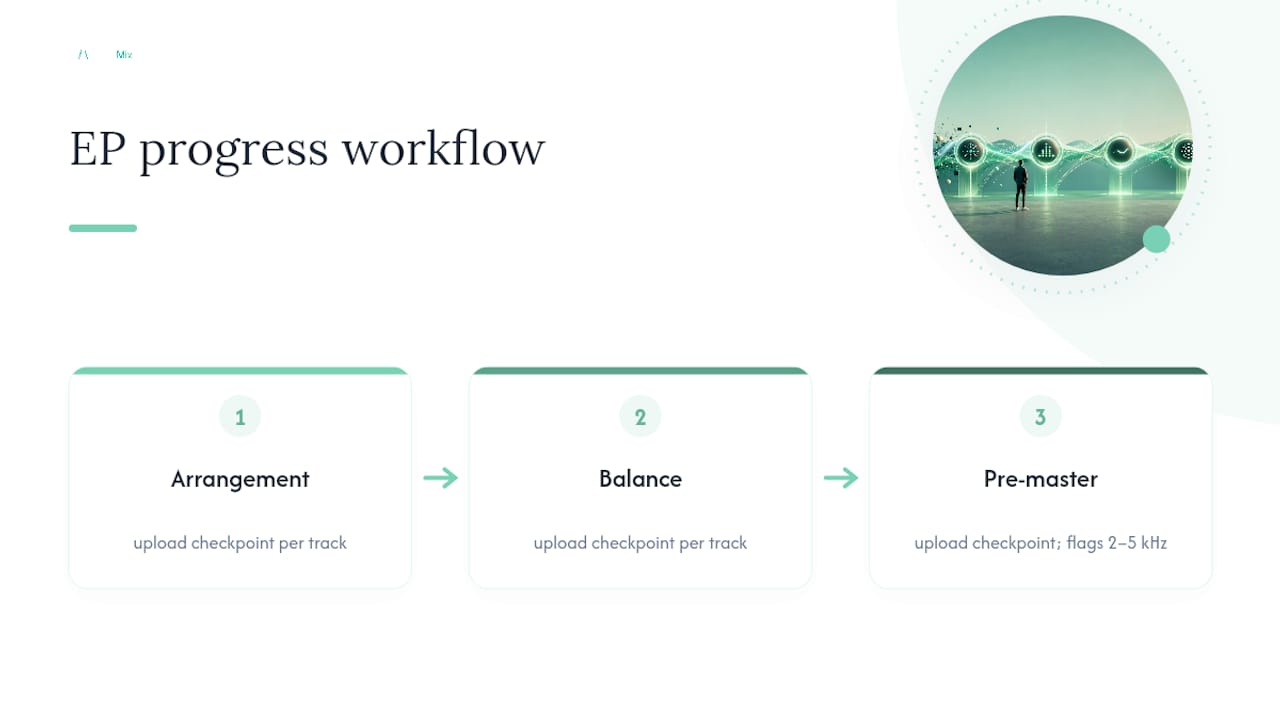
That's not five separate problems. It's one skill gap showing up five times, and the trend data is what made it visible. A single mix report would have read as "fix this correlation issue." Five reports across a project read as "learn to pan and EQ overlapping mid-range elements more deliberately," which is a fundamentally different, more useful takeaway.
The same logic applies across genres. A mix engineer alternating between pop-rock and techno projects might notice their techno mixes consistently score higher on dynamic range metrics but lower on spectral balance, a fair reflection of genre habits rather than inconsistent skill. Recognising that split stops them from applying pop-rock corrective habits to a genre where they don't belong, and instead points them towards genre-specific reference listening as the actual fix.
What both examples share is the same structural insight: a single report shows you a mix's condition, but only a series of them, read together, shows you where your actual growth edge is. That's the entire argument for tracking progress as a discipline rather than a one-off diagnostic tool, and it's the pattern the large-scale mix evaluation dataset research points to when it comes to logging mix parameters systematically over time.
How should you fold client and collaborator feedback into your tracking?
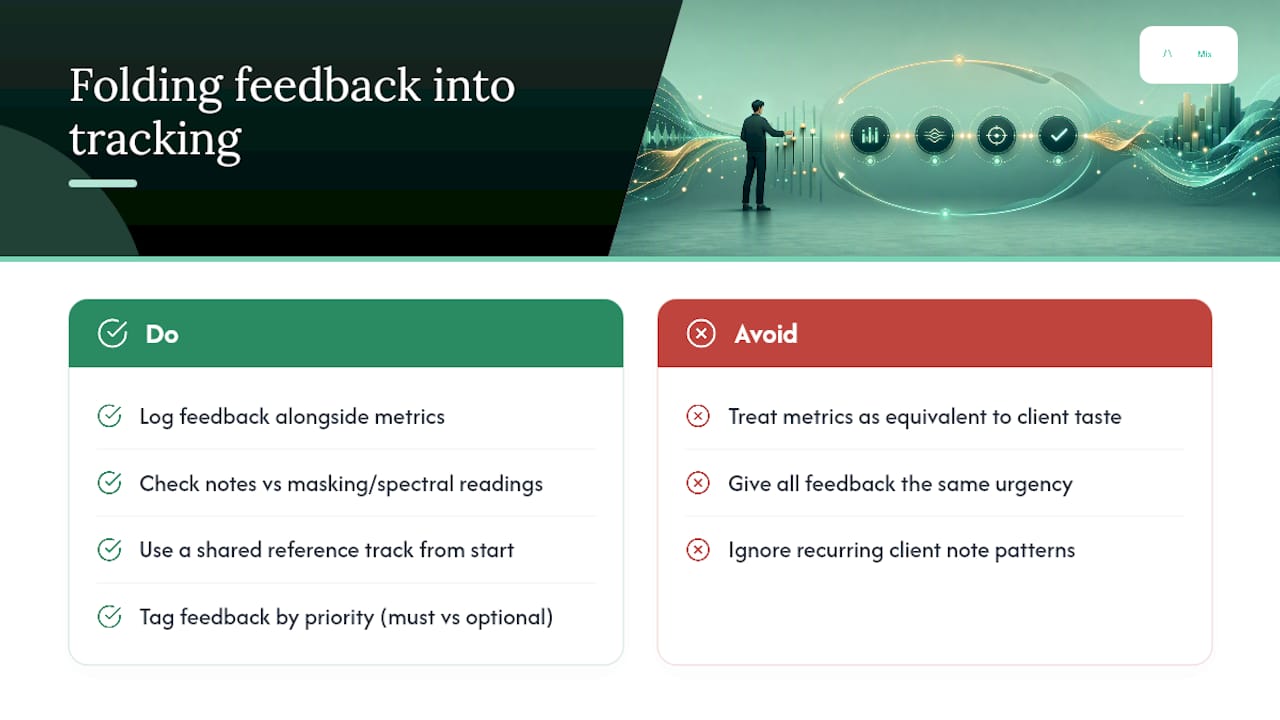
Metrics measure the technical side of a mix. They don't measure whether a client actually likes it, and treating the two as interchangeable is how producers end up with a mix that scores brilliantly and gets rejected anyway.
The fix is to log feedback alongside your metrics, not instead of them. When a client sends a note like "vocals feel buried," check that against your masking and spectral balance readings for the same version. Often the subjective complaint and the objective flag point at exactly the same frequency range, which turns a vague note into a specific, fixable task. When they don't line up, that's useful information too, it usually means the issue is arrangement or performance, not mixing.
Keep a shared reference point with collaborators from the start. If everyone involved is comparing against the same reference track, disagreements about direction shrink considerably, because you're arguing about a specific, audible target rather than abstract taste. Clear communication around revisions tends to save more back-and-forth than any technical fix on its own.
Tag feedback by priority the same way you'd tag your own mix notes, must-fix versus optional, so a client's preference doesn't get treated with the same urgency as a genuine technical fault. This also gives you a record for future projects: if the same kind of note keeps coming from clients across several jobs, that's a pattern worth addressing at the mixing stage, before the file ever reaches a client's inbox. Turning client notes into concrete tasks is a skill in its own right, and it compounds the same way technical tracking does.
AubioMix perspective: why we built progress tracking into our workflow
We designed AubioMix's version history around the same checkpoints professional mixers already use: after arrangement, after balance, before mastering. Every report includes genre benchmarks and a downloadable PDF, because a score without context, or without a record you can revisit, teaches you nothing. Our blog covers the checklists behind this. Treat tracking as a habit, not an occasional audit, and the improvement shows up in weeks, not months.
— AubioMix
Ready to start tracking your own mixes?
Spreadsheets and manual A/B notes can get you partway there, but they rely on you remembering to update them and interpreting your own numbers consistently, which is exactly where most producers fall off after a few weeks. AubioMix removes that friction by scoring every upload automatically and stacking it against your version history, so the trend line builds itself while you focus on mixing.

Every report includes genre-specific benchmarks, so your progress gets measured against material that's actually comparable to yours, whether that's a pop-rock mix, a techno production, or a singer-songwriter session. Version history, downloadable PDFs, and leaderboard comparison come standard, matching every habit this guide has recommended.
For your first session, upload your current pre-master version, read the full report before touching anything, and pick three fixes from it rather than trying to act on everything at once. Then check the full benchmark library to see where your genre's typical scores sit before you set your next target. Whether you start with a pay-as-you-go credit pack or a subscription built around regular uploads, the next report is the first data point in a trend line worth building.
Sources
- How to mix music: a complete guide to audio mixing — Avid resource centre
- The role of communication and reference songs in the mixing process — research paper (arXiv)
- Mix self-assessment techniques: 7 ways to review and improve your mixes — Sean Kim
- From session to production checklist — Songkeeper blog