
Ambience — early reflections, room tone and reverb decay — is the primary cue your ears use to judge whether a sound is close or far away. Change the wet level, pre-delay, high-frequency roll-off or early-reflection balance, and you move a source front to back without touching its pan or fader dramatically. That is the role of ambience in mix depth in one sentence, and everything below is about applying it reliably.
Quick wins to act on now:
- Close sounds: keep them drier, brighter and louder
- Distant sounds: make them wetter, darker and softer
- Use shared reverb buses and a two-chain approach (early reflections + tail) for believable spatial realism
- Validate every ambience decision with the fader technique before committing
Pro Tip: Before you touch a single plugin, decide where each element "stands" on an imaginary stage. Aubiomix's objective feedback can confirm whether your spatial decisions are landing the way you intend.
Table of Contents
- What does ambience actually mean in mixing?
- How ambience creates perceived depth in a mix
- Hands-on techniques for building depth with ambience
- How should you route ambience in your DAW?
- A practical workflow for placing ambience reliably
- Common ambience mistakes and how to fix them
- Quick-start parameter table by instrument
- How do you test and validate your ambience choices?
- Key takeaways
- Ambience is a creative decision, not just a technical one
- Get objective feedback on your ambience decisions with Aubiomix
- Useful sources and further reading
What does ambience actually mean in mixing?
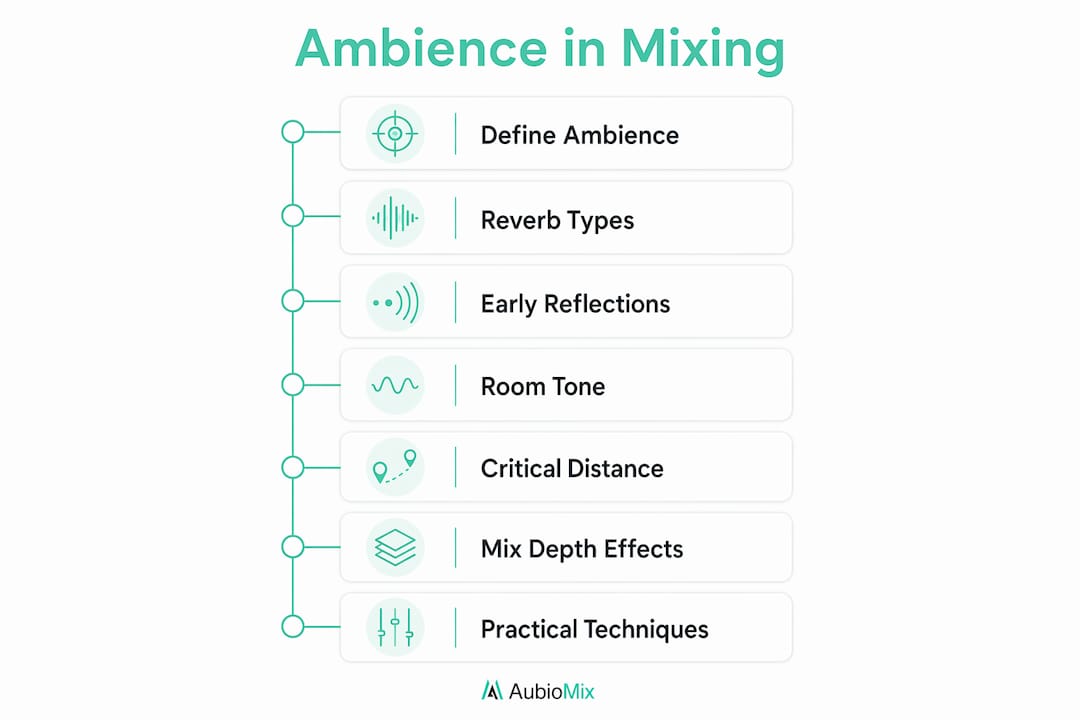
Ambience is the set of spatial cues — early reflections, room tone and reverberation — that transform a sound from a flat, two-dimensional point source into a three-dimensional object sitting somewhere in your mix. Think of it as the fingerprint of the space a sound inhabits.
Picture an imaginary stage in your DAW:
- Direct sound: the dry signal, right in front of you, no delay
- Early reflections: the first bounces off nearby walls, arriving within roughly 5–80 ms; these define size and proximity
- Room tone / diffuse field: the blend of countless reflections that builds the sense of a space "breathing" around the source
- Tail / decay: the long, fading wash that gives a room its character and emotional colour
Two broad reverb technologies shape how you recreate these layers. Algorithmic reverb (Lexicon 480L-style processing, Valhalla Room, FabFilter Pro-R) generates reflections mathematically, giving you precise control over every parameter. Convolution reverb (Altiverb, Waves IR-1) uses impulse responses captured in real spaces, so the character is inherently authentic but harder to sculpt. Neither is universally better; the choice depends on whether you need control or realism.
One perceptual phenomenon worth knowing is the Haas effect (also called the precedence effect): when two identical sounds arrive within roughly 35 ms of each other, the brain fuses them and perceives the source as coming from the direction of the first arrival. That is why pre-delay on a reverb return keeps the dry source "in front" even when the wet level is relatively high.
The critical distinction for your workflow: early reflections and room tone can be adjusted in the mix (via send level, pre-delay, EQ on returns, decay time and stereo width), but the fundamental room character is largely captured at source. A close-miked vocal in a dead booth gives you maximum flexibility; a room mic in a live space bakes in a character you will work around rather than override.
How ambience creates perceived depth in a mix
Depth is a multi-cue illusion built from level, brightness, timing and texture. Your brain triangulates distance using several acoustic cues simultaneously:
- Relative level: louder = nearer, quieter = farther; the most obvious cue but also the bluntest
- High-frequency content: air absorbs high frequencies over distance, so a brighter sound reads as closer; rolling off the top end of a reverb return simulates that air absorption convincingly
- Early-to-late energy ratio: more early reflections relative to tail energy places a source closer; a wash of diffuse tail with few distinct early reflections pushes it back
- Pre-delay: a longer pre-delay on a vocal separates the dry source from its reverb, keeping the source upfront while the space blooms behind it
- Stereo width of returns: wider returns feel more enveloping and therefore more distant; narrowing a return pulls it closer to the phantom centre
- Temporal smear / tail length: longer decay times imply larger, more reverberant spaces; short, tight rooms feel intimate and near
The concept of critical distance ties these cues together. Critical distance is the point at which direct sound energy and reflected sound energy are equal. Push a source beyond that threshold by increasing reflected energy and rolling off high frequencies, and it recedes into the background. Pull it back by boosting direct energy and HF presence, and it steps forward. Every send-level and EQ decision you make on a reverb return is, in effect, moving a source across that perceptual line.
Understanding mix balance as a spatial map rather than just a level map is what separates flat mixes from ones that feel genuinely three-dimensional.

Hands-on techniques for building depth with ambience
Reverb: early reflections, tail and the two-chain approach
Professional mixers commonly use two reverb chains per source: one for early reflections (defines physical size and proximity) and one for the tail (adds emotional colour). A short room or ambience plugin handles the first chain; a plate, hall or chamber handles the second. Blending both keeps the source located while letting it bloom.
For the early-reflection chain, keep pre-delay short, decay tight and the return relatively bright. For the tail chain, push pre-delay out, let the decay breathe, and apply a gentle high-shelf cut on the return to simulate distance. Always high-pass your reverb returns to prevent low-end mud accumulating in the diffuse field.
Algorithmic reverbs give you the parameter control you need for this approach. Convolution reverbs work beautifully for the tail chain when you want a specific room character, but they are harder to sculpt for early reflections.
Delay: space without pushing things too far back
Delay effects — Haas, slapback and tempo-sync — are more audible per unit of wet signal than reverb, so use them more sparingly. A Haas delay widens a sound without moving it noticeably further back. A slapback delay adds vintage character and a sense of space on guitars and vocals. Tempo-sync delays keep rhythmic elements cohesive while adding depth.
The practical rule: reach for delay when you want definition and rhythmic interest; reach for reverb when you want a continuous ambient field. Combining both — a short delay feeding into a reverb return — is a classic vocal trick that adds richness without sacrificing clarity.
Layering and texture
Ambient pads, processed room mics or granular layers can push background elements back while keeping the lead sharp. The key is subtlety: these layers should add texture to the diffuse field, not compete with it. Send them to your shared room bus rather than giving each one its own private reverb, and keep their high-frequency content gentle.
Pro Tip: Watch for conflicting cues. A very bright, dry lead vocal sitting on top of a dark, long reverb tail with no pre-delay sounds unnatural — the source and its space feel disconnected. Add 20–30 ms of pre-delay to the tail return and the vocal will lock into its environment convincingly.
Per-instrument starting points
- Lead vocal: short room (early chain) + plate or hall (tail chain), 20–30 ms pre-delay on the tail
- Snare: plate reverb, tight decay (0.6–1.2 s), high-pass at 200 Hz
- Drum kit: shared room bus, tight ambience (AMB A position), kick kept drier
- Electric guitar: room or chamber, AMB B position, slightly less than reference send level
- Acoustic guitar: keep relatively dry; light room send to glue it to the kit
- Pads / synths: longer hall or shimmer, AMB C position, narrow the return width for focus
For electronic music production, shorter, tighter ambiences tend to work better in dense arrangements where transient clarity is paramount.
How should you route ambience in your DAW?
Clean routing is what keeps ambience musical rather than chaotic. The standard approach uses dedicated ambience buses — typically labelled AMB A (near), AMB B (mid) and AMB C (far) — all feeding into a single AMB Master bus. That master bus is your global ambience control: one fader to shape the entire spatial field.
Core routing principles:
- Use sends/returns (aux sends to reverb channels) rather than inserts for all shared ambience. Inserts are fine for a private reverb on a specific element, but shared rooms must be returns.
- Keep reverb returns post-fader so that when you ride a source down, its contribution to the shared room drops proportionally.
- Pan returns thoughtfully: AMB A wide, AMB B at roughly two-thirds, AMB C narrower still. This progressive narrowing creates a convincing sense of looking into a three-dimensional space.
- Route the whole drum kit (including overheads and rooms) to AMB A to unify the kit in the virtual space.
- Send lead vocals and lead instruments to AMB C for maximum depth from the room position; the longer pre-delay keeps the dry vocal upfront.
Parallel reverb (wet return blended alongside the dry signal) is almost always preferable to 100% wet insert reverb. It preserves the transient attack of the dry source while adding the spatial character of the return. The only exception is when you deliberately want a fully processed, "swimming in reverb" effect for a specific creative purpose.
Ducking / side-chain compression on reverb returns is a powerful clarity tool. Key a compressor on the AMB Master (or individual tail returns) to the lead vocal or kick drum. When the lead hits, the reverb ducks slightly, keeping transients clean; in the spaces between phrases, the room blooms back up. The effect is subtle when set well, but it makes a real difference in busy arrangements.
A practical workflow for placing ambience reliably
Follow this sequence in every session and ambience decisions become deliberate rather than accidental.
- Set a dry balance first. Get your levels, panning and basic EQ sorted before adding any ambience. Ambience should enhance a working balance, not compensate for a broken one.
- Establish your depth anchors. Decide which elements live at the front (lead vocal, kick, snare) and which live further back (pads, room guitars, backing vocals). Write it down if it helps.
- Create three ambient planes. Set up AMB A, AMB B and AMB C buses with a single reverb algorithm (same room, different pre-delay and decay settings). Route instruments to the appropriate plane.
- Add pre-delay on lead elements. Start at 20 ms on the lead vocal tail return and adjust by ear. Shorter pre-delay = more intimate; longer = more spacious.
- Colour returns with EQ. High-pass each return (100 Hz on AMB A, 160 Hz on AMB B, 220 Hz on AMB C). Apply a gentle high-shelf cut on AMB C to simulate distance.
- Use the fader technique. Raise the AMB Master until the mix opens up and loses its two-dimensional dryness. Note that position. Raise further until it sounds obviously wet. Note that position too. Return to the first point — that is your working window for automation.
- Automate wet returns. Ride the AMB Master (or individual returns) up slightly in choruses and back in verses to maintain presence and contrast. Use dynamic contrast techniques to keep the arrangement feeling alive.
- Check in mono. Collapse to mono and listen for phase issues, frequency masking and whether the depth cues still hold. Narrow stereo returns are more mono-compatible.
- Listen at low volume. Mixing at lower levels exposes over-reverbed mixes quickly — ambience that sounds subtle at high volume often becomes overwhelming at low volume.
- Pre-export sanity check. Confirm LUFS integrated target is met, true peak is under -1 dBTP, mono sum is clean, and ambience level sits comfortably in context. Check the LUFS and true peak glossary if you need a quick reference on metering terms.
Common ambience mistakes and how to fix them
Even experienced engineers fall into these traps. Here is what to watch for and how to correct it fast.
- Too much wet level: the mix sounds washy and instruments lose definition. Fix: reduce the send level or automate the AMB Master down; do not just lower the reverb's internal mix knob.
- Tails masking transients: long hall tails smear snare and percussion attacks. Fix: shorten decay time, increase pre-delay, or switch to a tighter room for percussive elements.
- Conflicting HF content: a bright plate on a lead vocal clashes with the dry signal's own brightness, creating a harsh, unnatural wash. Fix: apply a high-shelf cut (around 8 kHz) on the reverb return to separate the source from its space.
- Stereo clutter: wide returns on multiple elements create a diffuse, unfocused image. Fix: narrow returns progressively (AMB A wide, AMB C narrow) and check in mono regularly.
- Poor mono compatibility: wide stereo reverbs can cancel or thin out in mono. Fix: use mono reverb instances for AMB A and AMB B, or narrow the stereo field on returns before export.
- Washing out drums: very long hall tails on the kit destroy punch and transient clarity. Fix: keep the drum bus on AMB A (tight room), and only send overheads lightly to AMB B.
Short rooms and tight ambiences are the safest starting point in modern, busy productions — they add life without overwhelming transients. You can always add length; it is harder to pull back once the mix is built around a long tail.
Pro Tip: Rather than only lowering the wet level to simulate distance, try a high-shelf cut on the return first. Rolling off above 6–8 kHz mimics air absorption and creates a convincing sense of depth without reducing the sense of space.
Quick-start parameter table by instrument
These are starting points, not rules. Always follow up with the fader technique and A/B testing to refine for your specific track and genre.
| Instrument | Reverb type | Send level guidance | Return EQ hint | Stereo width |
|---|---|---|---|---|
| Lead vocal | Plate (tail) + room (ER) | Moderate | Use high-shelf cut to reduce brightness | Medium |
| Backing vocals | Room or chamber | Light to moderate | Use high-pass filter for clarity | Medium-wide |
| Snare | Plate | Moderate | Use high-pass filter for clarity | Medium |
| Toms / full kit | Room (AMB A) | Reference level | Use high-pass filter to avoid muddiness | Wide |
| Electric guitar | Room or chamber | Slightly below reference | Use high-pass filtering selectively | Medium |
| Acoustic guitar | Room | Light | Use high-pass filtering selectively | Medium |
| Pad / synth | Hall or shimmer | Light to moderate | Use high-shelf cut for distance | Narrow to medium |
How do you test and validate your ambience choices?
Subjective listening and objective measurement work best together. Here is a repeatable methodology.
A/B testing steps:
- Save two DAW snapshots: one with ambience buses active, one with the AMB Master muted
- Toggle between them on multiple playback systems (studio monitors, headphones, laptop speakers)
- Use blind testing where possible — have a colleague switch without telling you which is which
- Listen for whether depth cues hold on each system, not just on your main monitors
The fader technique checklist:
- Solo the AMB Master and confirm the three-dimensional image sounds cohesive
- Unsolo and lower the AMB Master to zero
- Raise slowly until the mix "opens" (position A)
- Raise further until the mix sounds obviously wet (position B)
- Return to position A; mute and unmute the AMB Master — the mix should feel flat when muted, open when unmuted
- Work within the A–B window for automation, riding up in choruses and back in verses
Measurement checks:
| Check | What to look for | Tool |
|---|---|---|
| LUFS integrated | Ambience should not push loudness above target | DAW loudness meter or Youlean Loud Meter |
| True peak | Keep below -1 dBTP; reverb tails can add unexpected peaks | True peak limiter / meter |
| Mono sum | Depth cues should survive; phase cancellation should be minimal | Mono button on master bus |
| Frequency balance | Ambience returns should not add low-end mud or harsh mids | Spectrum analyser (e.g. Voxengo SPAN) |
For a broader diagnostic, the signs your mix needs work checklist is a useful companion to these ambience-specific tests.
Key takeaways
Ambience controls perceived depth through level, brightness, timing and texture — and the fader technique is the most reliable way to find the right amount for any mix.
| Point | Details |
|---|---|
| Level and brightness first | Drier, brighter sounds read as close; wetter, darker sounds recede — adjust both together. |
| Use pre-delay on lead elements | 20–30 ms on a lead vocal tail return keeps the source upfront while the space blooms behind it. |
| Two-chain reverb technique | Separate early reflections (size/proximity) from the tail (colour) for more believable depth. |
| Shared reverb buses | Route instrument groups to AMB A/B/C buses feeding one AMB Master for global control. |
| Validate with fader and A/B tests | Find the "open" fader point, automate within that window, and confirm choices in mono. |
| Aubiomix for objective feedback | Upload your mix to Aubiomix for detailed analysis across ambience, balance, stereo image and masking. |
Ambience is a creative decision, not just a technical one
Here is my honest perspective on how ambience actually gets used in practice, versus how it gets taught.
Most tutorials frame ambience as a corrective tool — something you add to fix a dry, lifeless mix. That framing misses the point. The most interesting ambience decisions are made before a single plugin is opened, when you are deciding where each element lives in the song. A lead vocal that sits in a tight, intimate room feels completely different from the same vocal floating in a cathedral tail, even at identical wet levels. The space is part of the performance.
What I find myself doing in practice is listening for whether the ambience is audible but forgettable. If I notice the reverb, it is usually doing too much. The goal is for the listener to feel the space without consciously registering it — the way you feel the size of a room when you walk in, without staring at the walls. When ambience prevents mixes sounding sterile and makes parts feel lived-in and cohesive, it is working. When it becomes the thing you hear, something has gone wrong.
The other thing worth saying: shared reverb buses are not a shortcut. They are genuinely the better approach for most mixes, because they create a consistent acoustic environment that glues the arrangement together. Private reverbs on every track create a collection of different rooms, which is sonically incoherent unless that incoherence is the point. For listening references that demonstrate how space and ambience work in released music, the ambient playlist on Intonality is worth an hour of your time — not to copy the production choices, but to hear how the best ambient producers use space as a compositional element.
Get objective feedback on your ambience decisions with Aubiomix
Knowing the theory is one thing; hearing whether your spatial decisions are actually working in your specific mix is another. Aubiomix analyses your uploaded audio across 15+ mixing and mastering parameters, including stereo image, frequency masking, balance and effects — giving you ranked, specific feedback on exactly where your ambience choices are helping or hurting.

Upload a stereo mix or a stem and you will receive a written and visual report with suggested parameter changes, a downloadable PDF, and progress tracking so you can see how your mixes improve over time. There is no subscription required to get started — credit packs mean you pay for analysis when you need it. The feedback is compatible with any DAW and any workflow, so you can act on the suggestions immediately in your next session.
Analyse your mix with Aubiomix and find out whether your ambience is doing exactly what you intend.
Useful sources and further reading
The sources below informed this guide and are worth reading in full for deeper study.
- Creating a sense of depth in your mix — Sound On Sound: the definitive practical guide to the three-plane reverb approach and the fader technique
- How to get better depth and perspective for the mix — Production Expert: clear explanation of critical distance and HF roll-off as depth tools
- Creating ambience and depth with reverberation — Sonarworks: solid primer on reverb types and spatial cues
- Delay magic: depth and ambience — Sonarworks: practical guide to using Haas, slapback and tempo-sync delays for space
- Reverb and depth: placing sounds in 3D space — Making A Scene: good on pre-planning depth before choosing plugins
- Reverb explained: a producer's guide to better mixes — Aubiomix blog: covers reverb types, routing and parameter tweaks in practical detail
- Mixing tricks that transform your productions — Aubiomix blog: broader collection of techniques including ambience use
- Intonality music promotion — curated playlists and music promotion, useful for finding reference tracks that demonstrate spatial production choices